

Guide: How to Build an Email List Part 2
Hello {{Name | EduCreator}}!
Welcome to Part 2 of our Guide all about growing your email list with Google and Beehiiv. As we progress in this guide, we will get more advanced with automations and high value content. In Part 2, I will walk you through the step by step process of uploading your new emails to Beehiiv. I will also show you how to set up your Welcome email, a simple and important one step automation.
In Part 3, I how you how to create an automated sequence with your educational email course lead magnet.
Beehiiv is free to use for up to 2,500 subscribers. You can do everything in Part 1 and 2 of this guide for free. As we advance, we will build multi-step automation sequences with the Educational Email Course GPT. This does require a paid version. If you use my link to sign up, you will get a 30 day free trial and 20% off for the first 3 months.
If you haven’t yet created your AI-Powered Lead Magnet with the Educational Email Course Creator GPT, you can sign up for the free 5-Day course by answering this poll (click yes or no will activate the course):
Happy Building!
Christel, Founding Principal OCC Metaversity
Table of Contents
Section 1: Downloading CSV and Uploading to Beehiiv
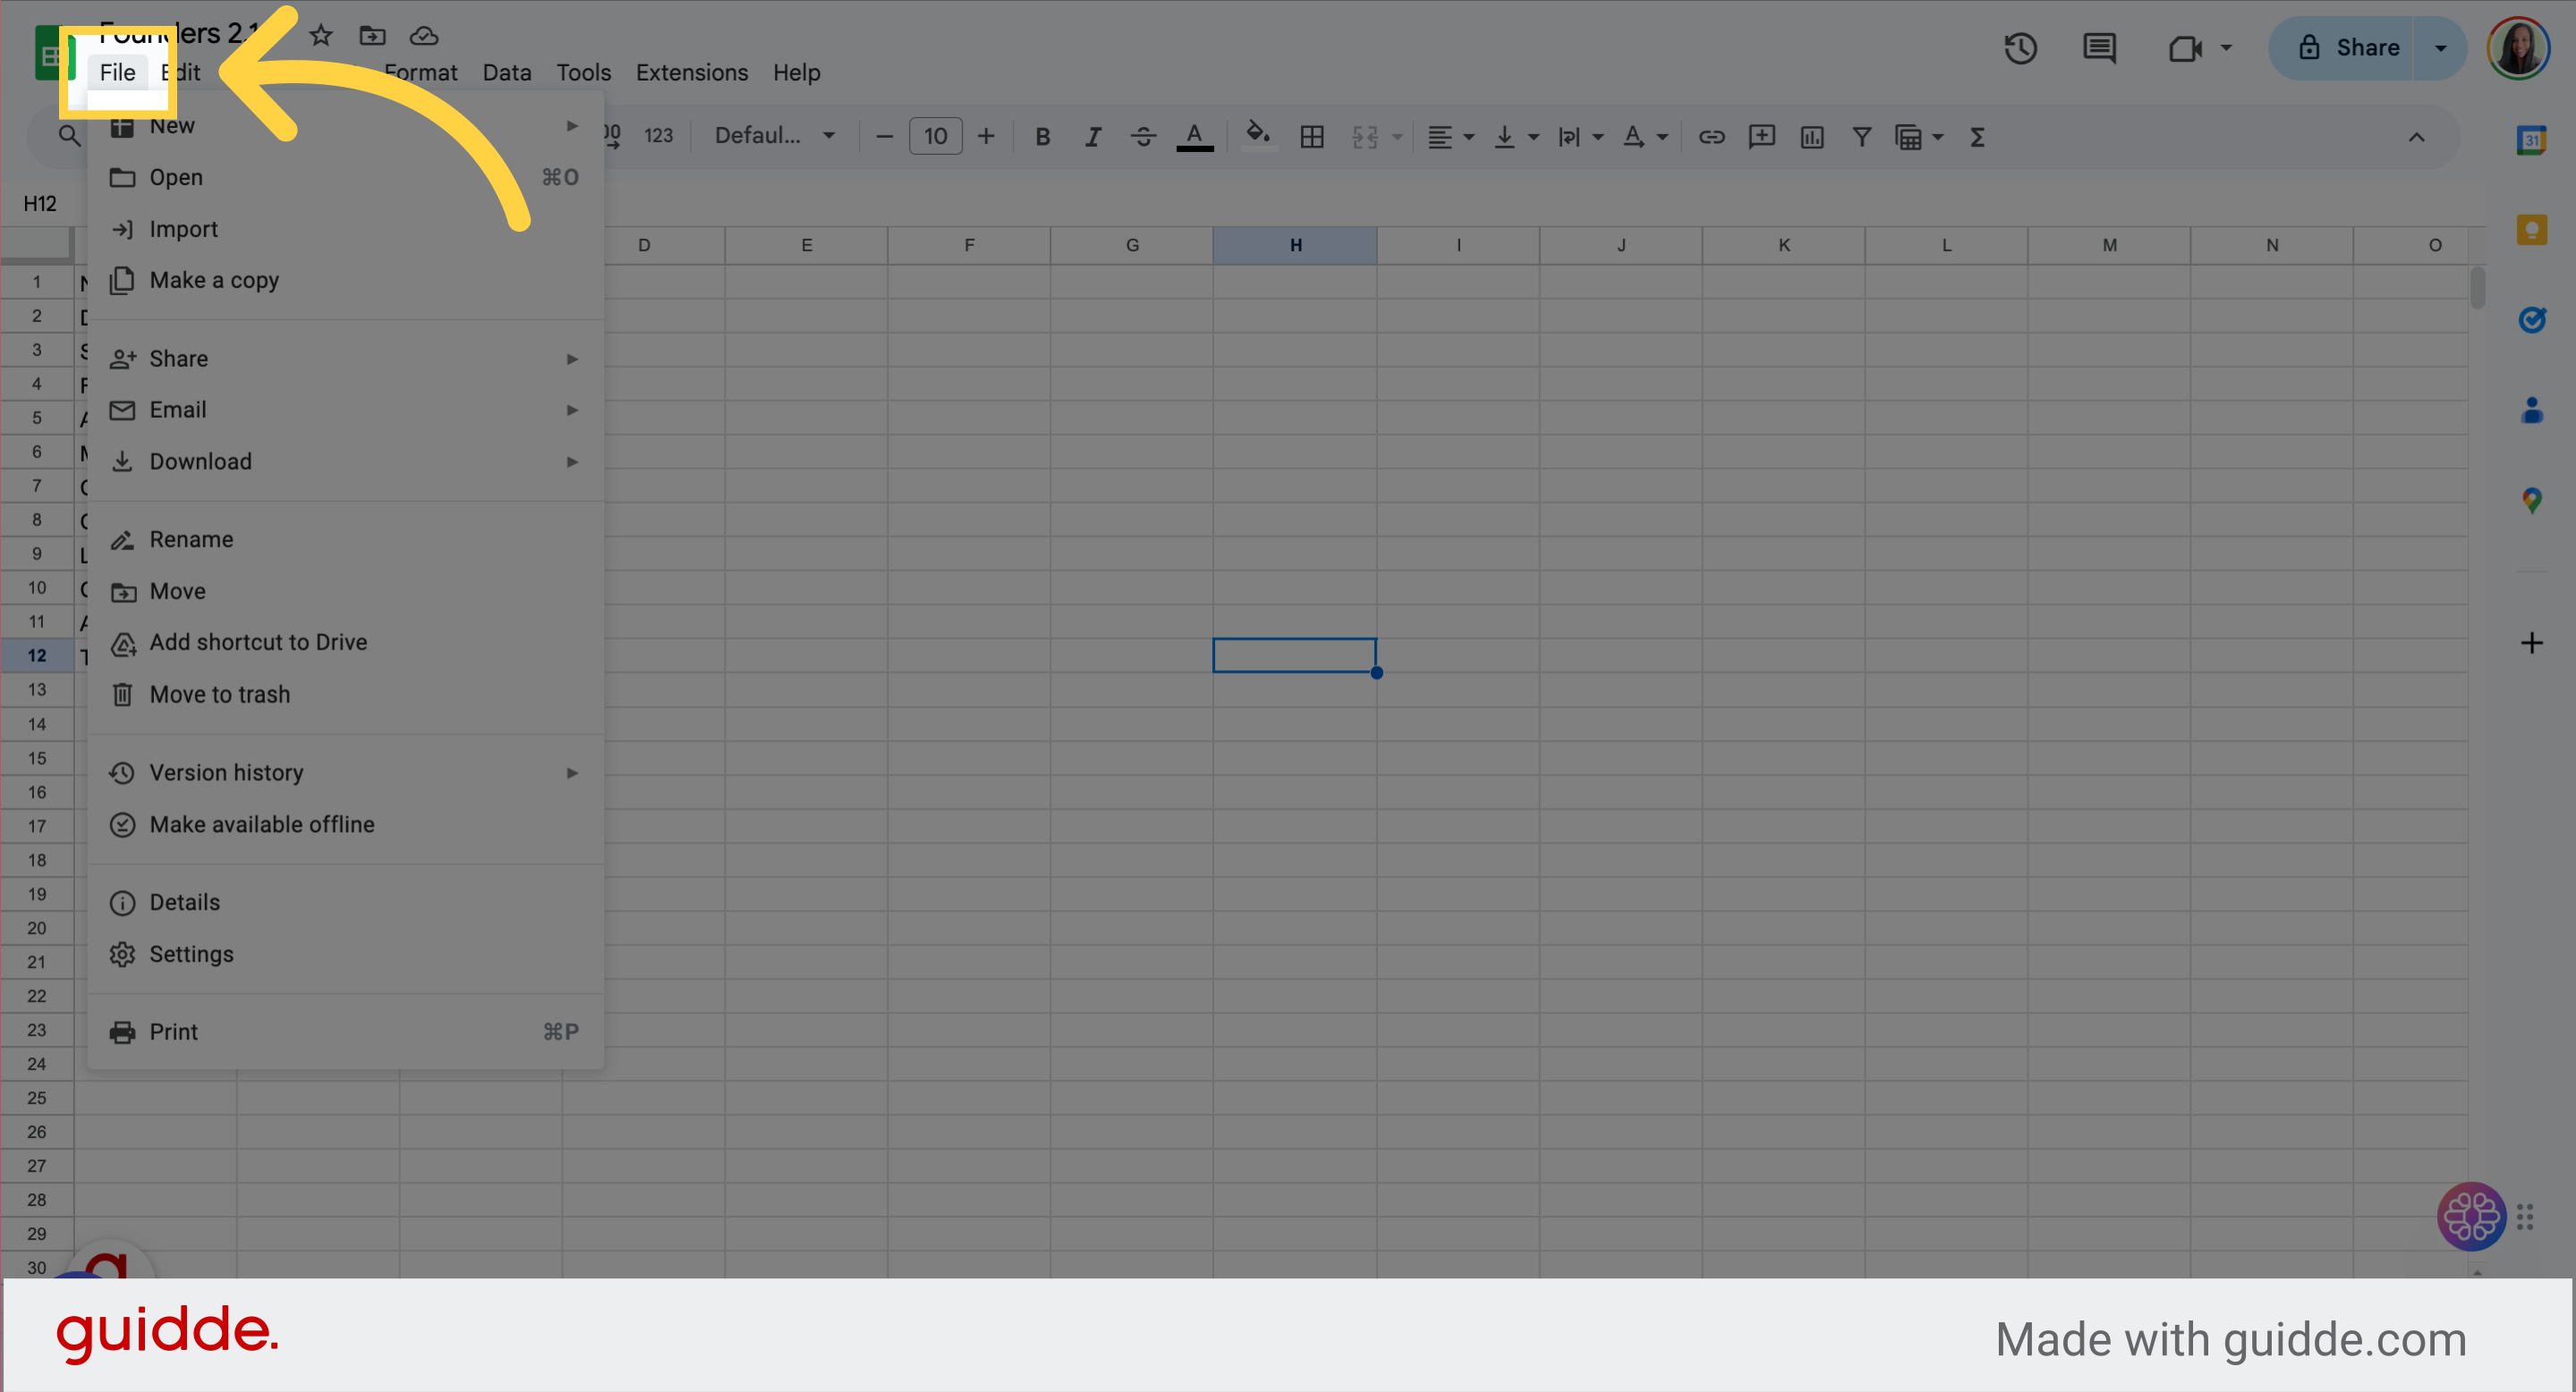
1. Go to sheets.google.com and open your Sheet from Part 1
Click on the File menu.
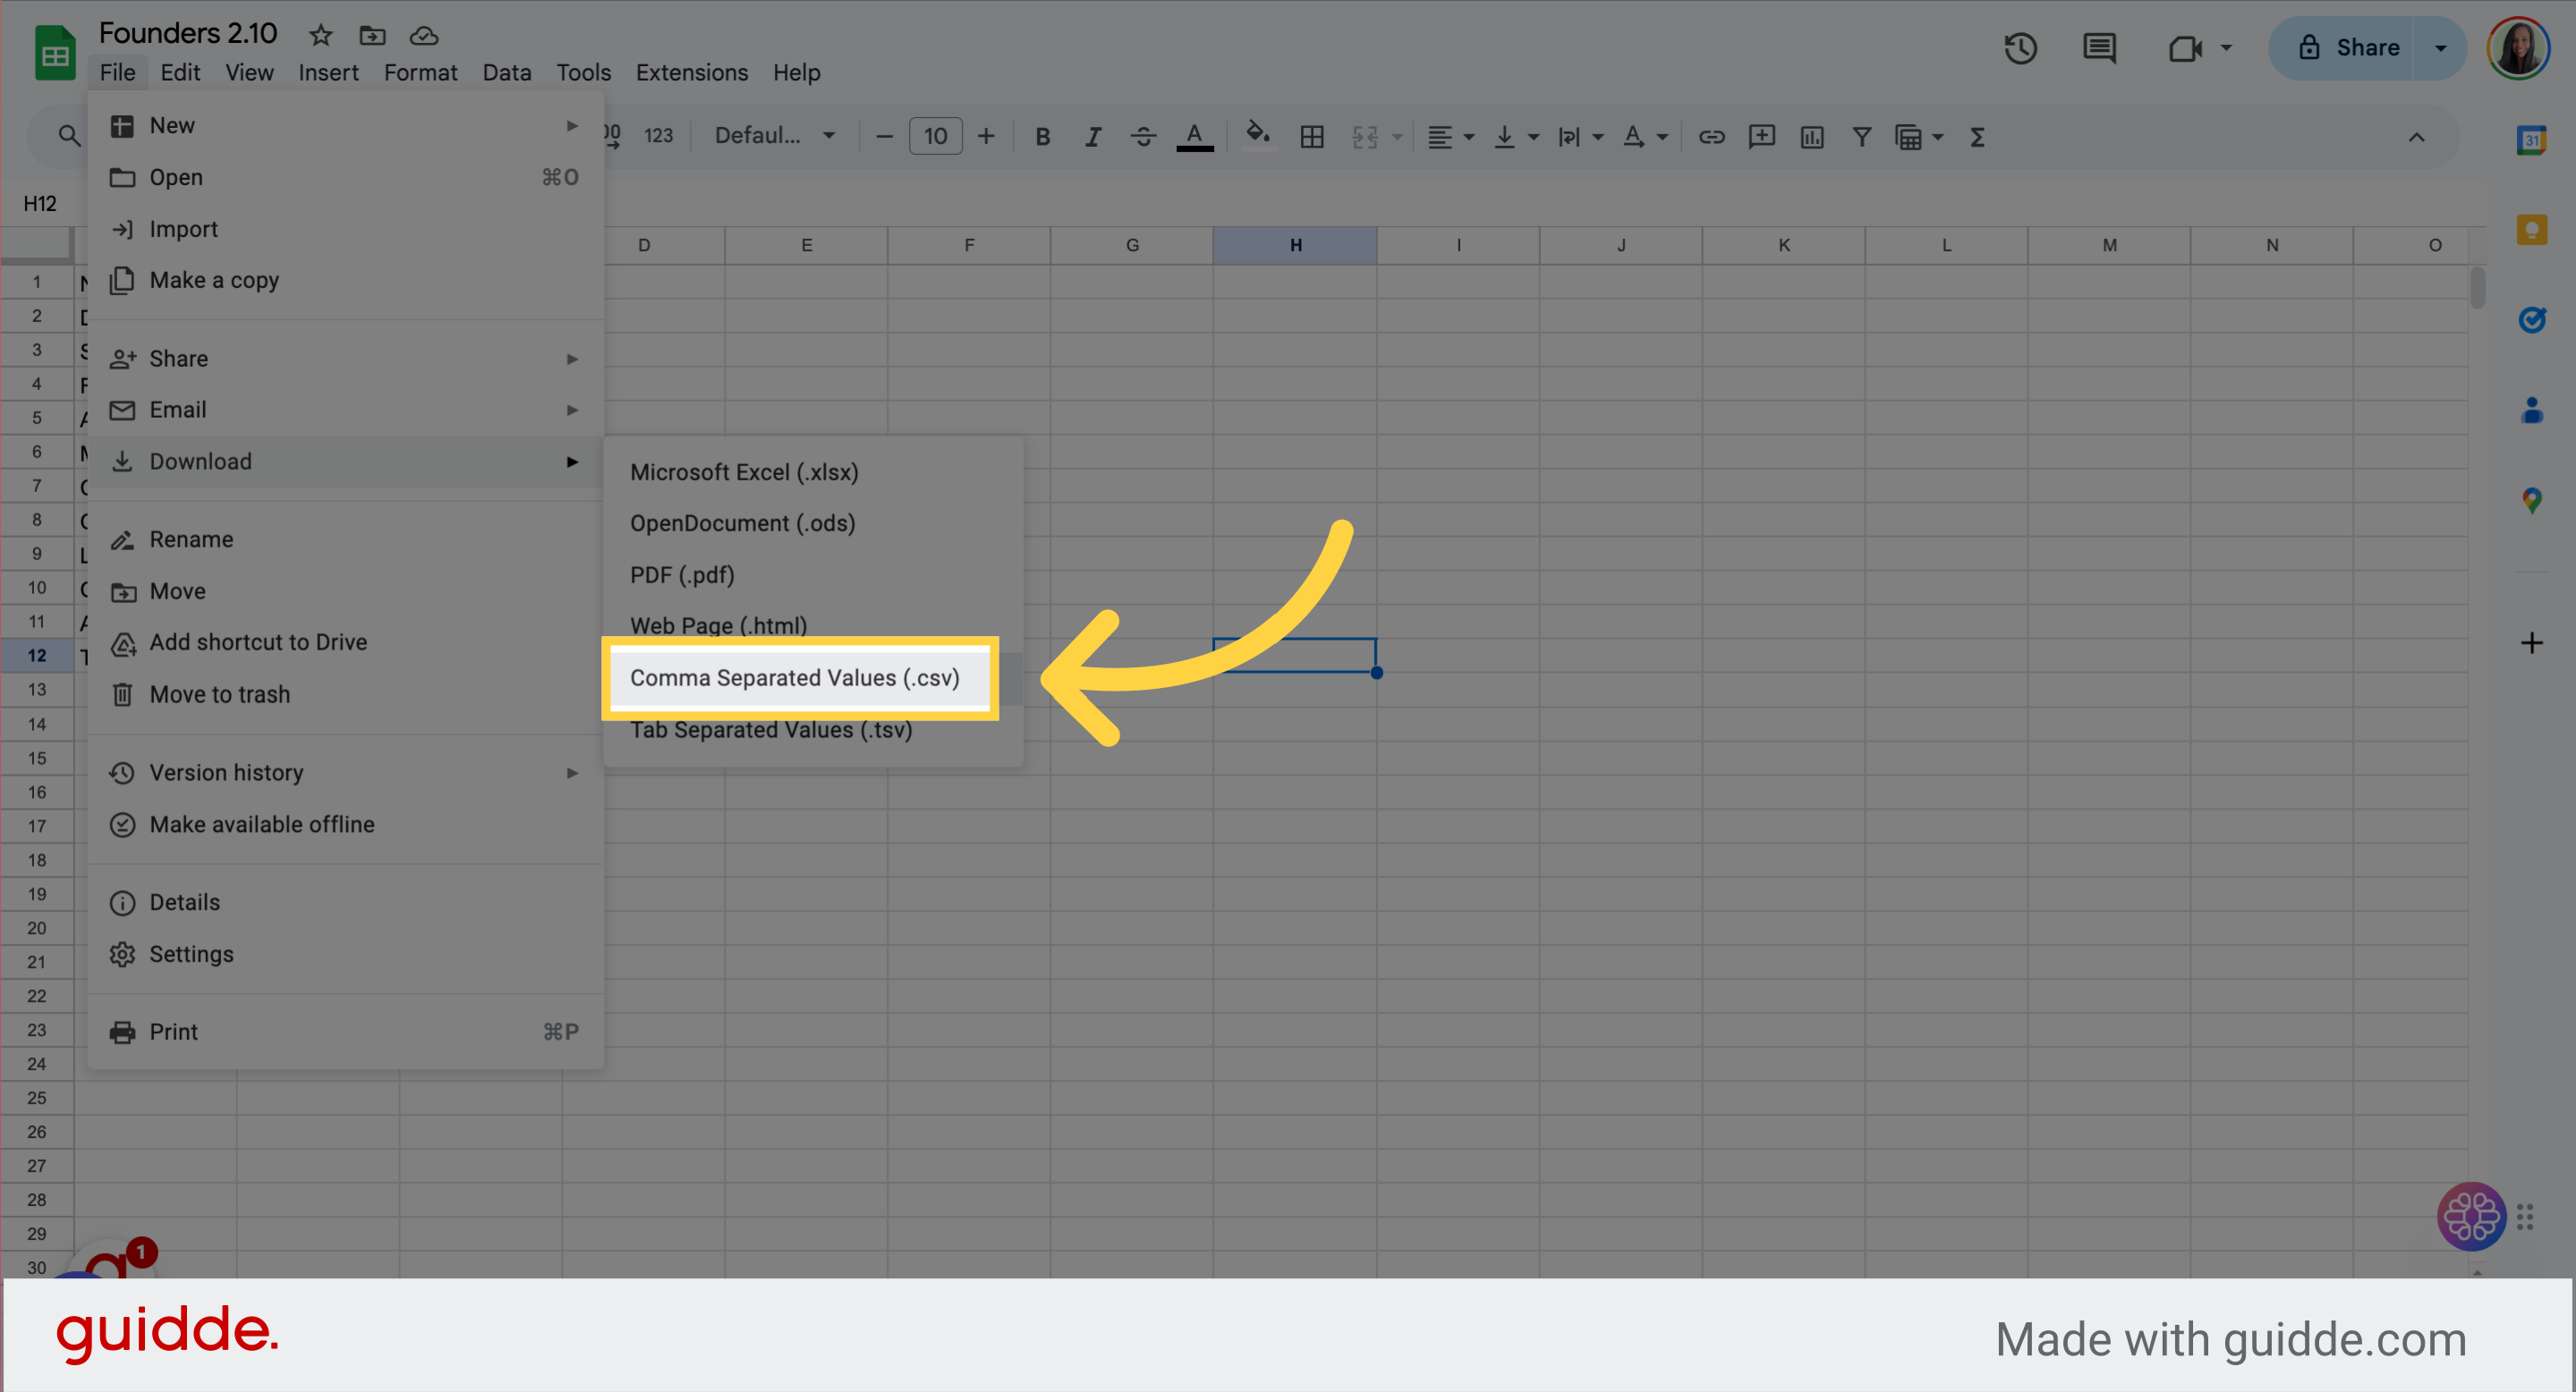
2. Go to Download
Click "Comma Separated Values (.csv)"
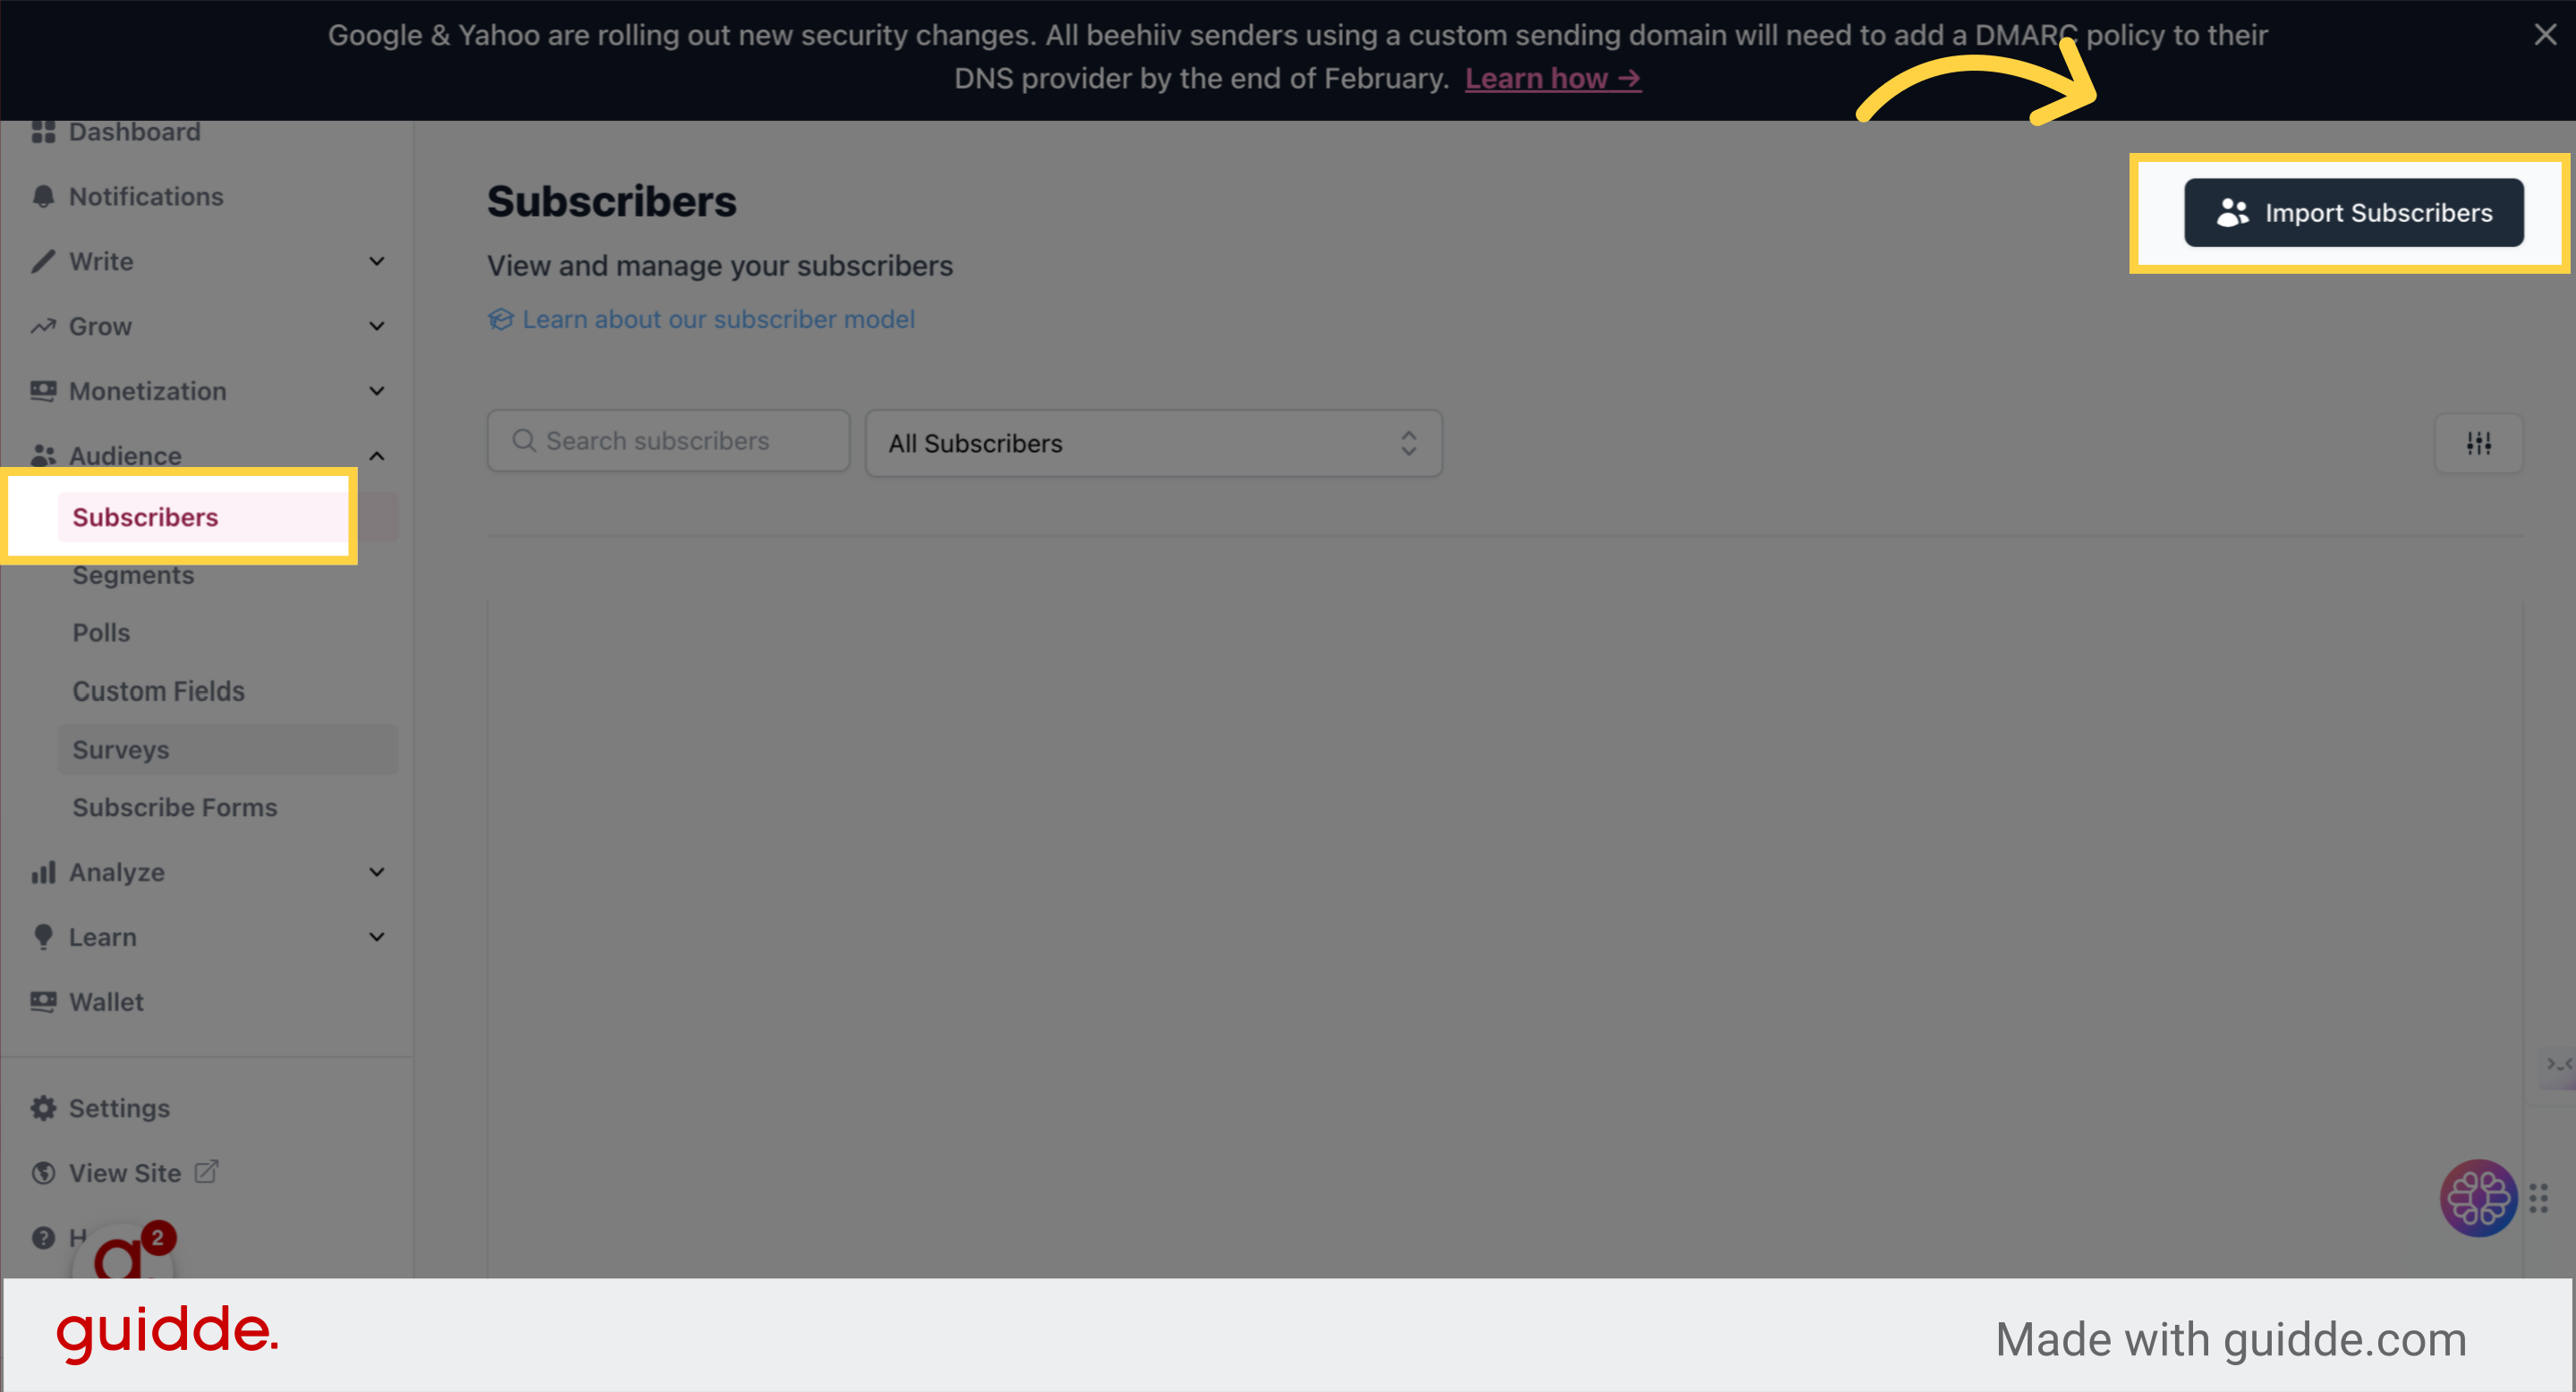
3. Go to "app.beehiiv.com"
Go to Audience > Subscribers to important subscribers
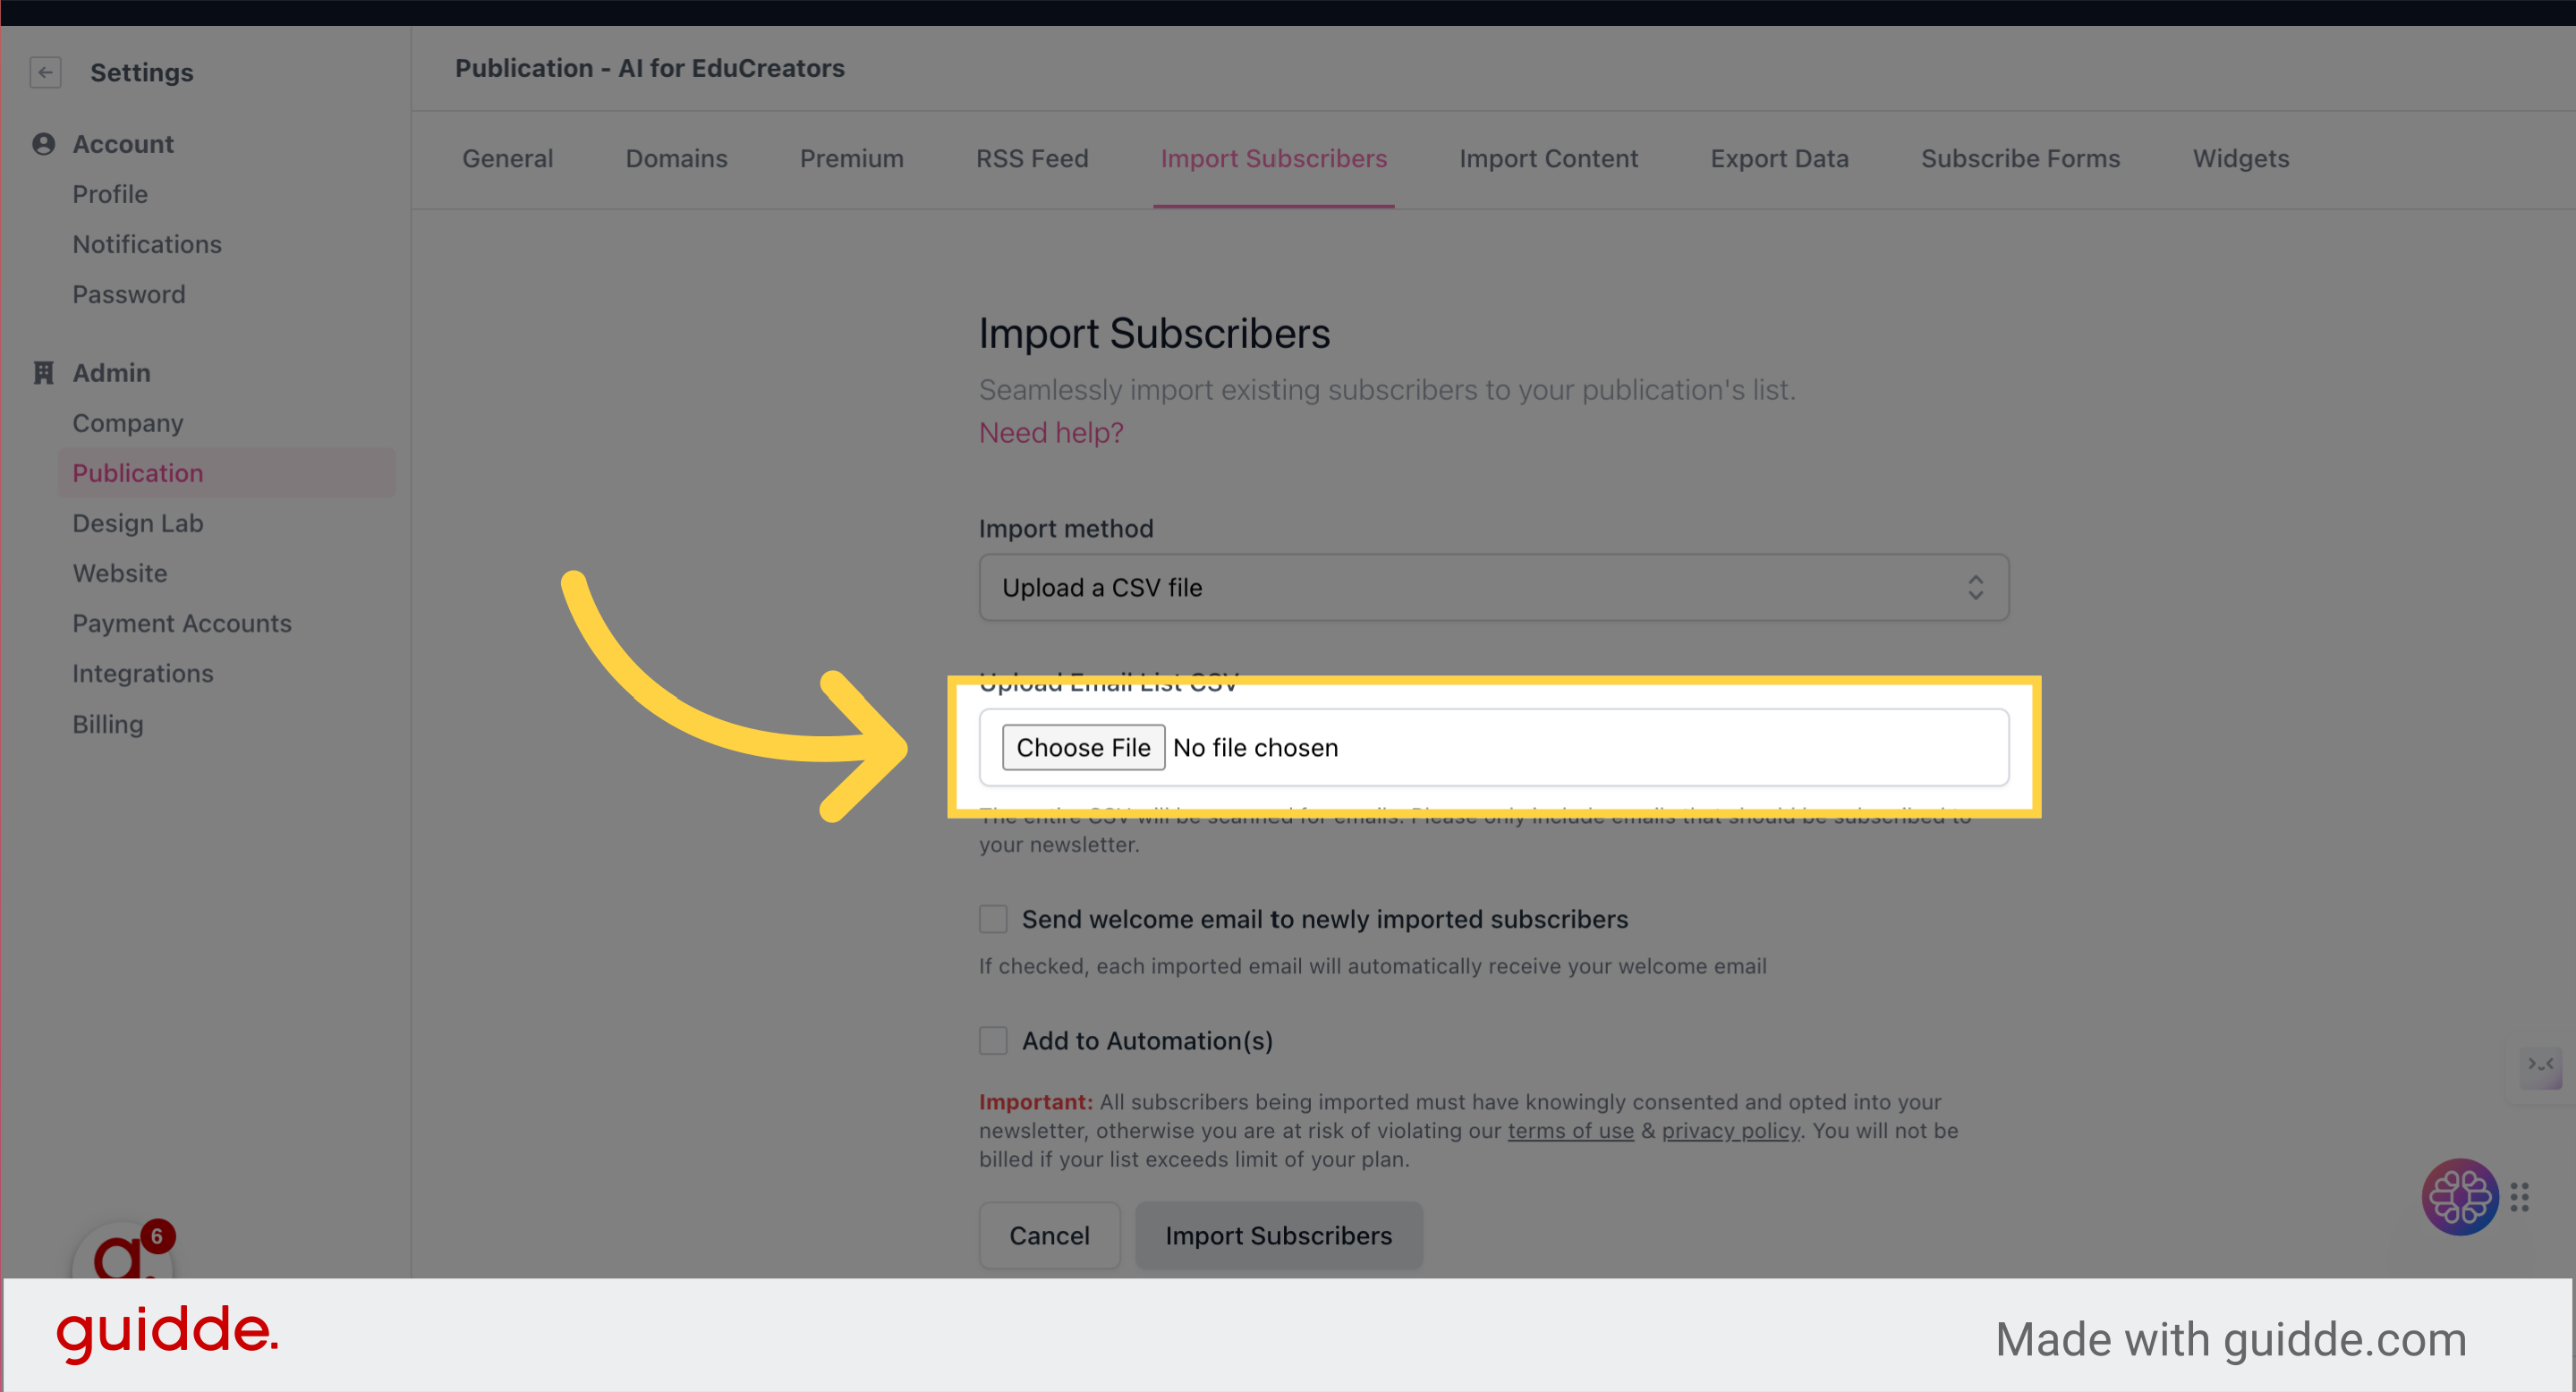
4. Click "Choose File"
Upload CSV file from Step 2
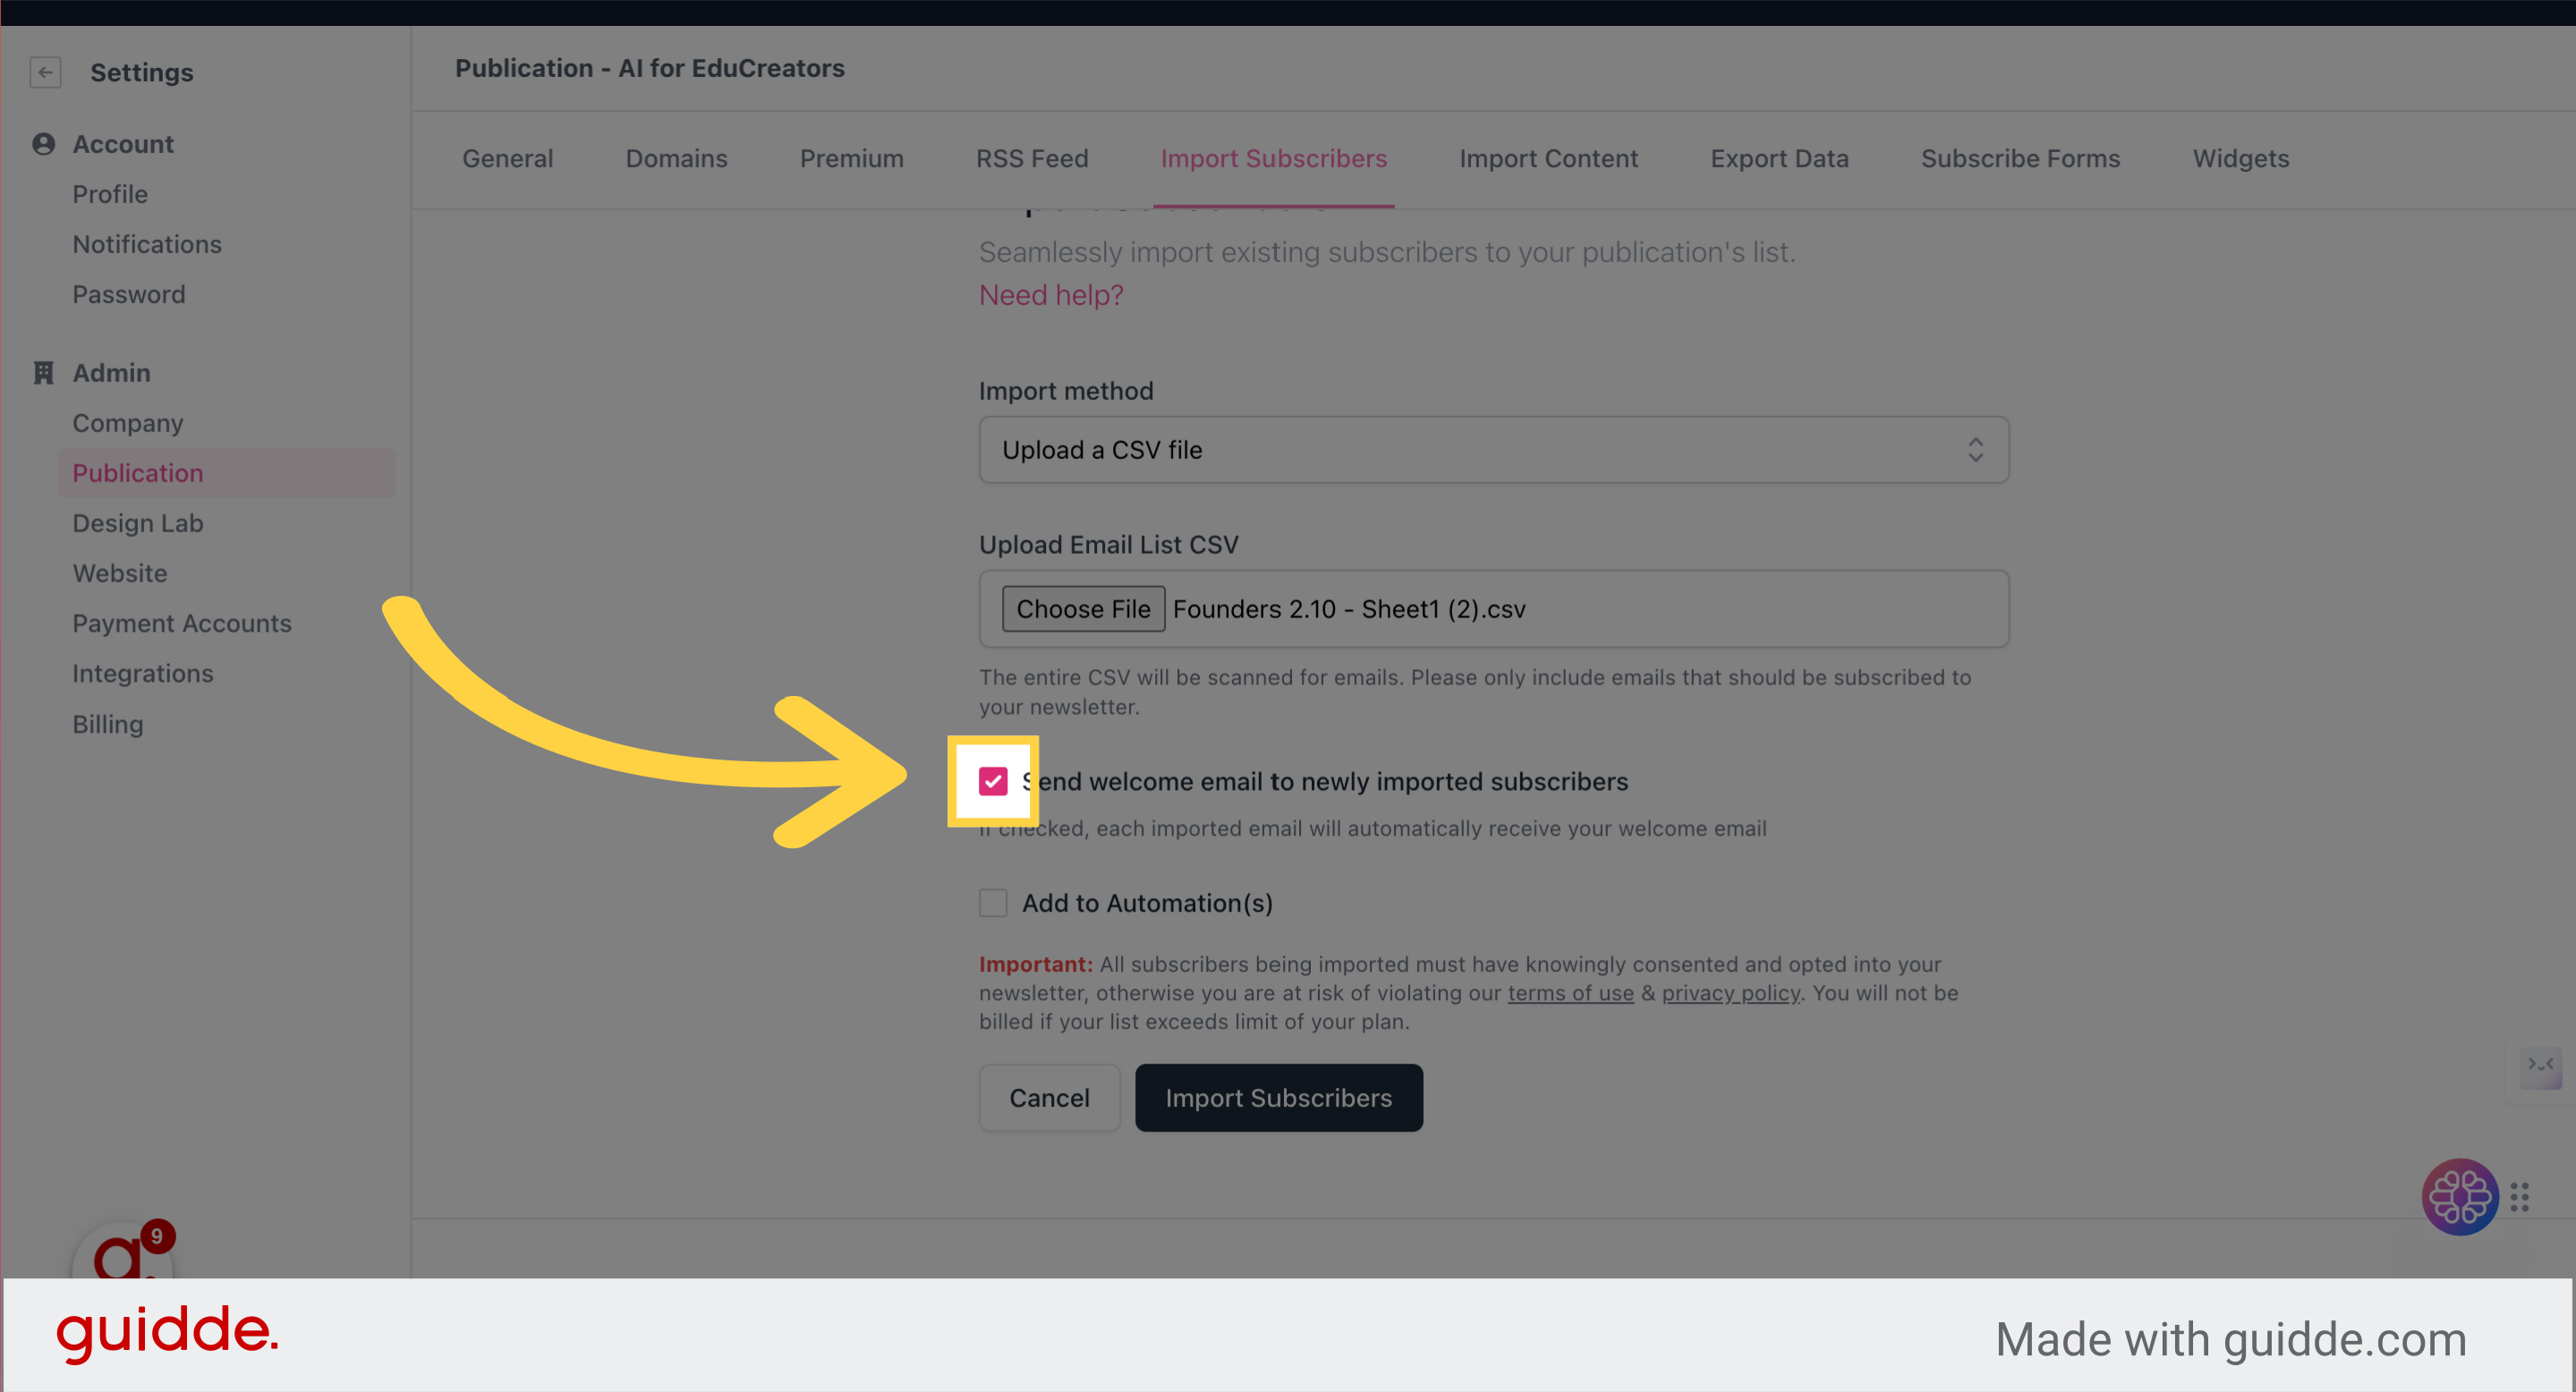
5. Click to send welcome email
Select the "on" button.
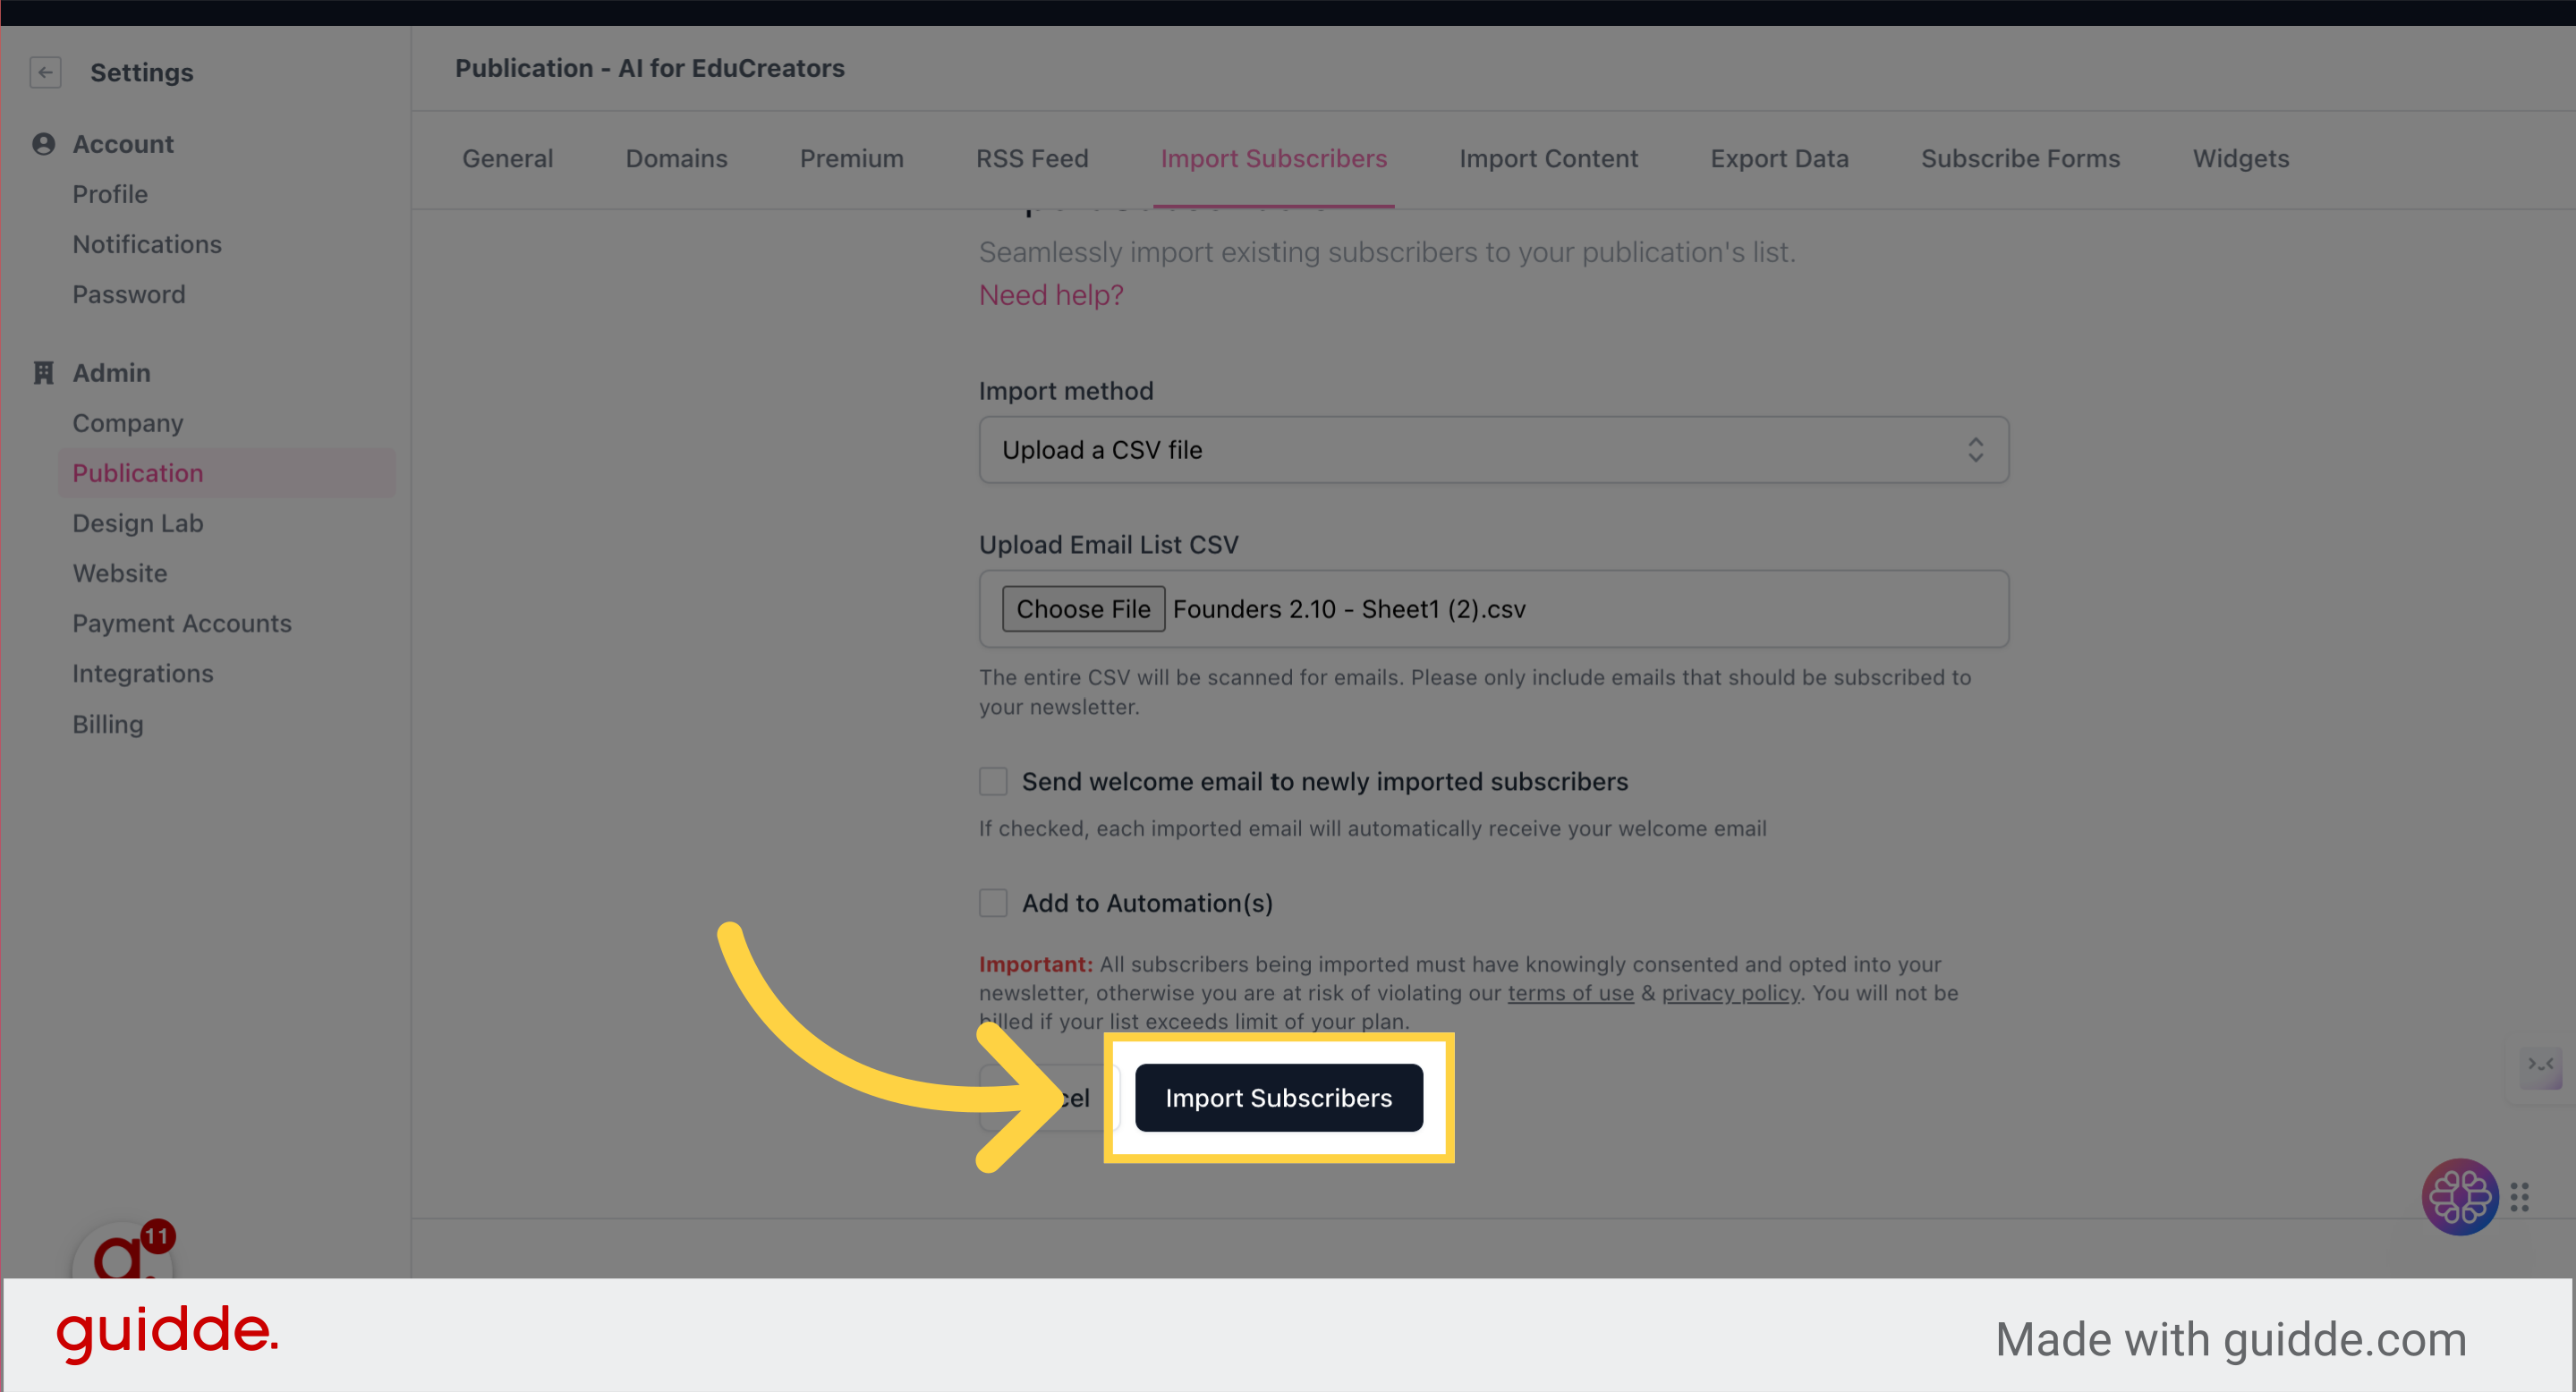
6. Click "Import Subscribers"
Proceed with importing subscribers.
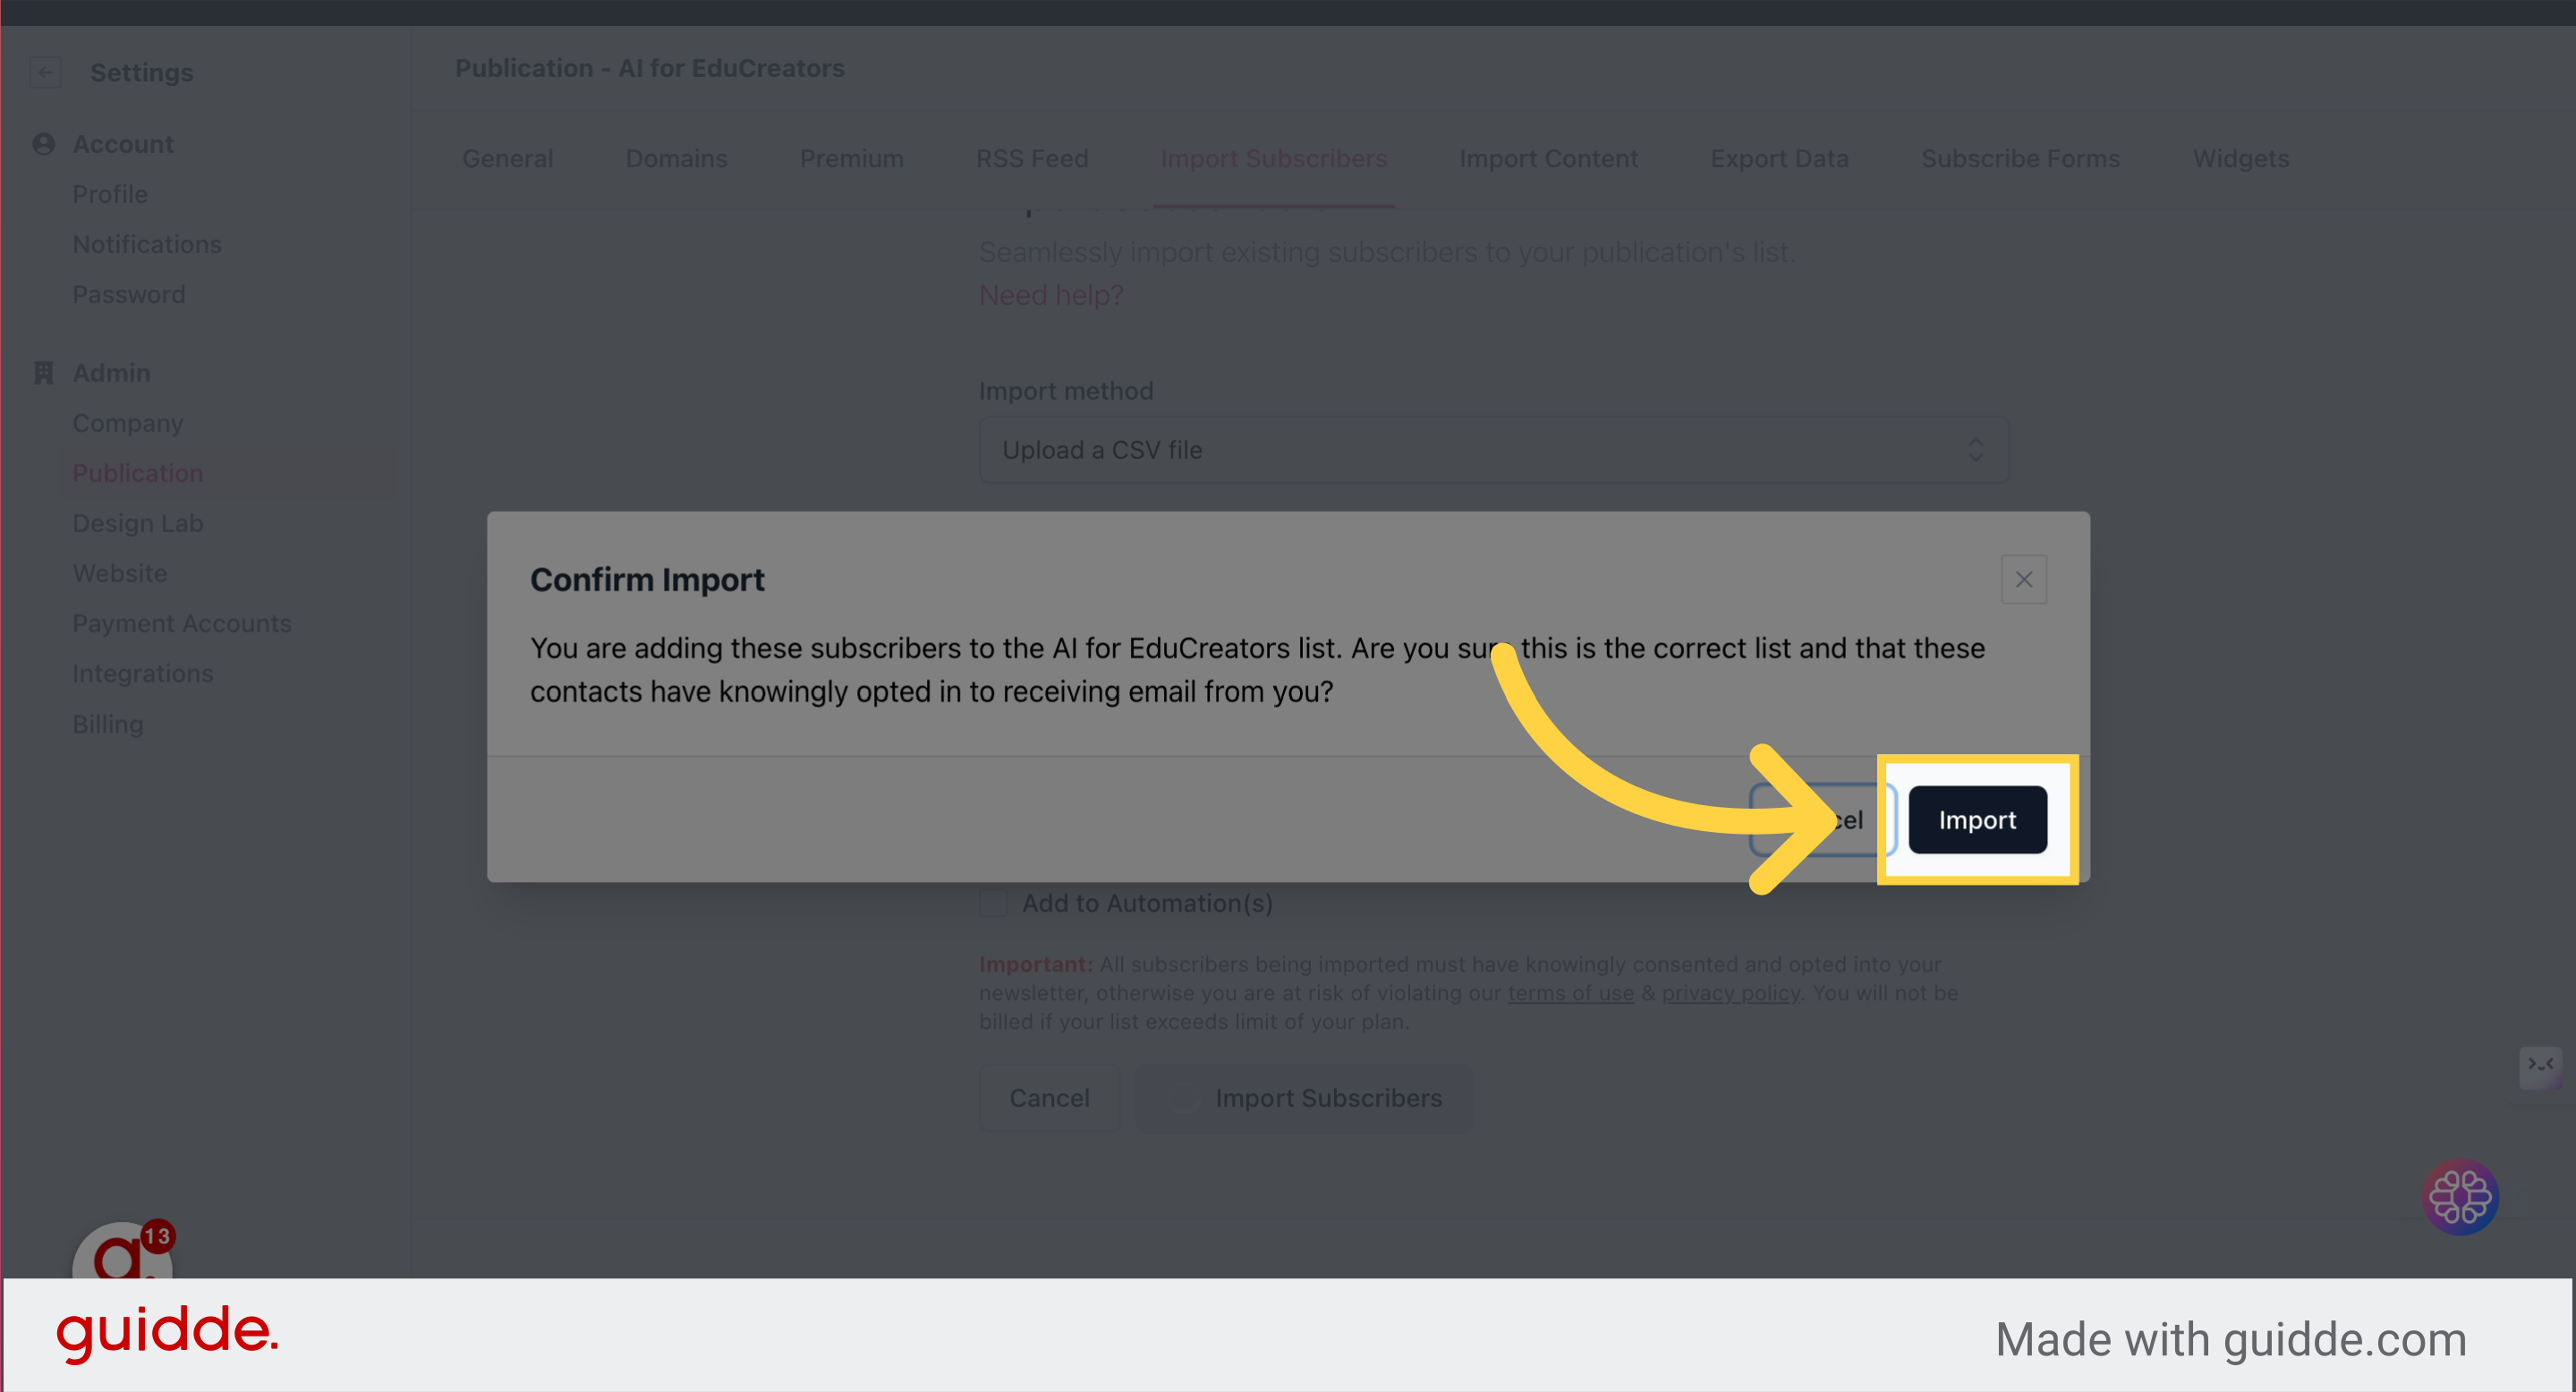
7. Click "Import"
Finalize the import process.
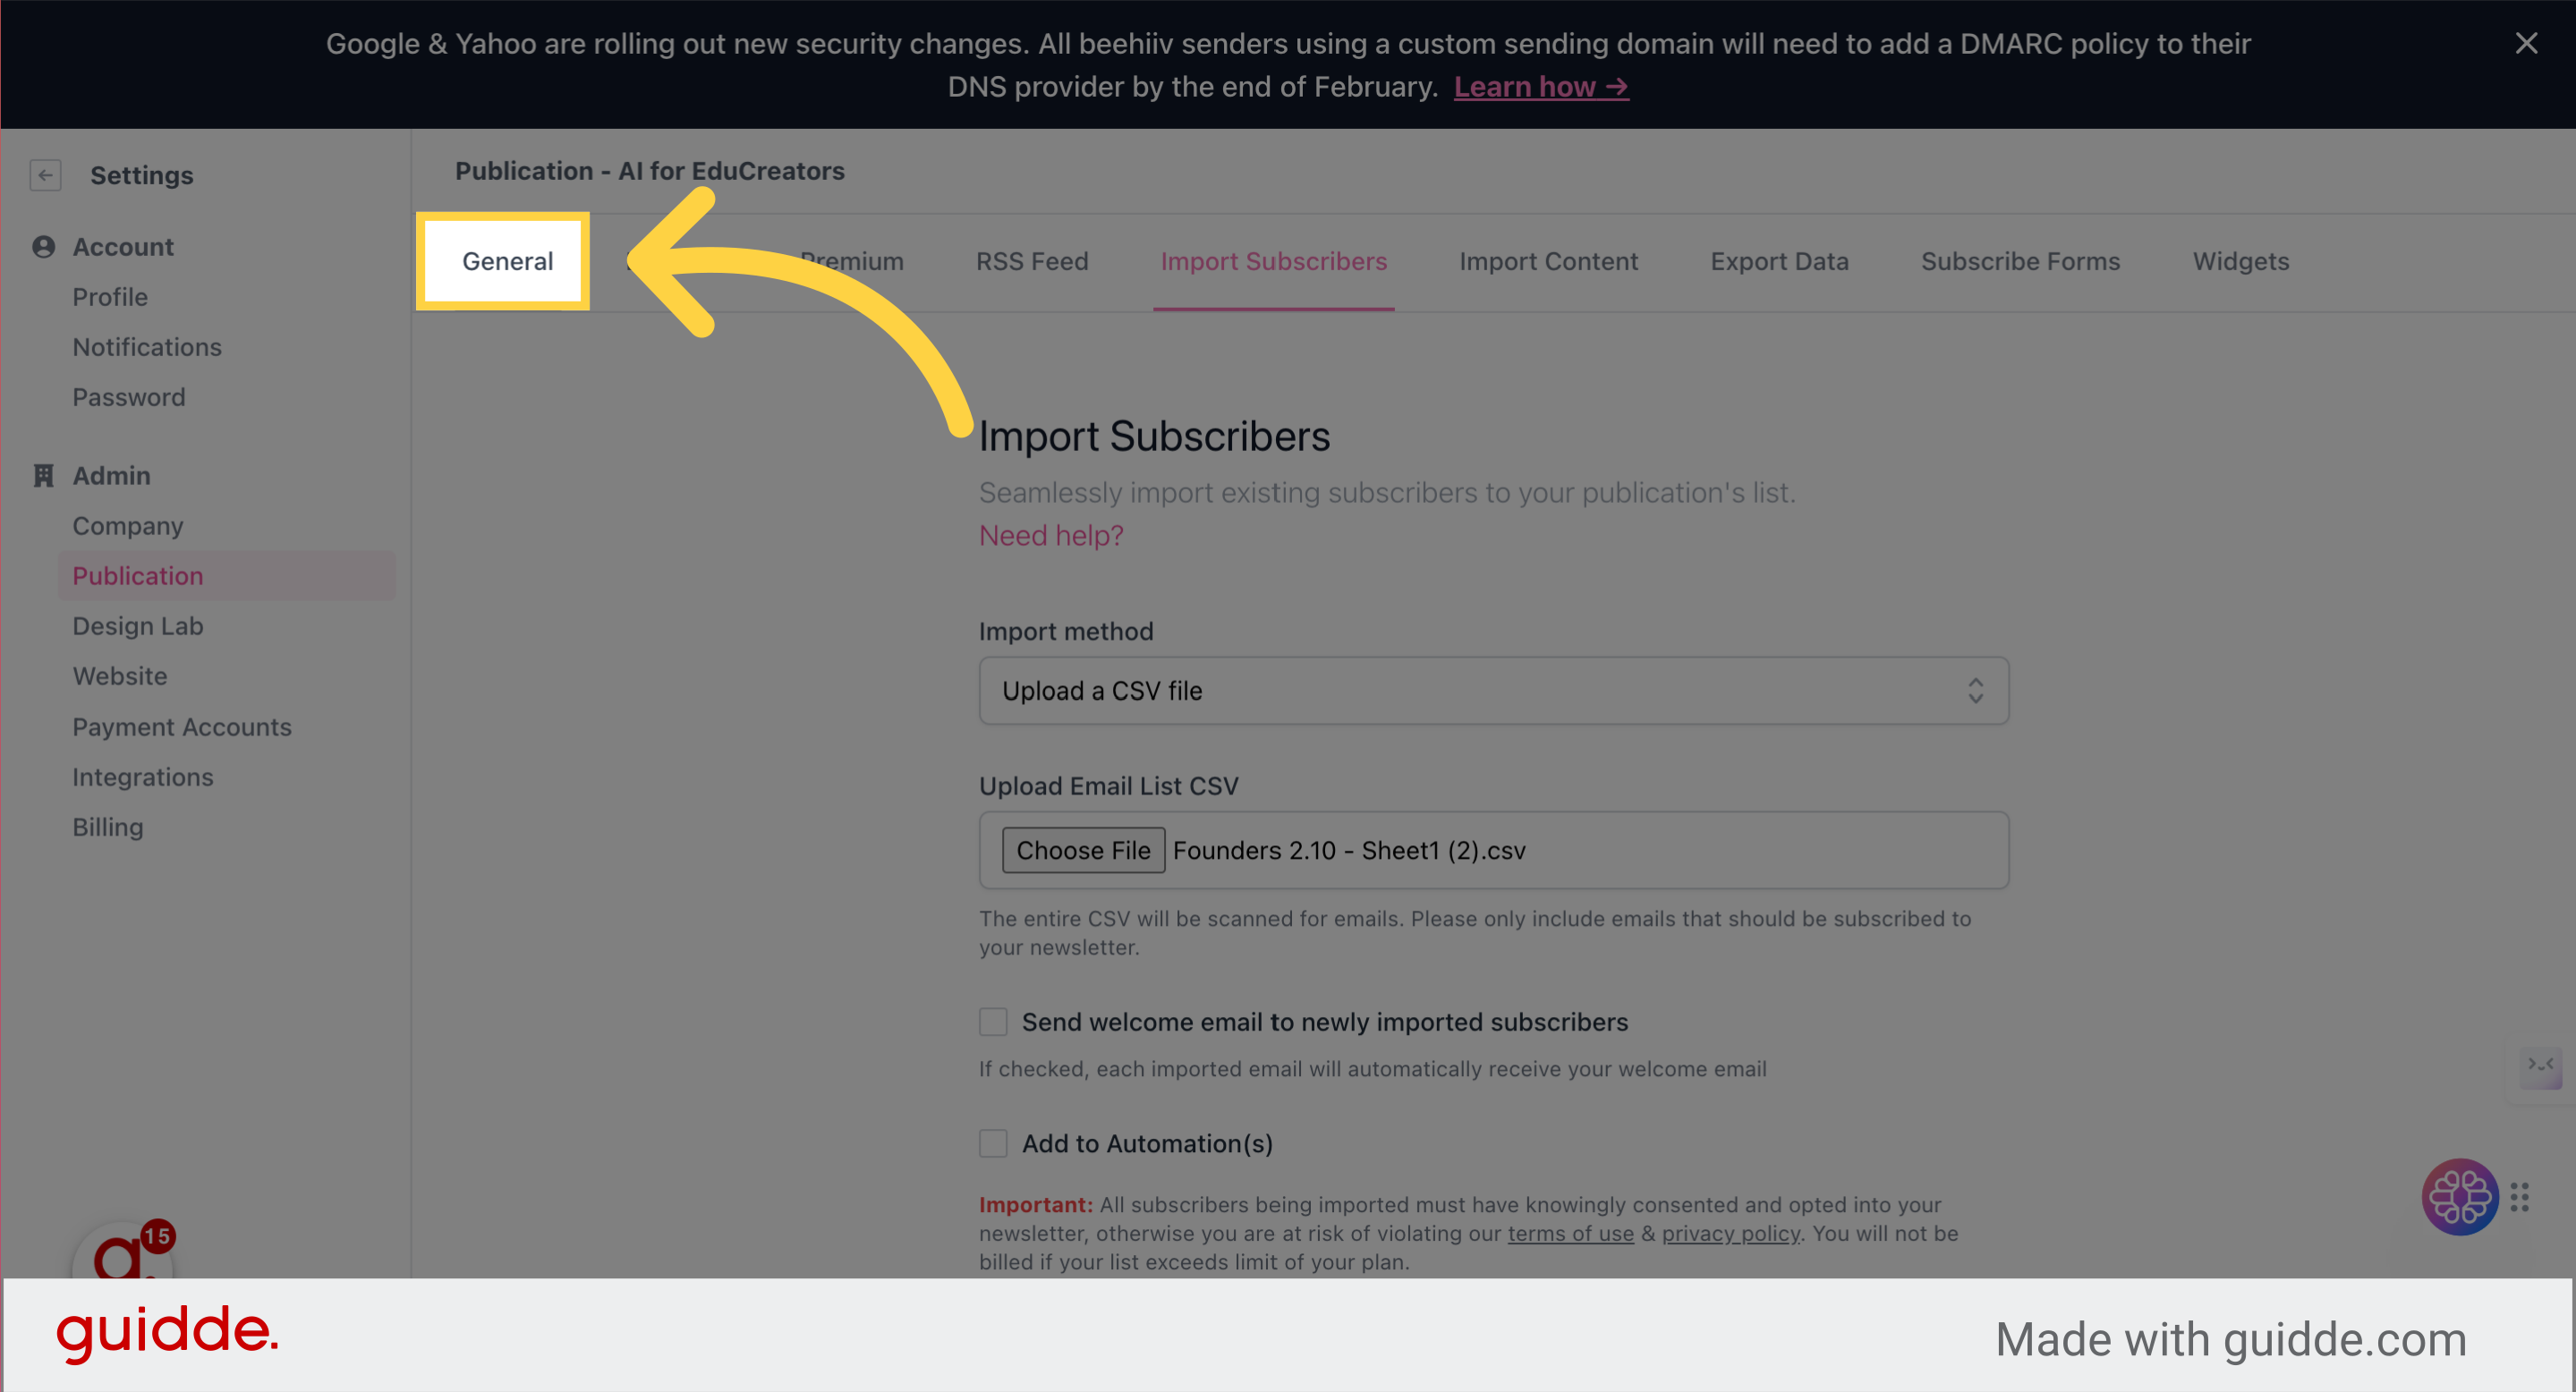
Section 2: Create Welcome Email
8. Click "General"
Navigate to the General section.
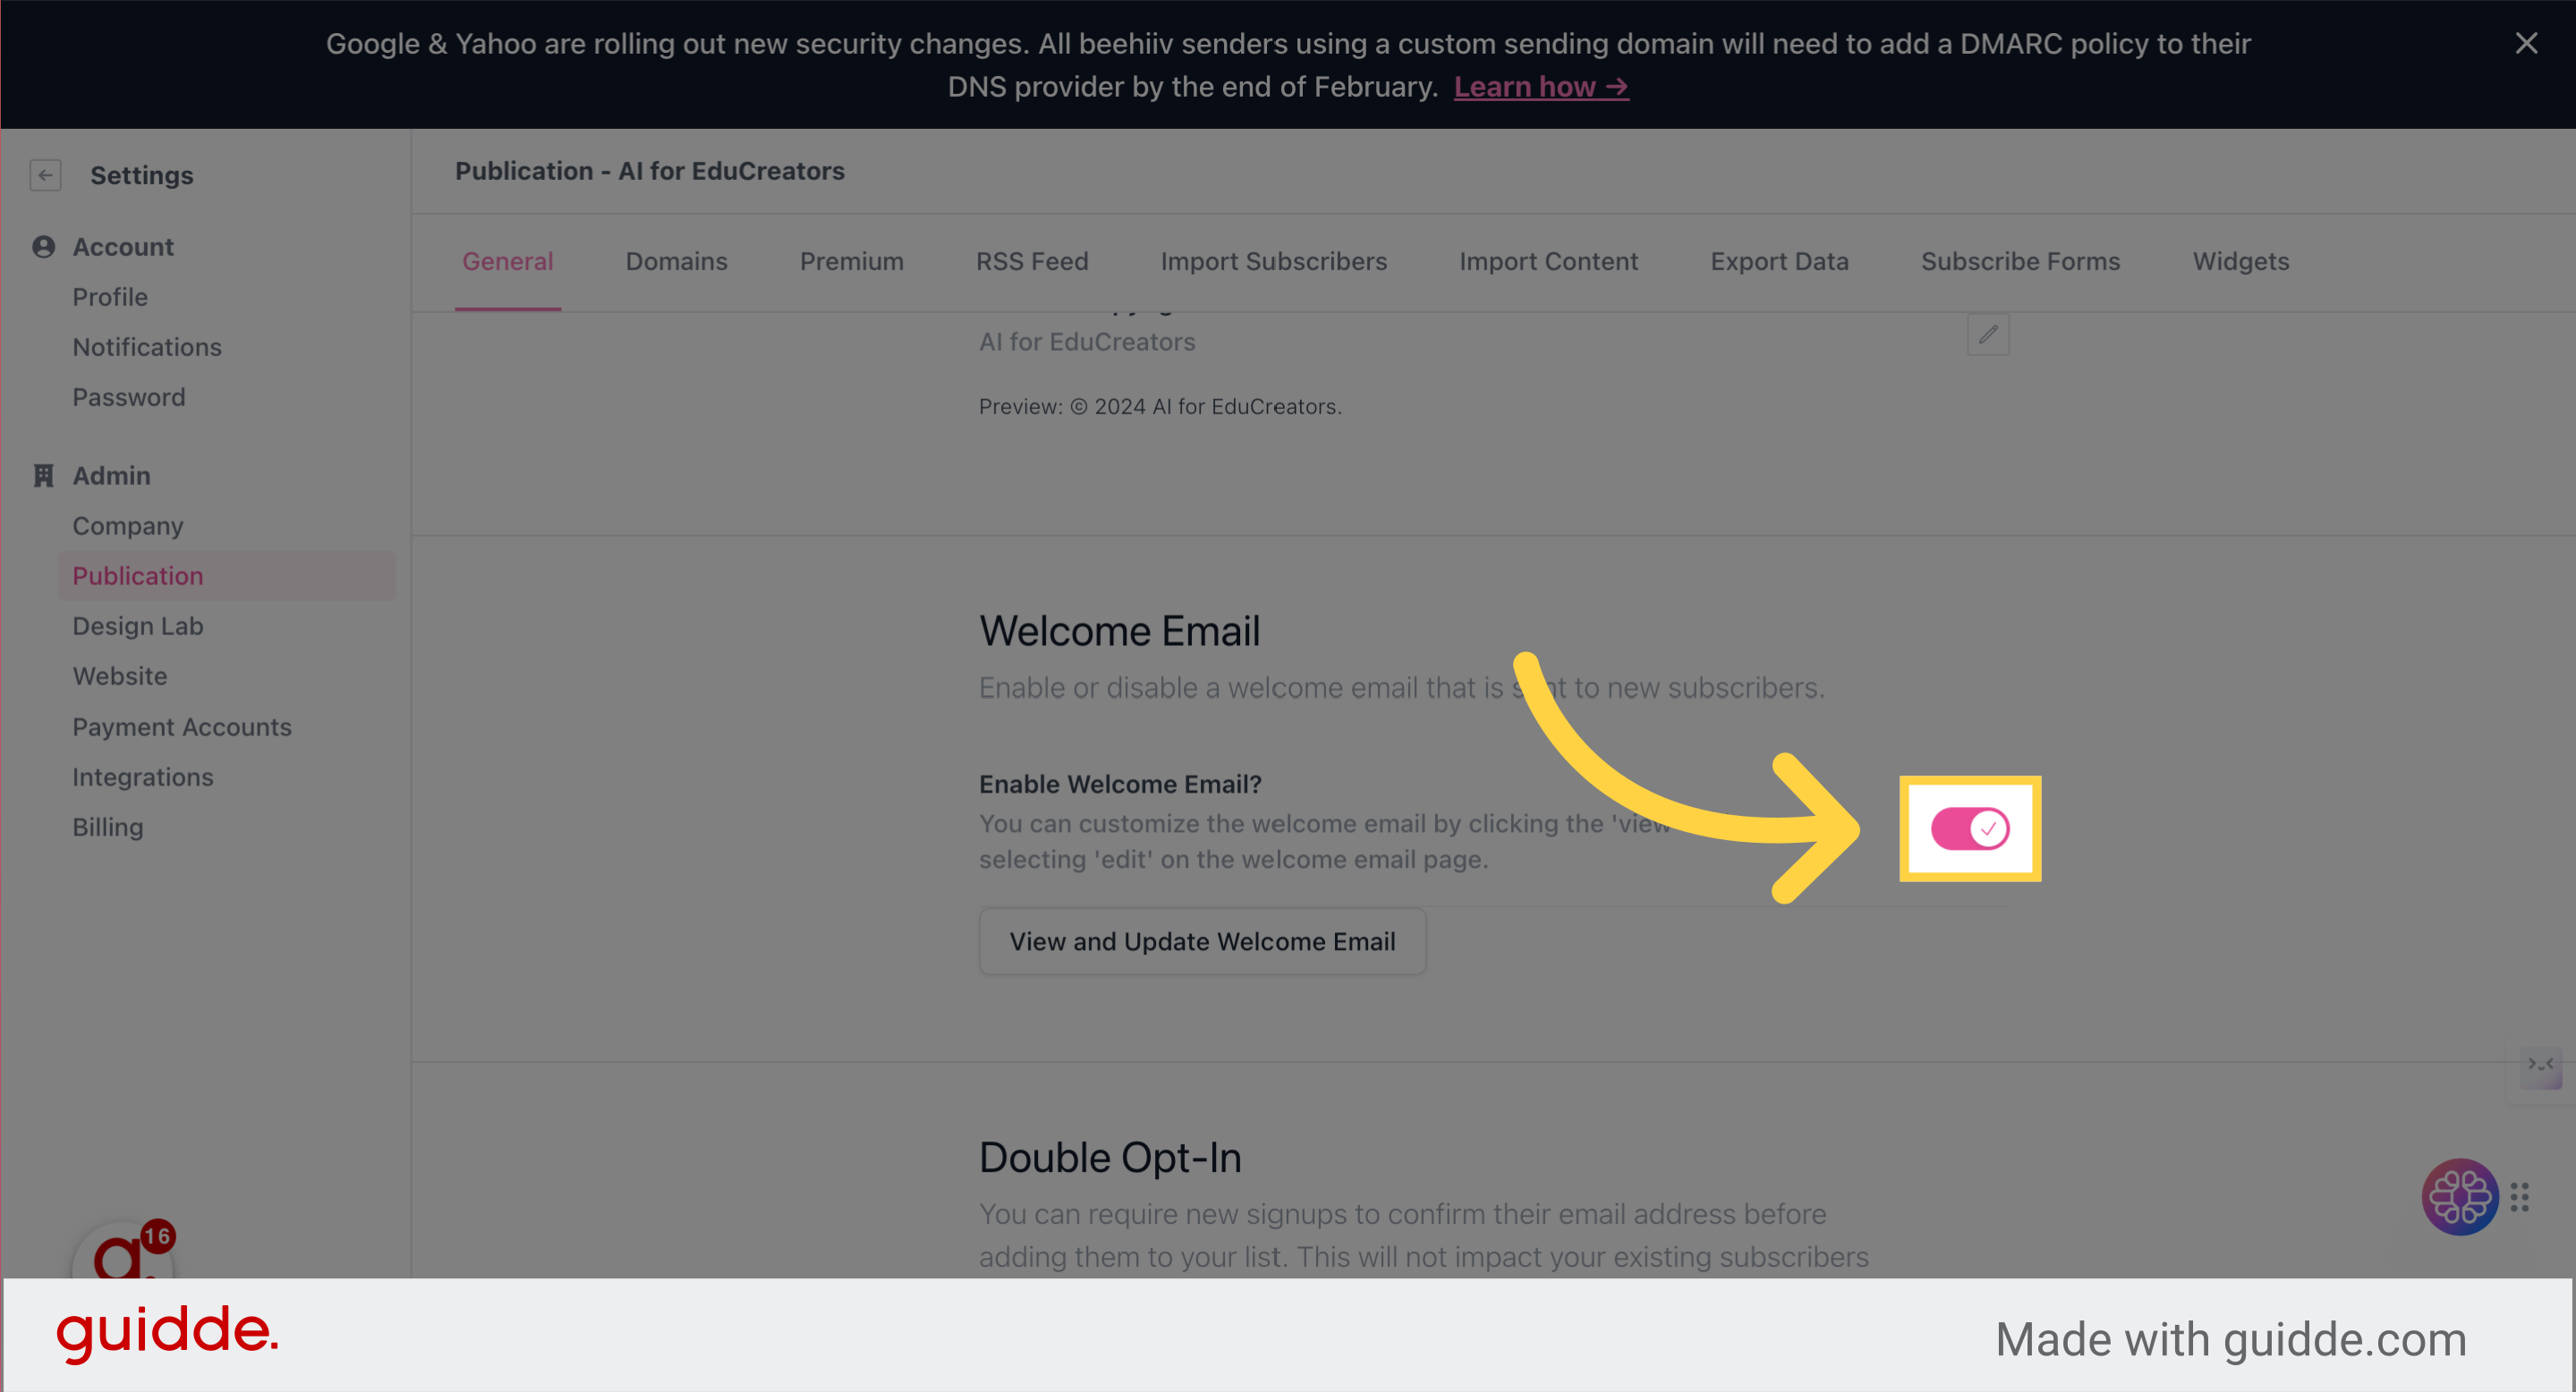
9. Toggle on Welcome Email
Click the selected button
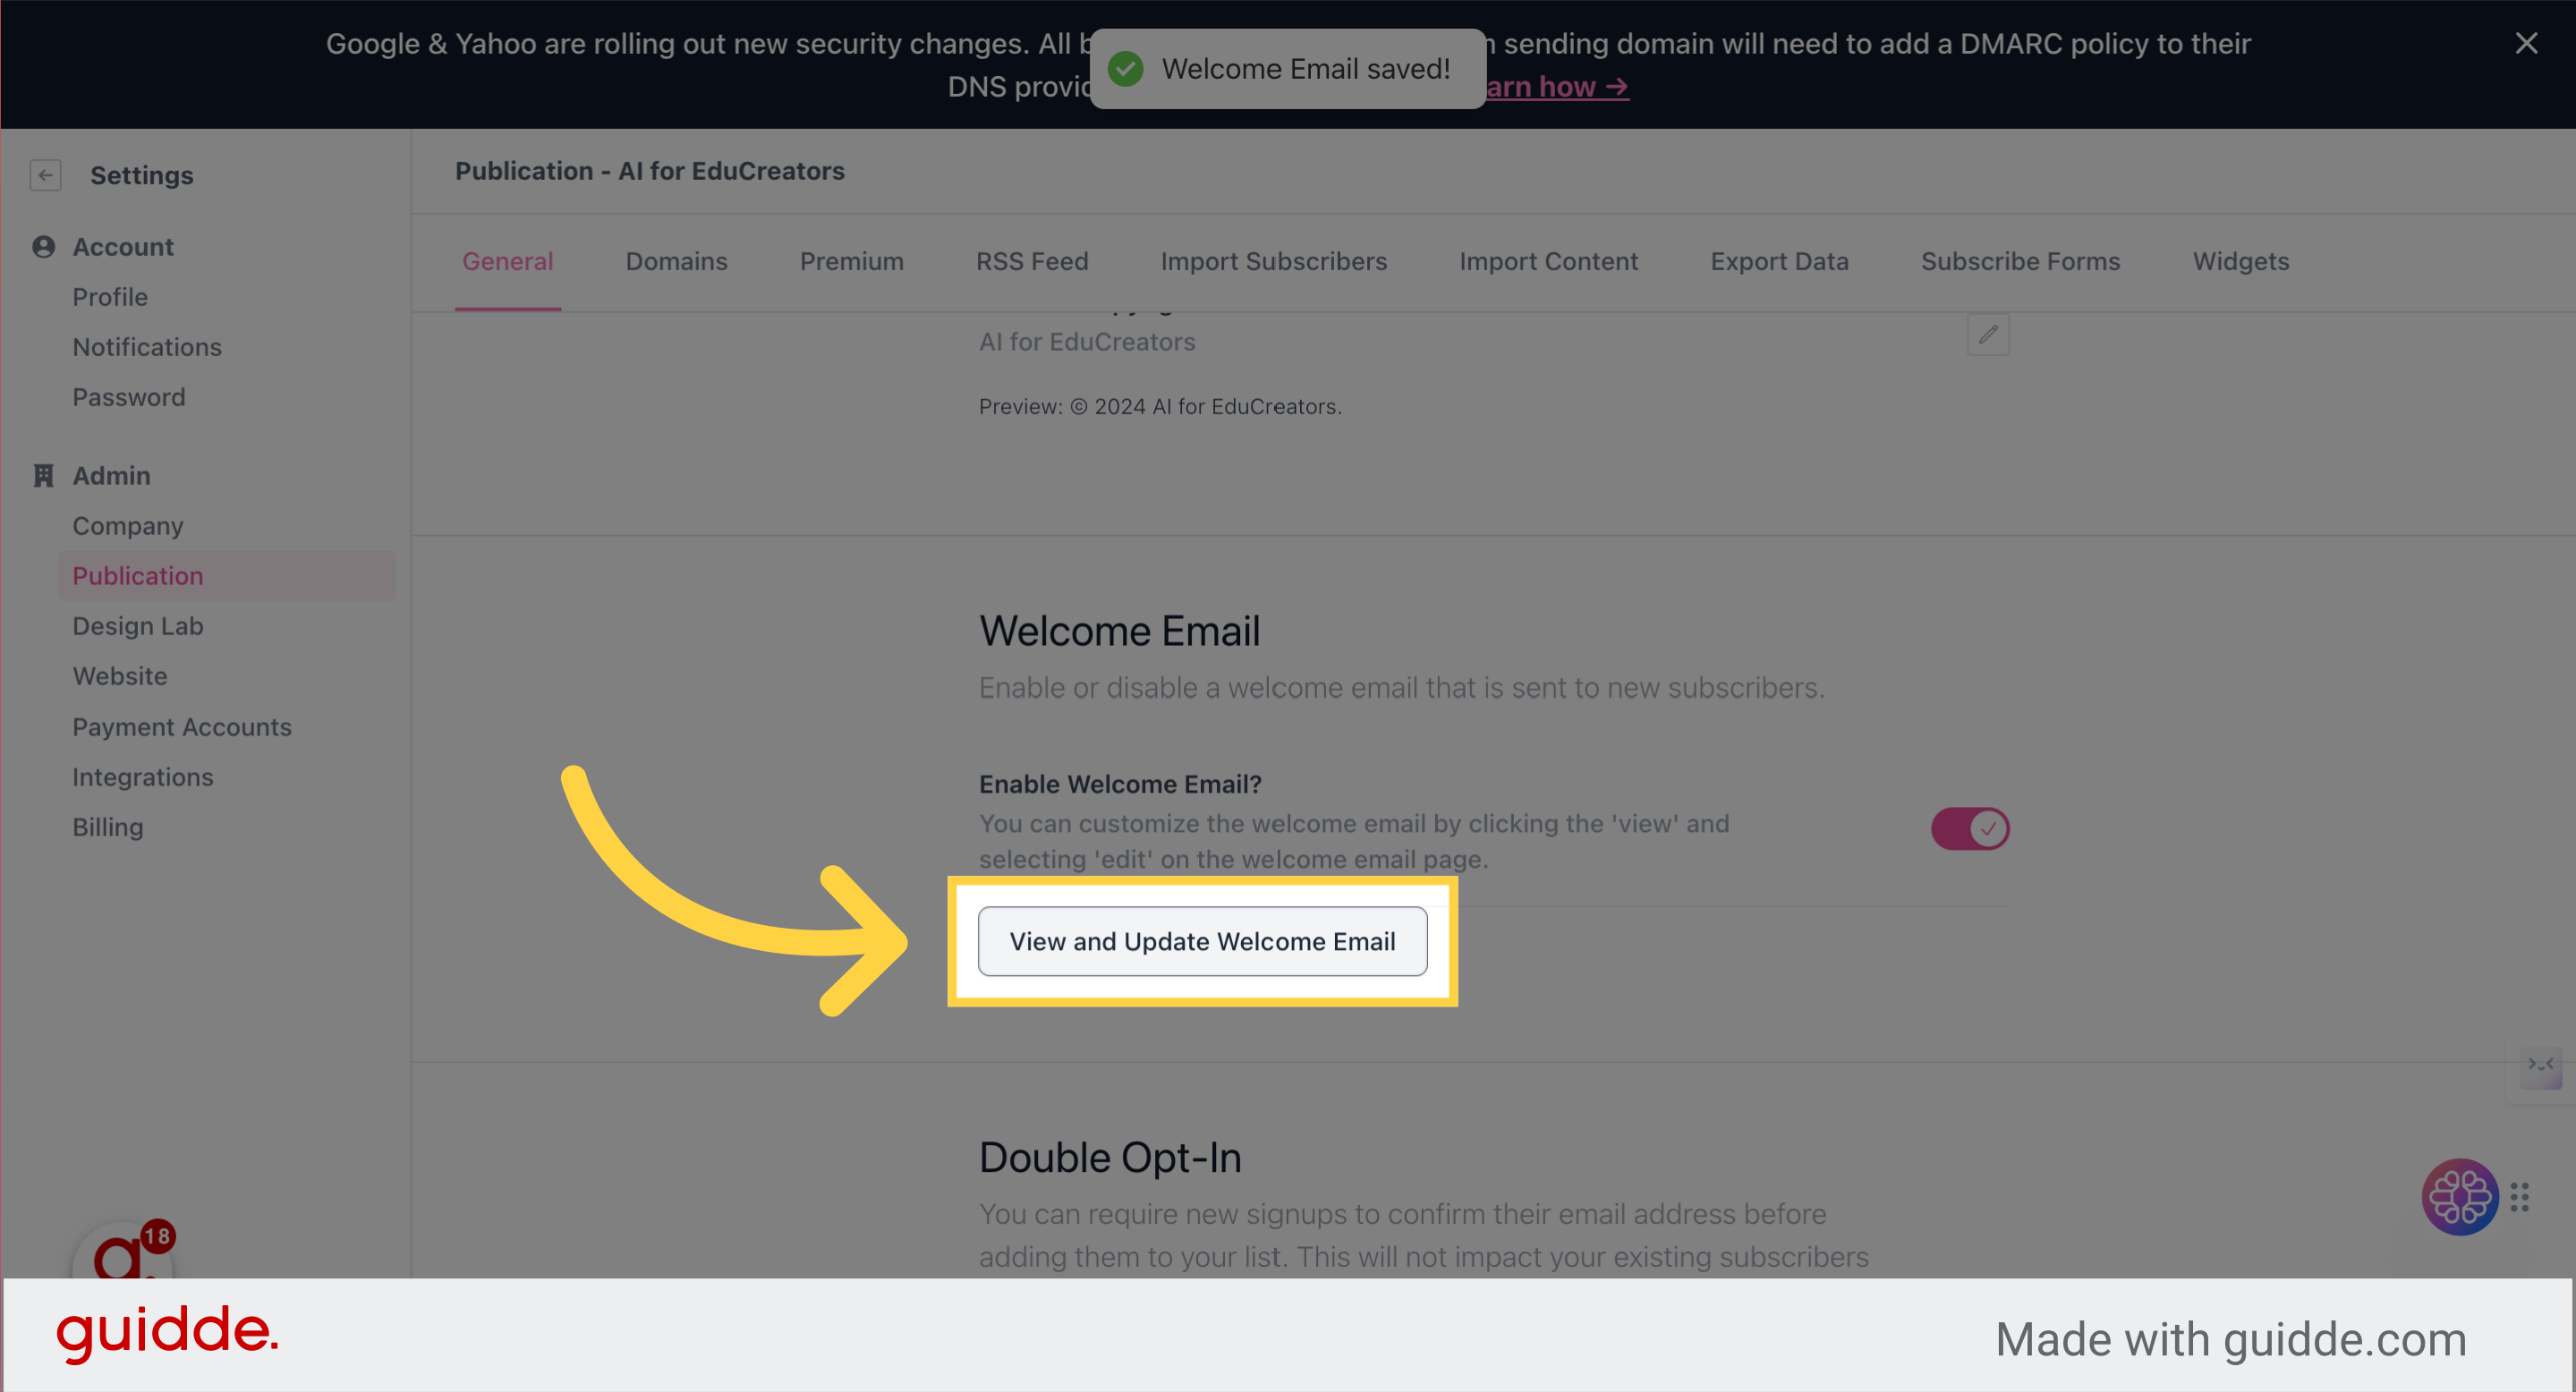
10. Click "View and Update Welcome Email"
Access the Welcome Email settings.
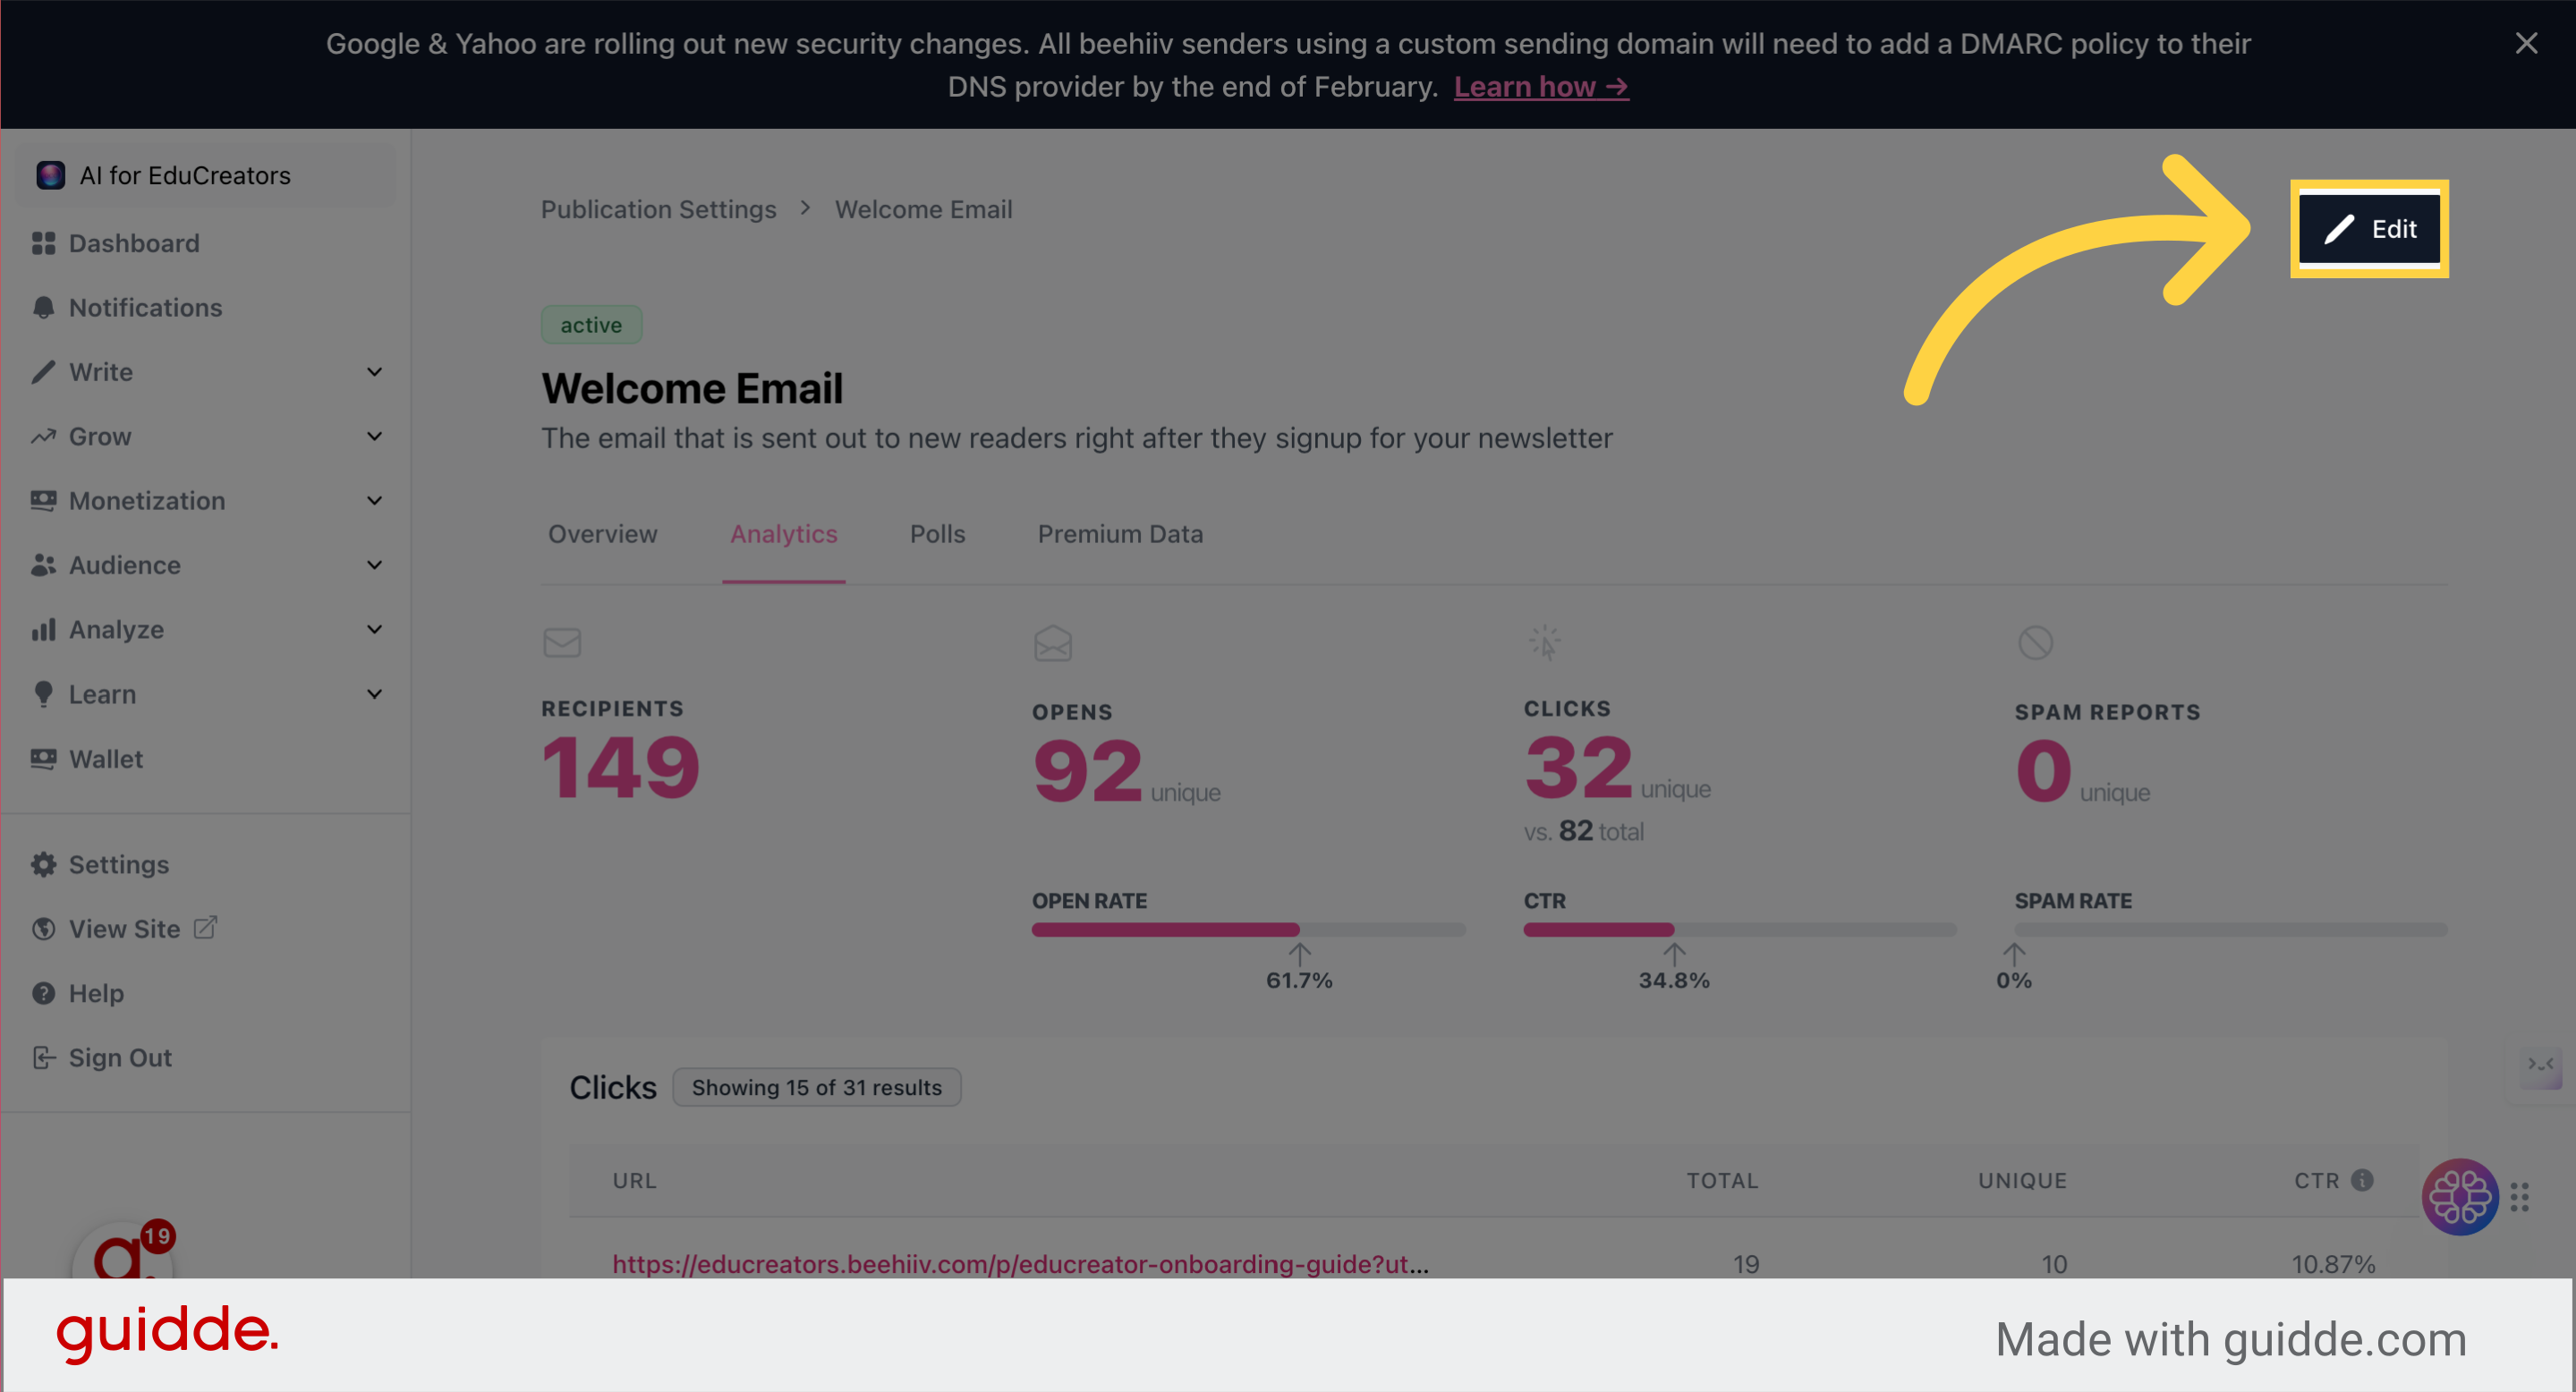
11. Click "Edit"
Modify the content as needed.
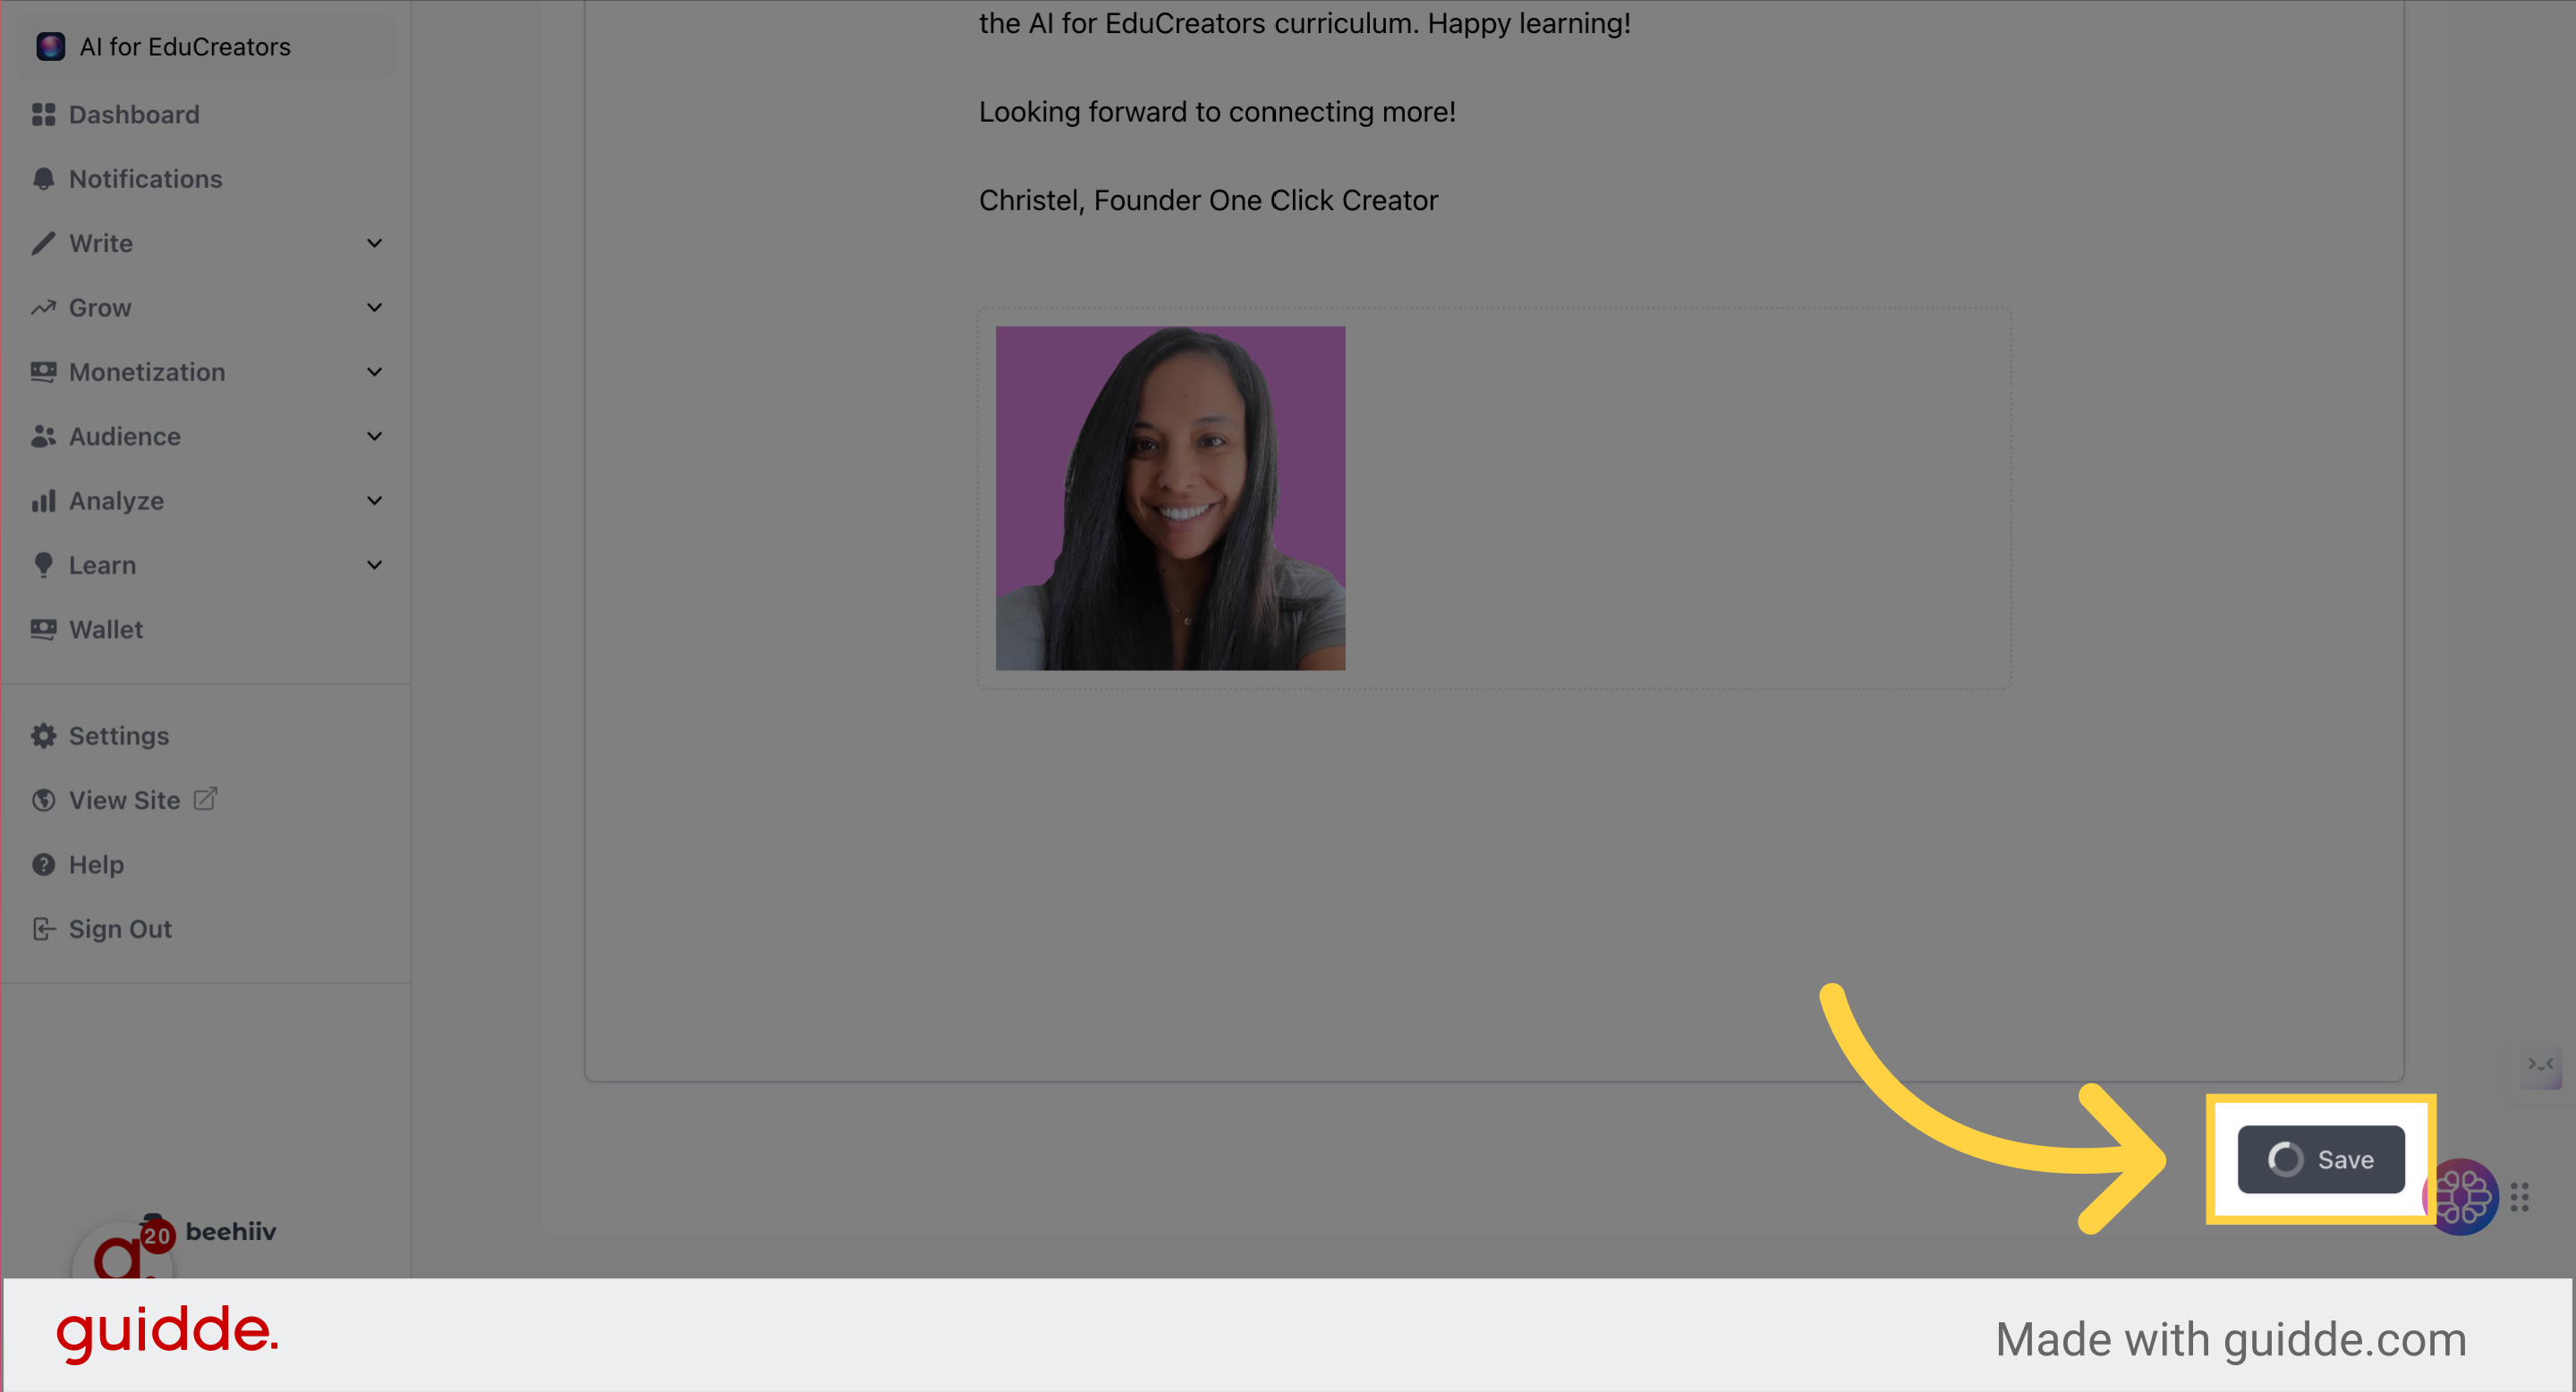
12. Click "Save"
Save the changes made.
Section 3: Writing a Great Welcome Email
The essential components of a great welcome email include:
1. Timeliness: Sending the welcome email promptly while the subscriber's interest is at its peak.
2. Clear and Engaging Subject Line: A subject line that is clear, engaging, and compels the recipient to open the email.
3. Greeting: Using the subscriber's name if available and a simple welcome message.
4. Clean and Uncluttered Design: A well-designed, uncluttered email with clear calls to action and engaging imagery.
5. Personalization: Adding a personal touch through the use of the subscriber's name or other relevant information.
6. Content Recommendations: Providing links to valuable content on your website to keep the subscriber engaged.
7. Custom Offers: Including personalized offers or incentives to encourage further engagement.
8. Call to Action: Clearly stating the next steps or actions you want the subscriber to take.
9. Social Follow Buttons: Including social media follow buttons to encourage subscribers to connect on other platforms.
10. Automation: Automating the welcome email to ensure it is sent in real time after the subscriber opts in[1][2][3][4][5].
Citations:
[4] https://www.campaignmonitor.com/resources/infographics/10-essential-elements-of-a-welcome-email/