Guide: How to Build an Automated Email Sequence in Beehiiv Part 3
I have been working on a series of Guides to help you set up your email list with Google Forms, Sheets and Beehiiv.
Guide Part 1 here
Guide Part 2 here
In this Guide, I will show you step-by-step how to build your automated email sequence with Beehiiv. If you haven’t yet created your AI-Powered Lead Magnet with the Educational Email Course Creator GPT, you can sign up for the free 5-Day course by answering this poll (click yes or no will activate the course):
If you would like me to build this with you or have the AVAs build it, please schedule a 1:1 call using this link or reply to this email.
Beehiiv also has a wonderful knowledge base. For everything you need to know about Automations with Beehiiv: click here. Sign up with my partner link and get 30 days free instead of 14, plus 20% off first 3 months. If you don’t monetize in 30 days with this system, cancel your subscription. No risk.
Step-by-Step Guide
Go to app.beehiiv.com
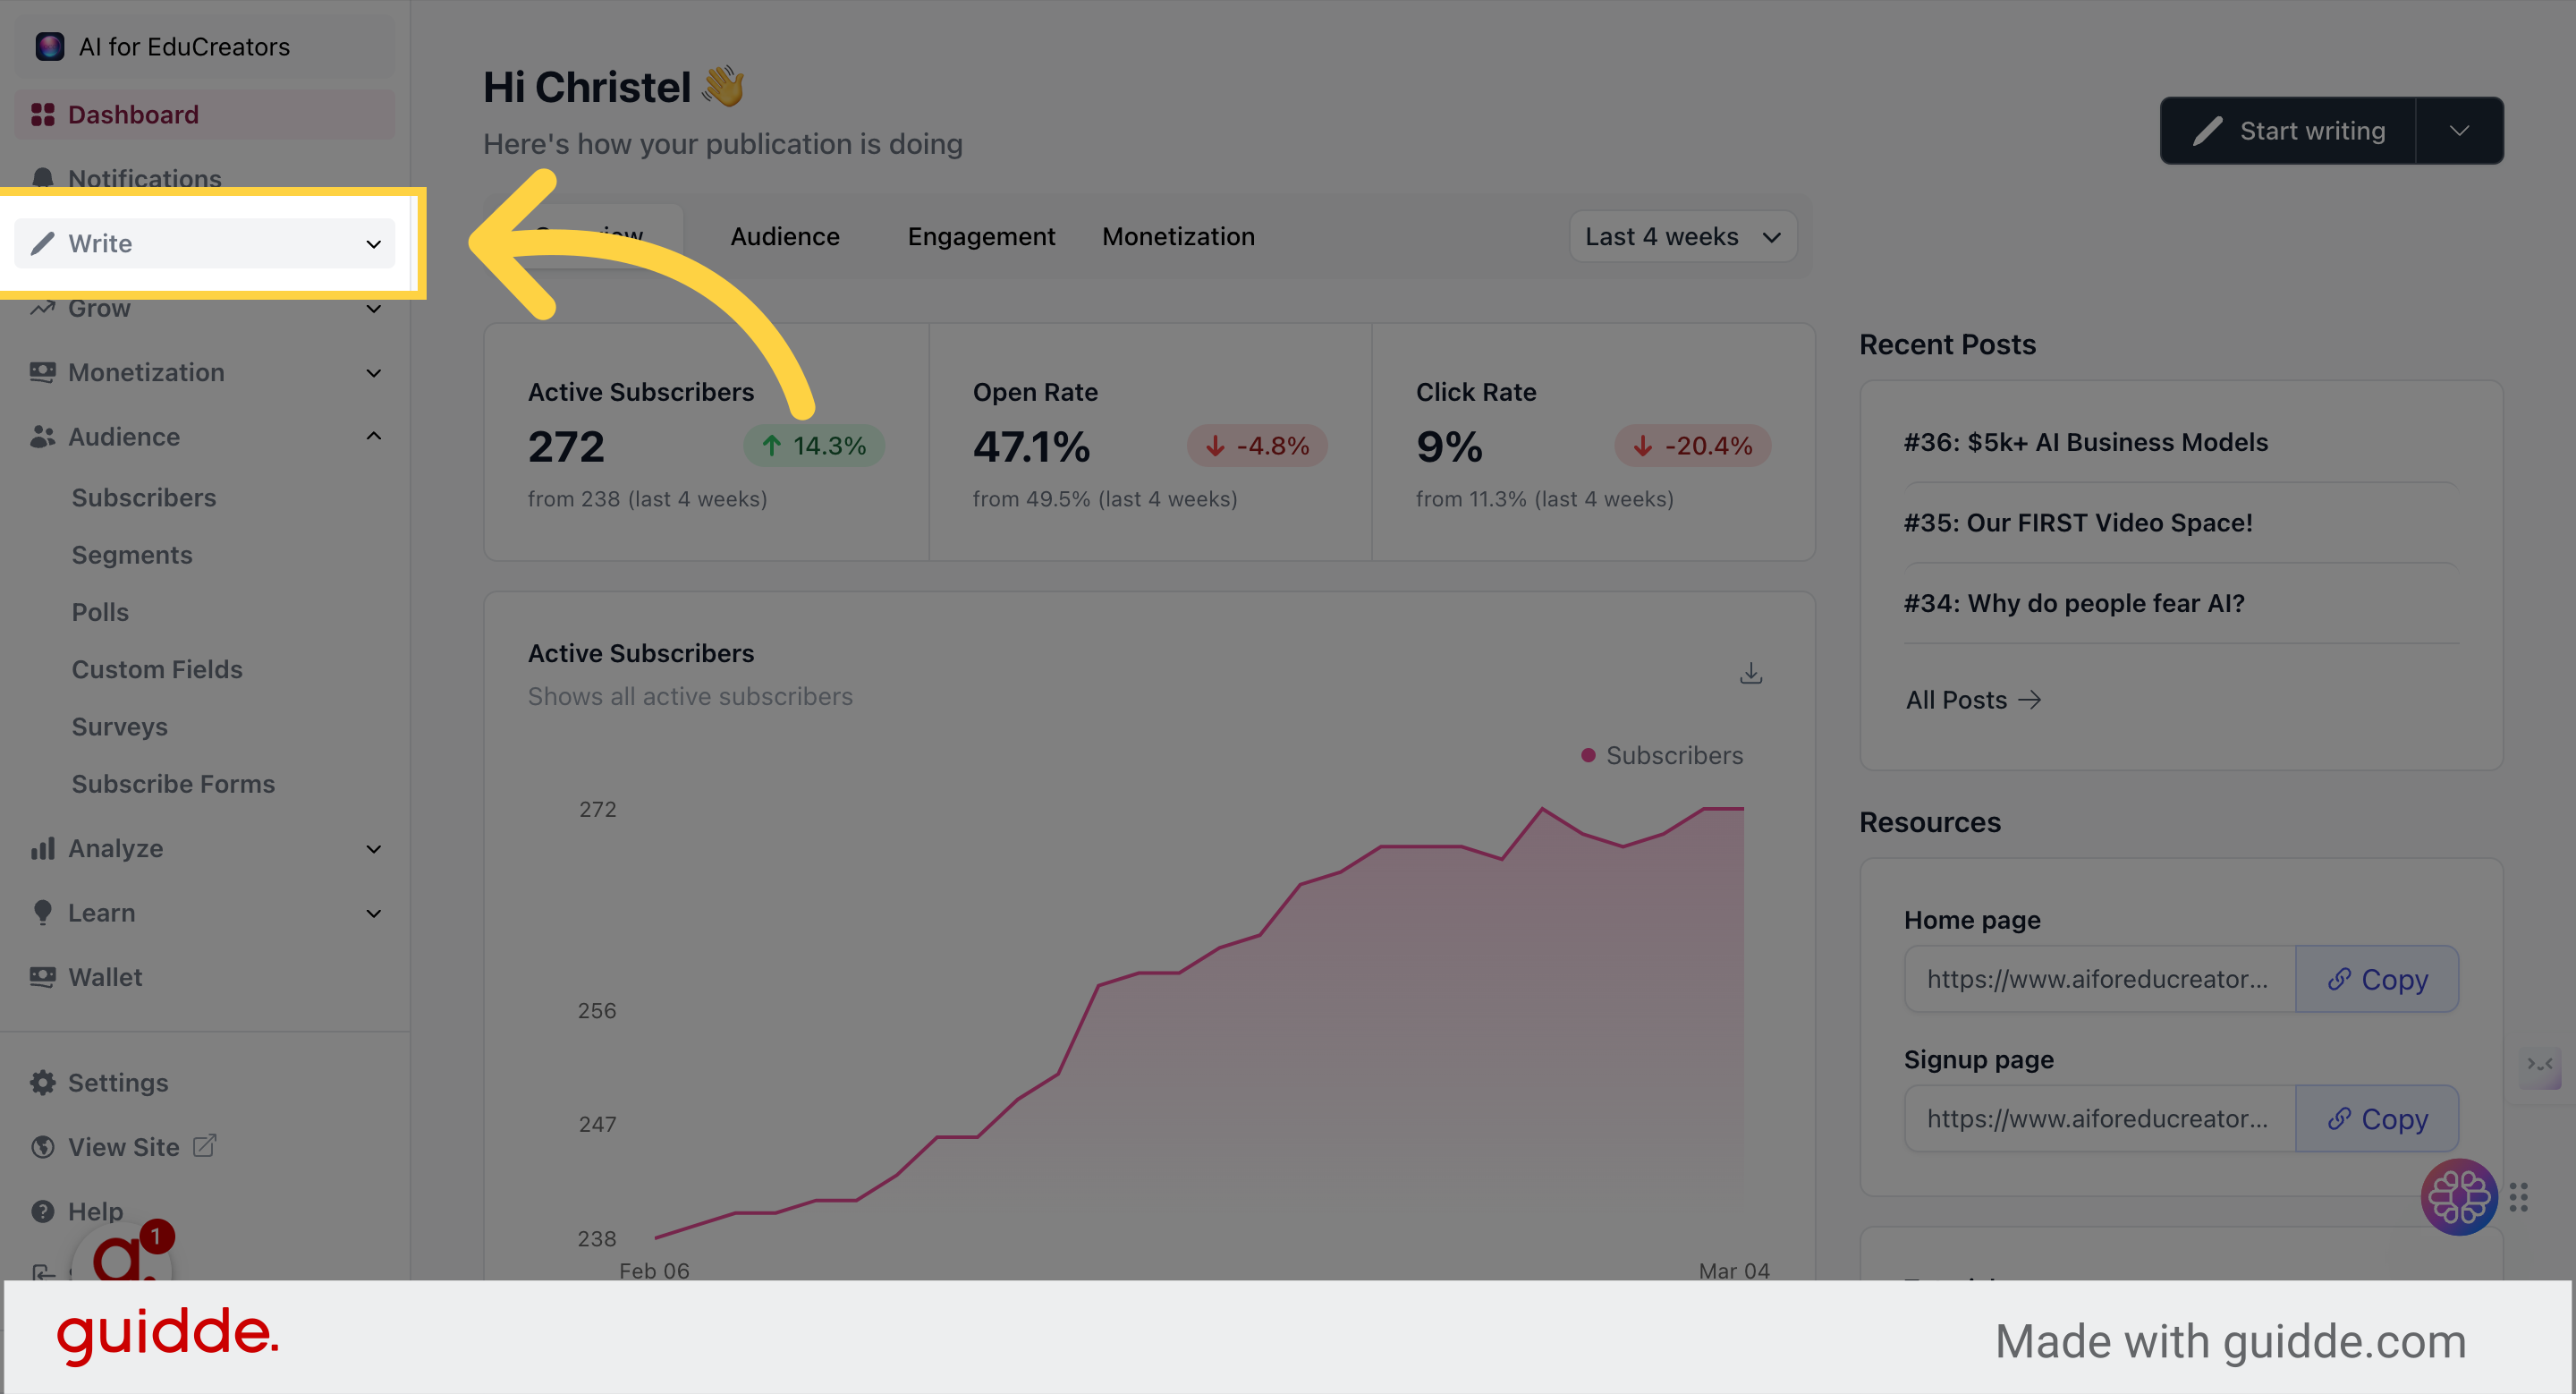
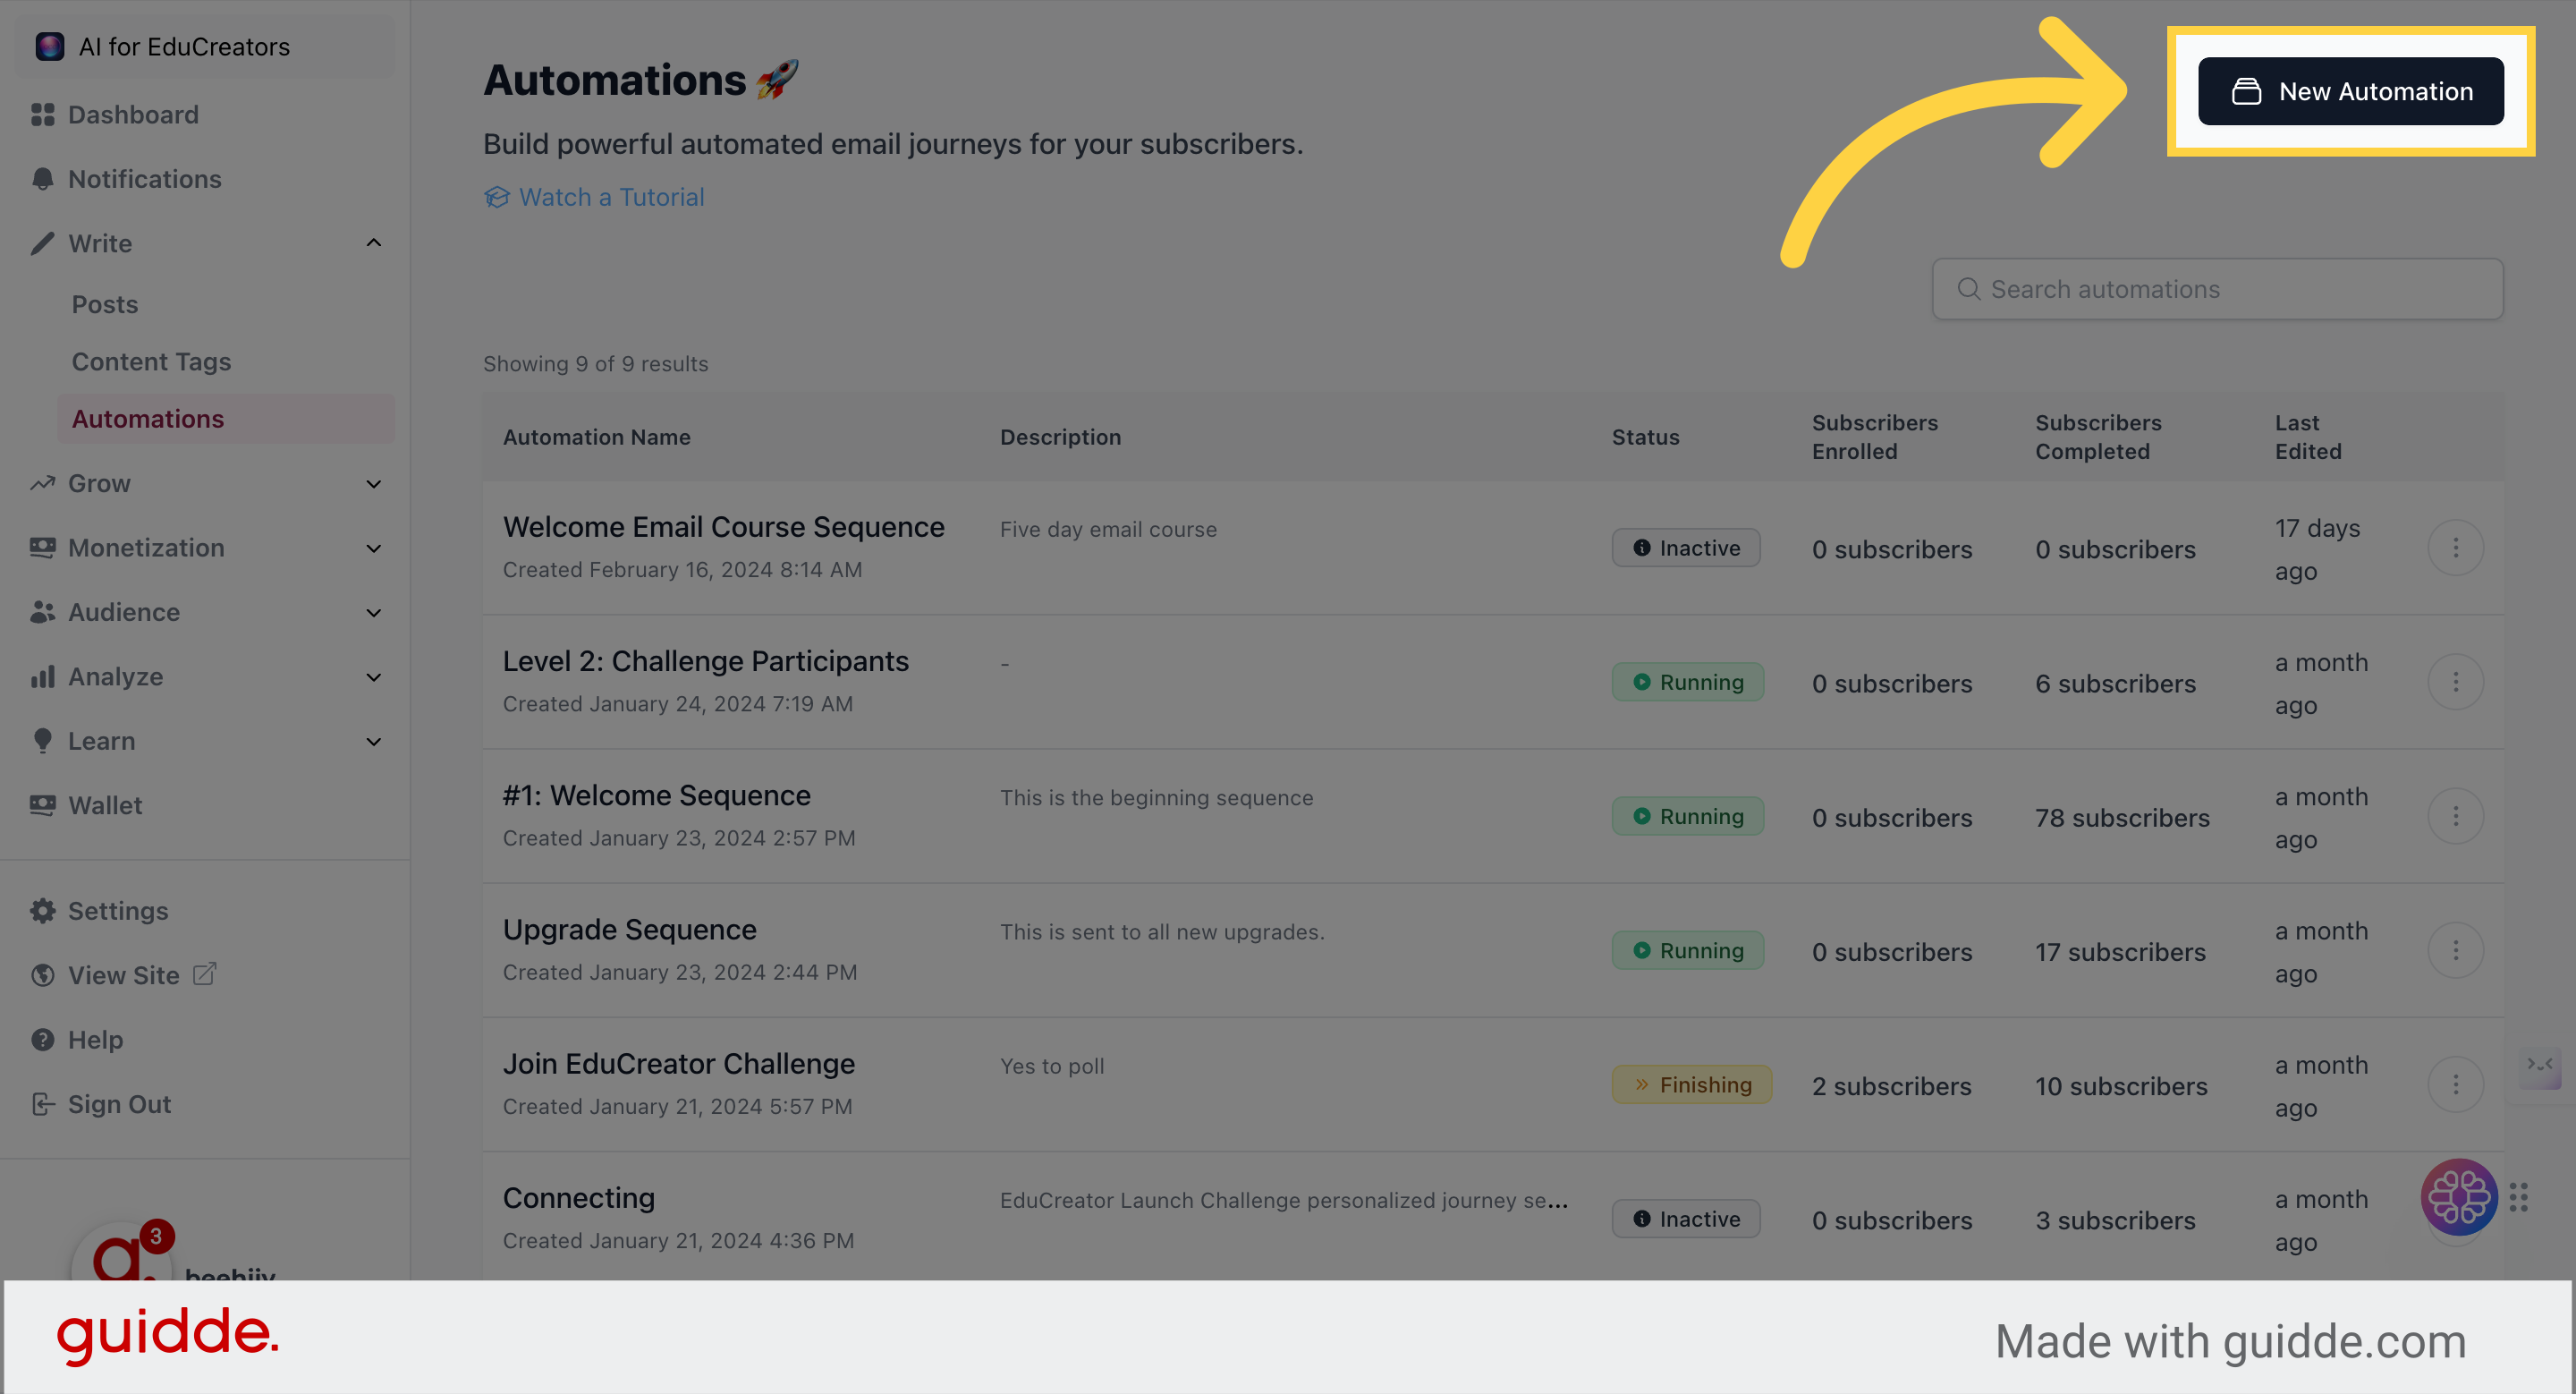
1. Begin from main page
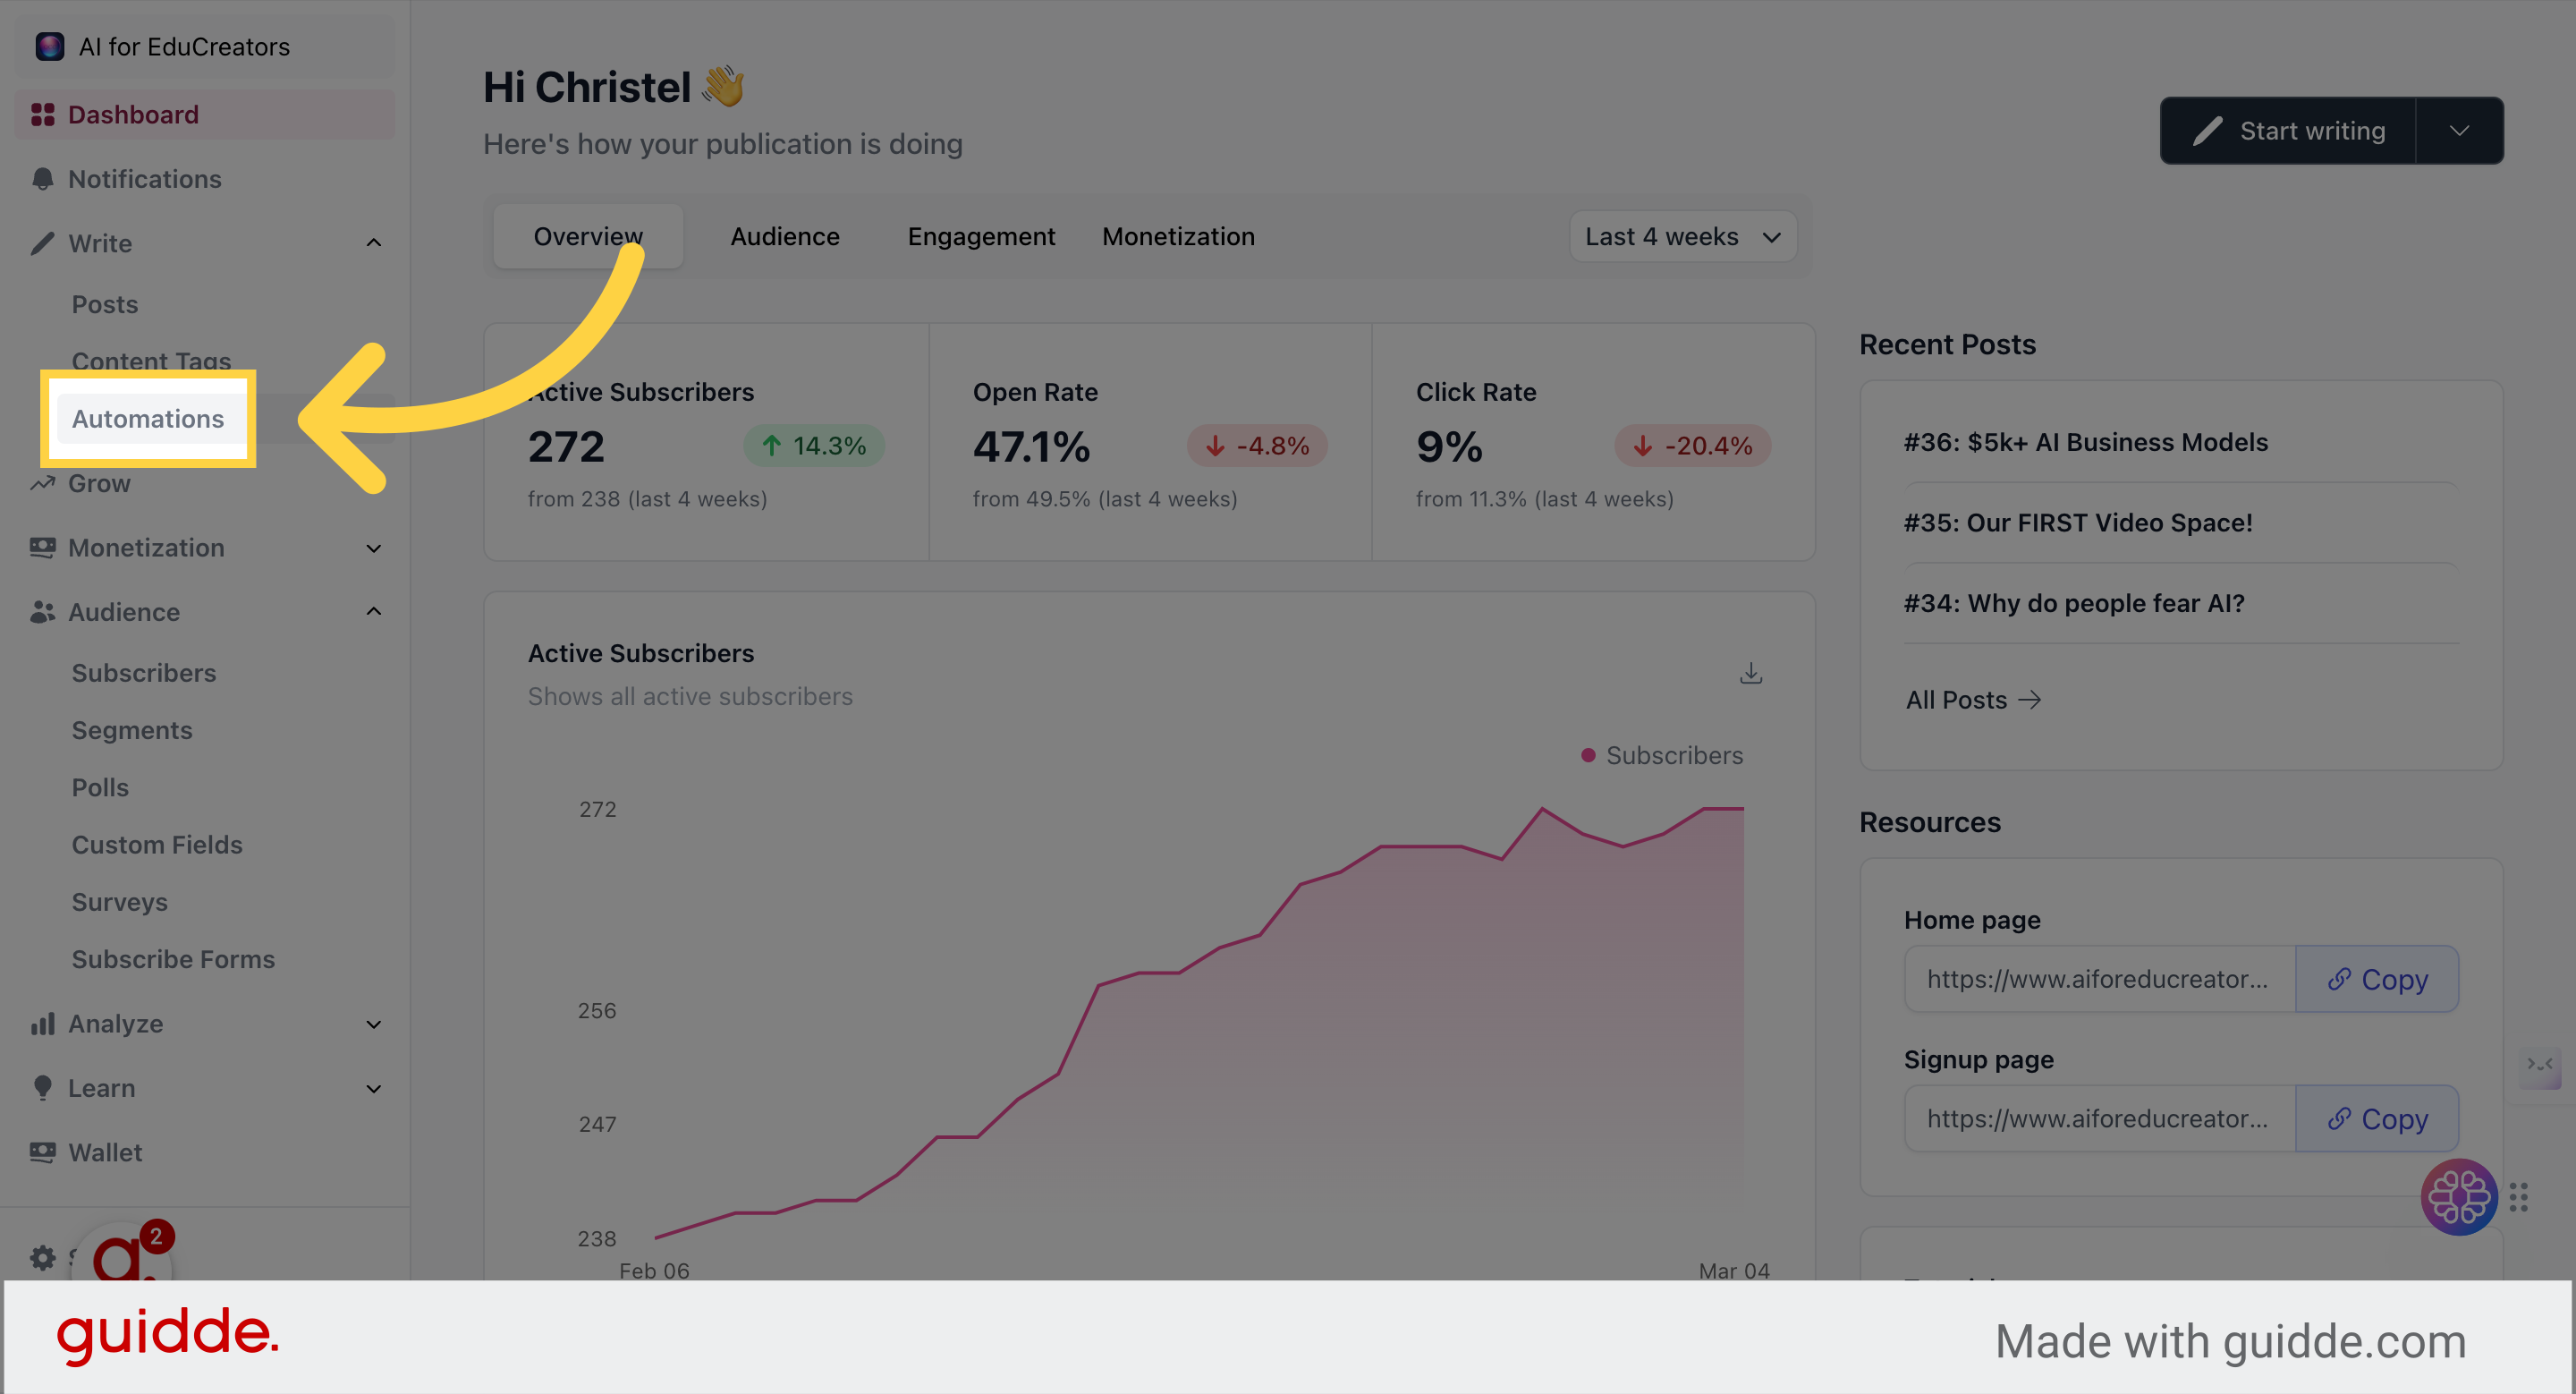
Click “Write” in left menu bar and navigate to Automations
Initiate a new automation sequence by clicking “New Automation”
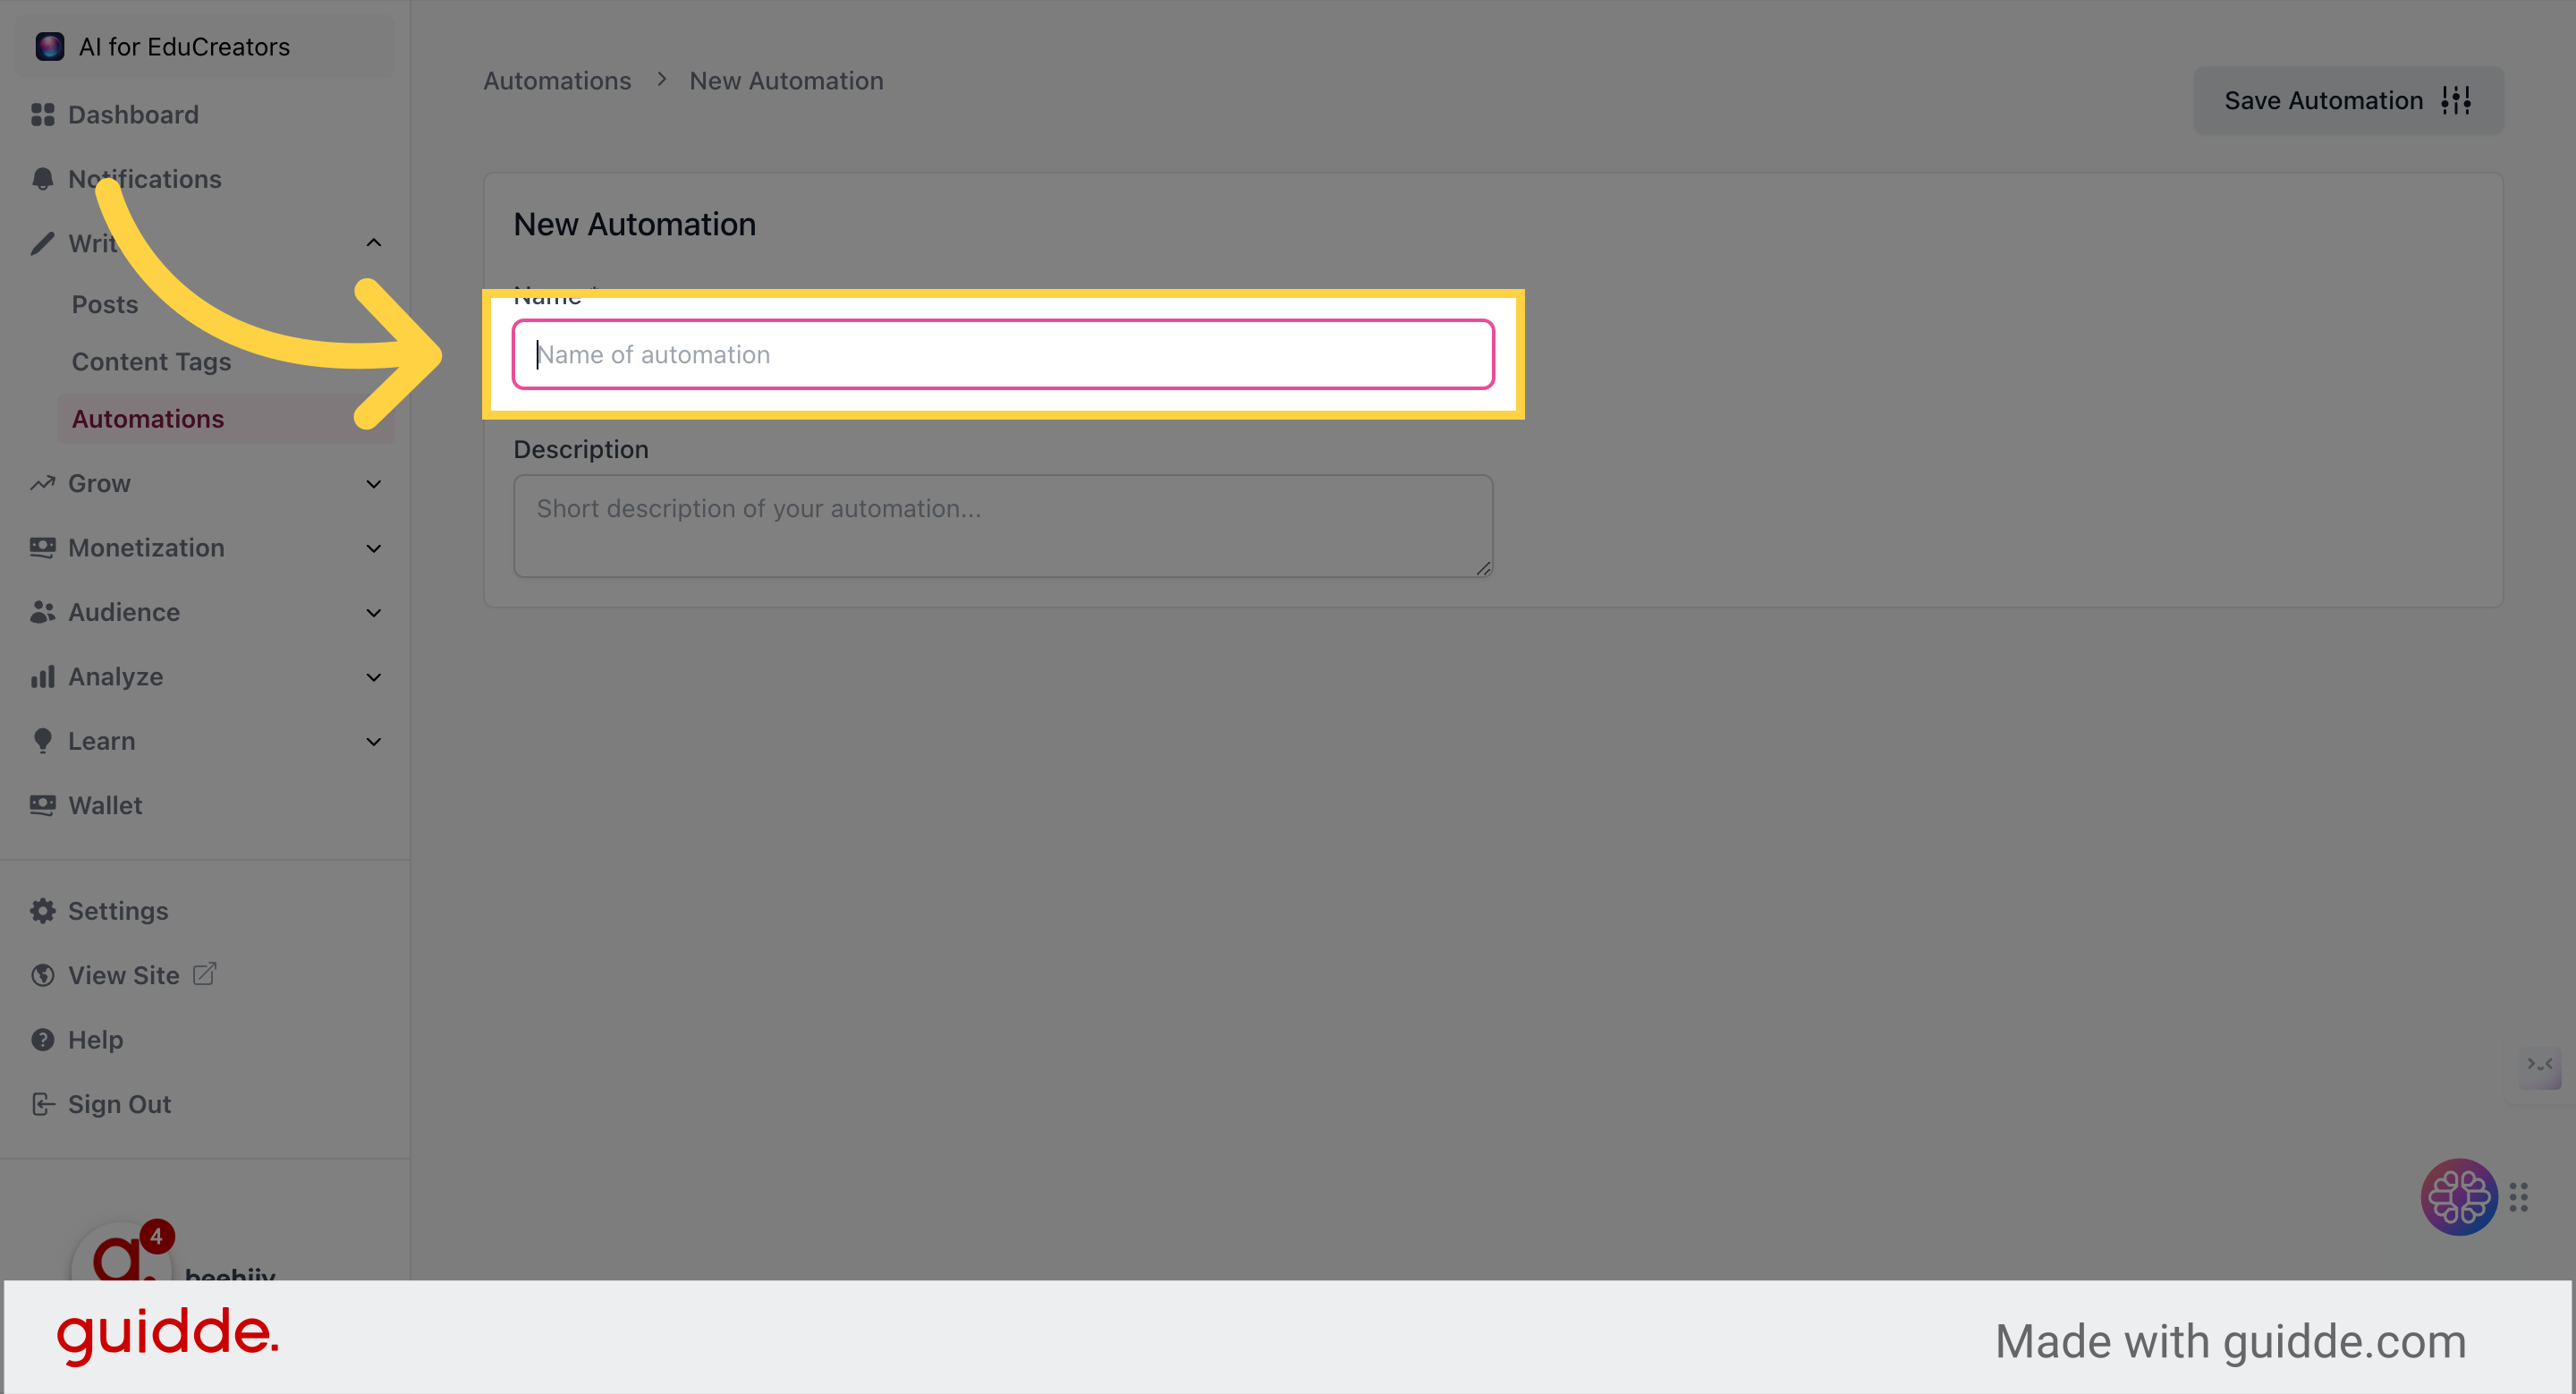
2. Name your automation
Enter the name of your automation
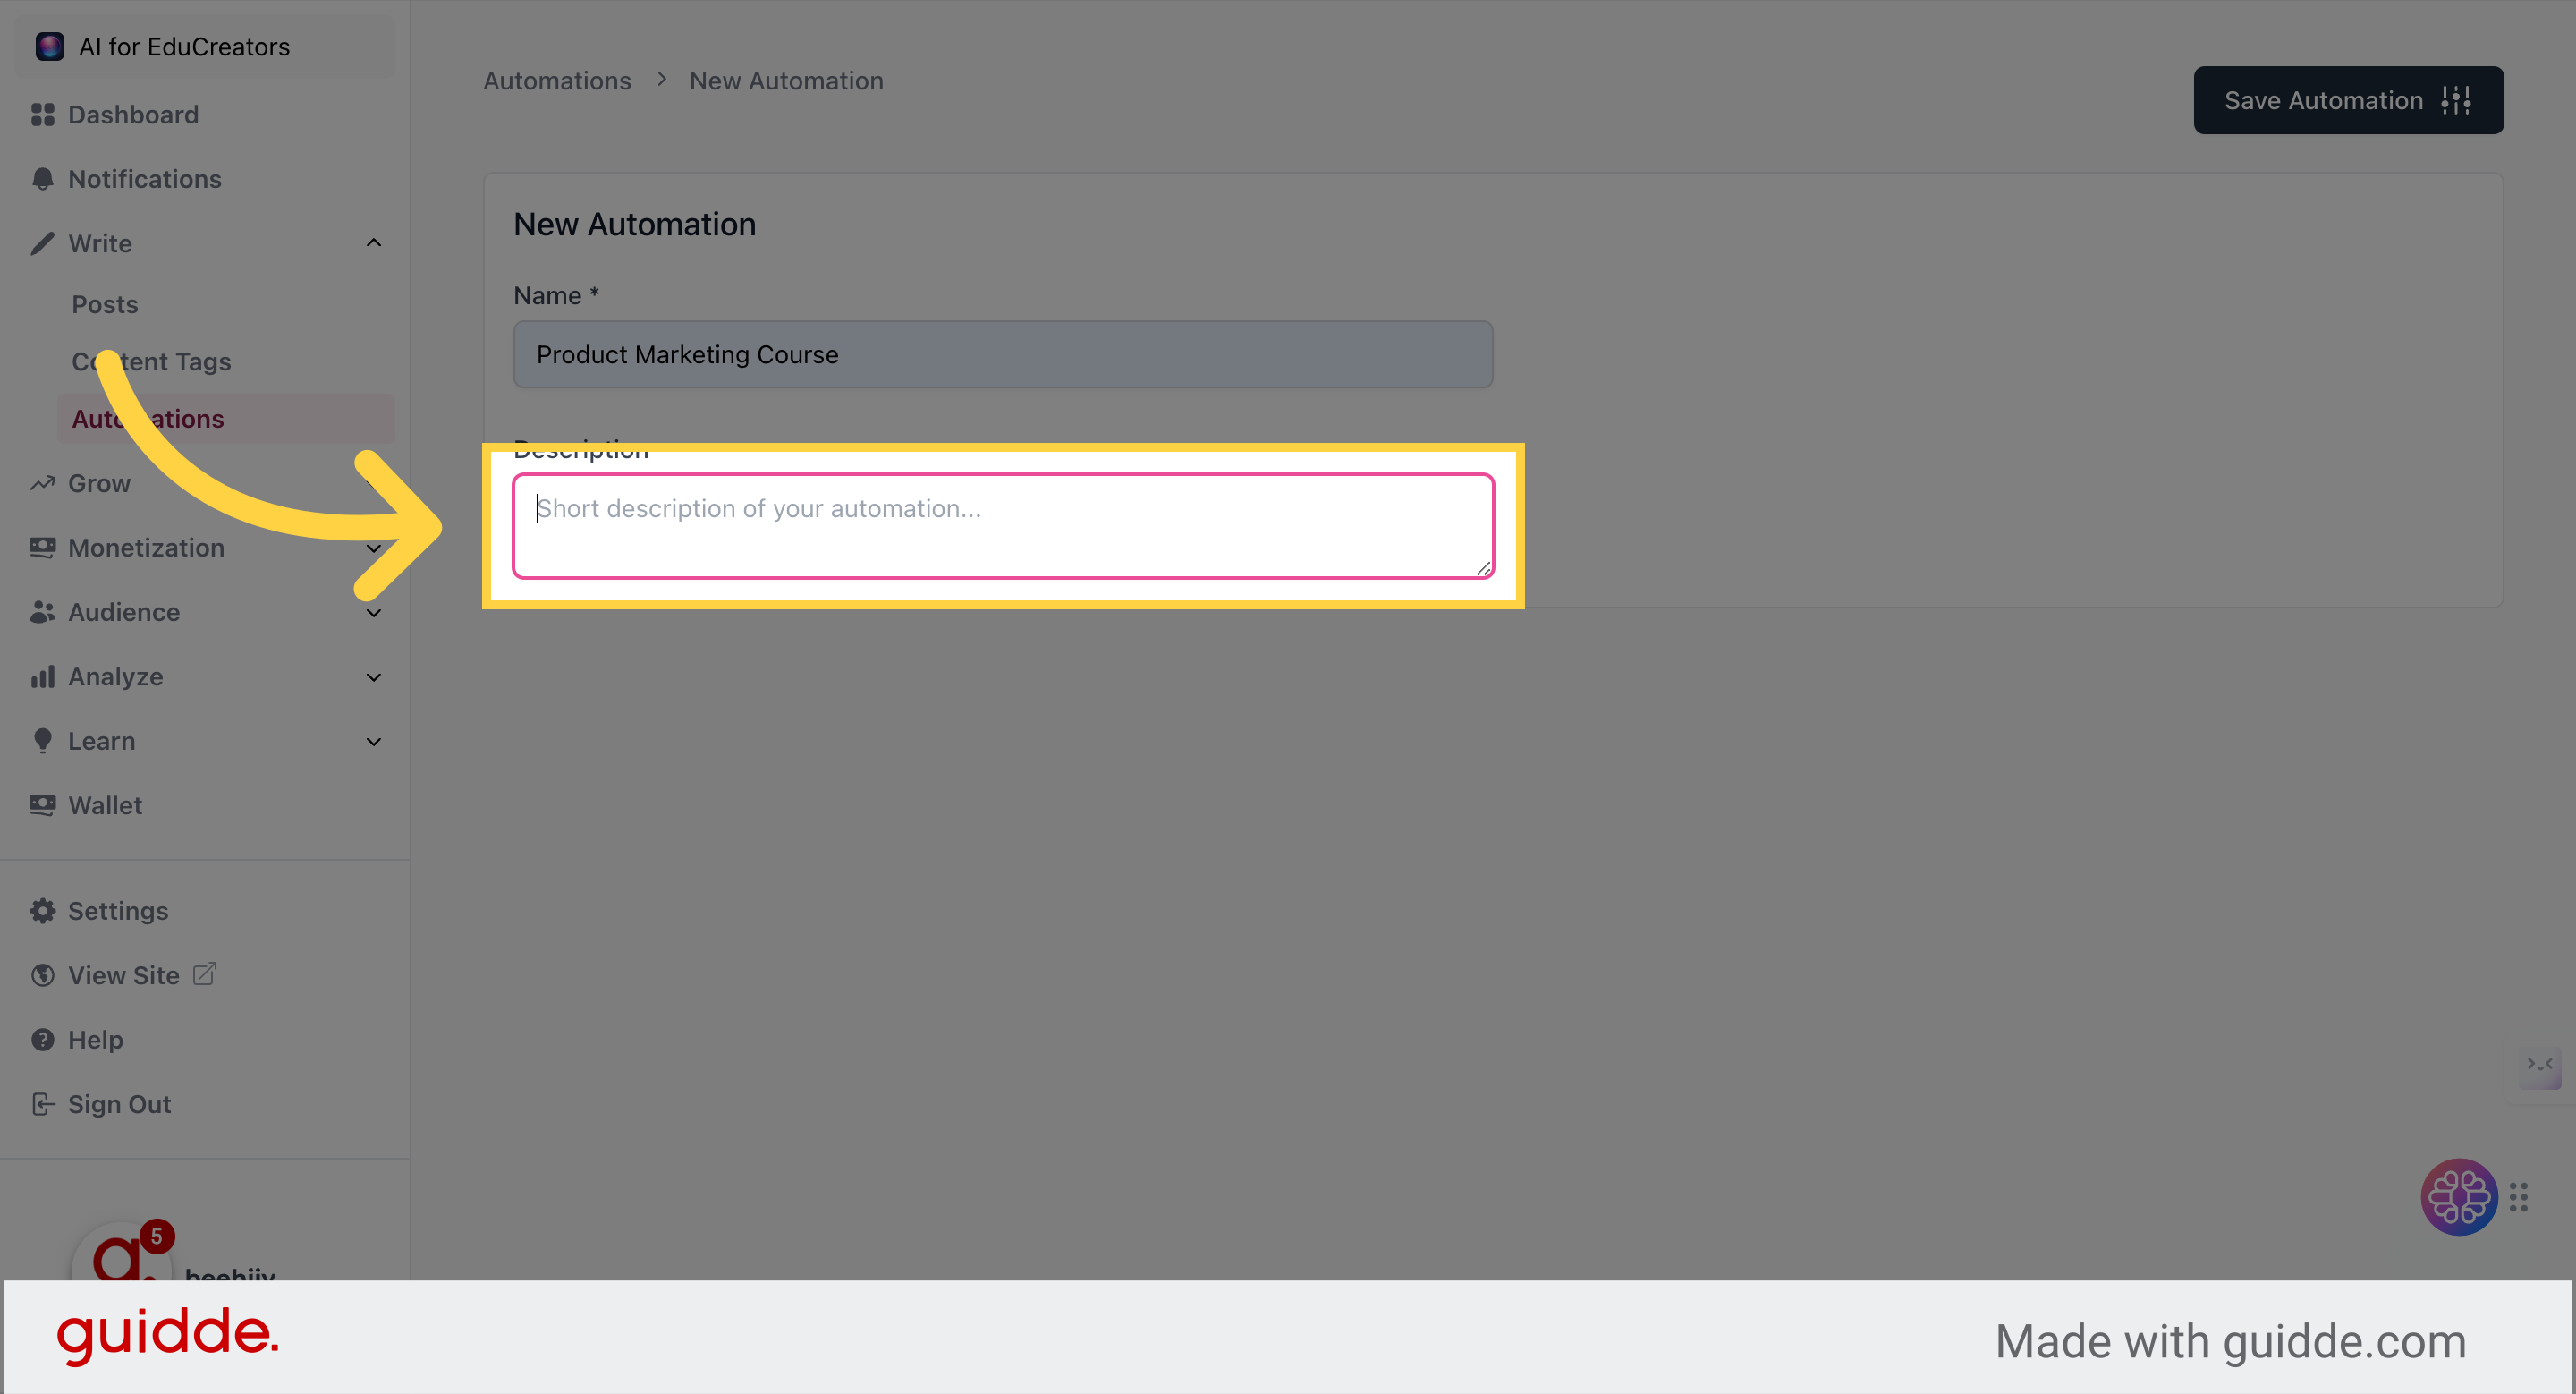
Provide a brief description
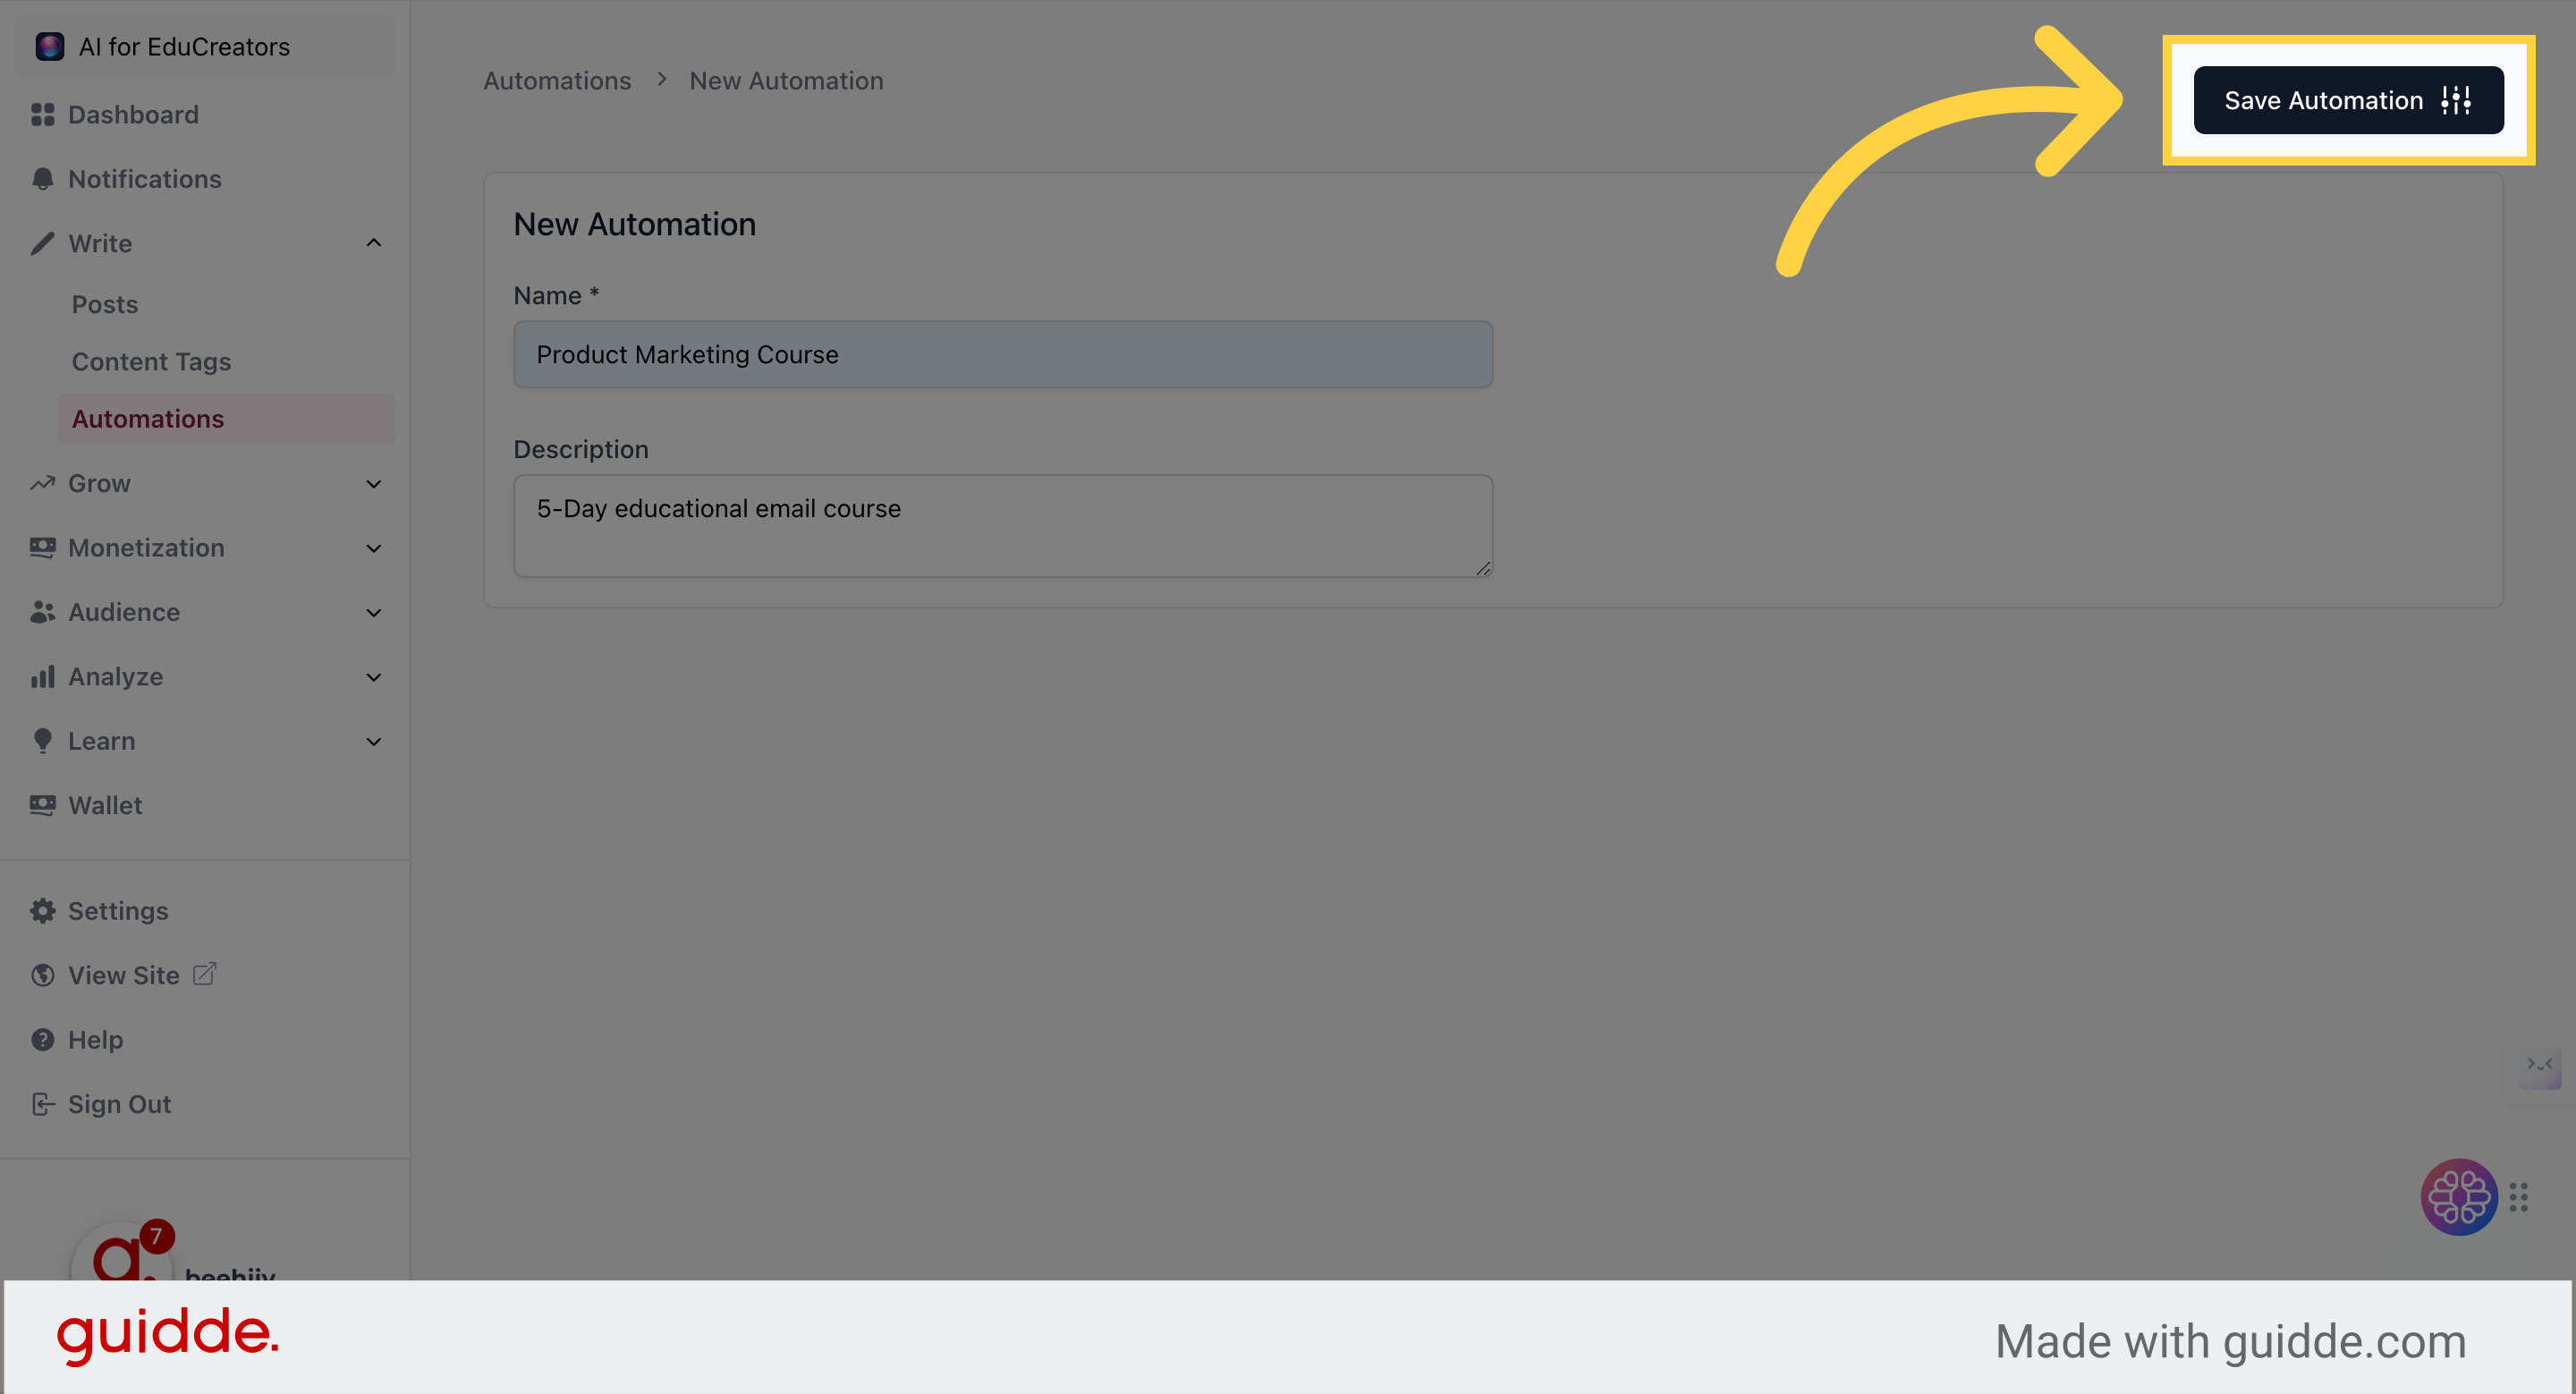
Save the automation configuration by clicking “save automation.”
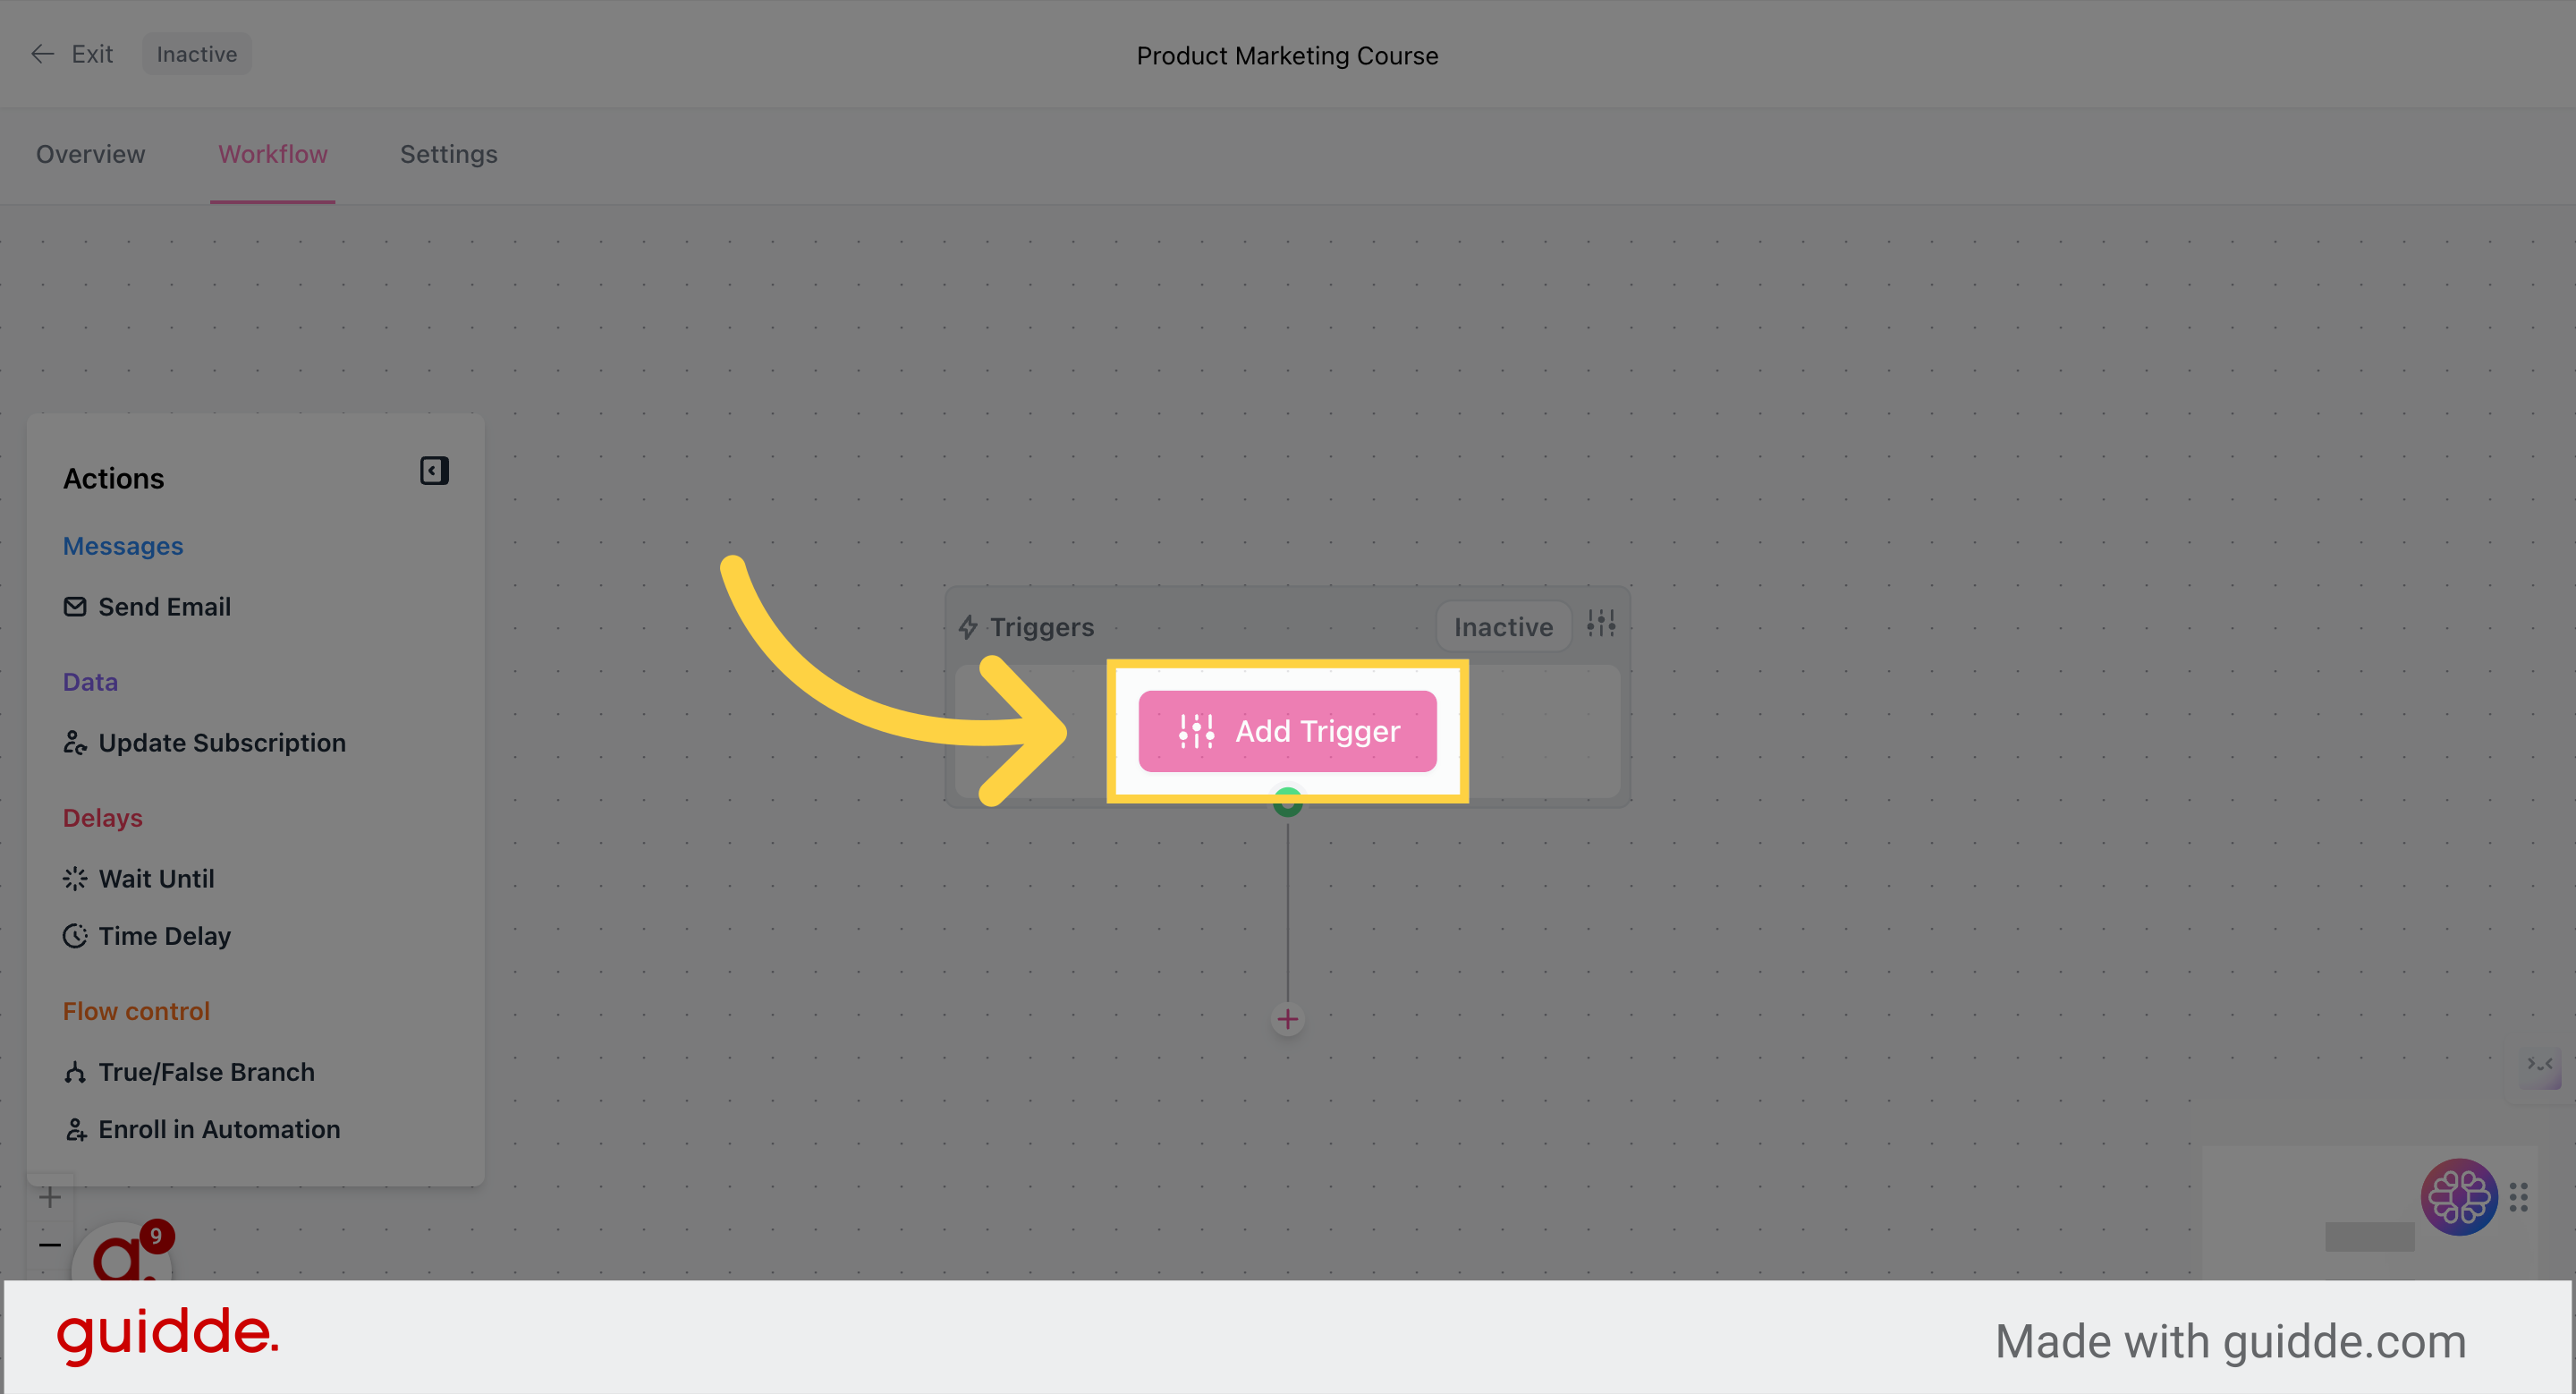
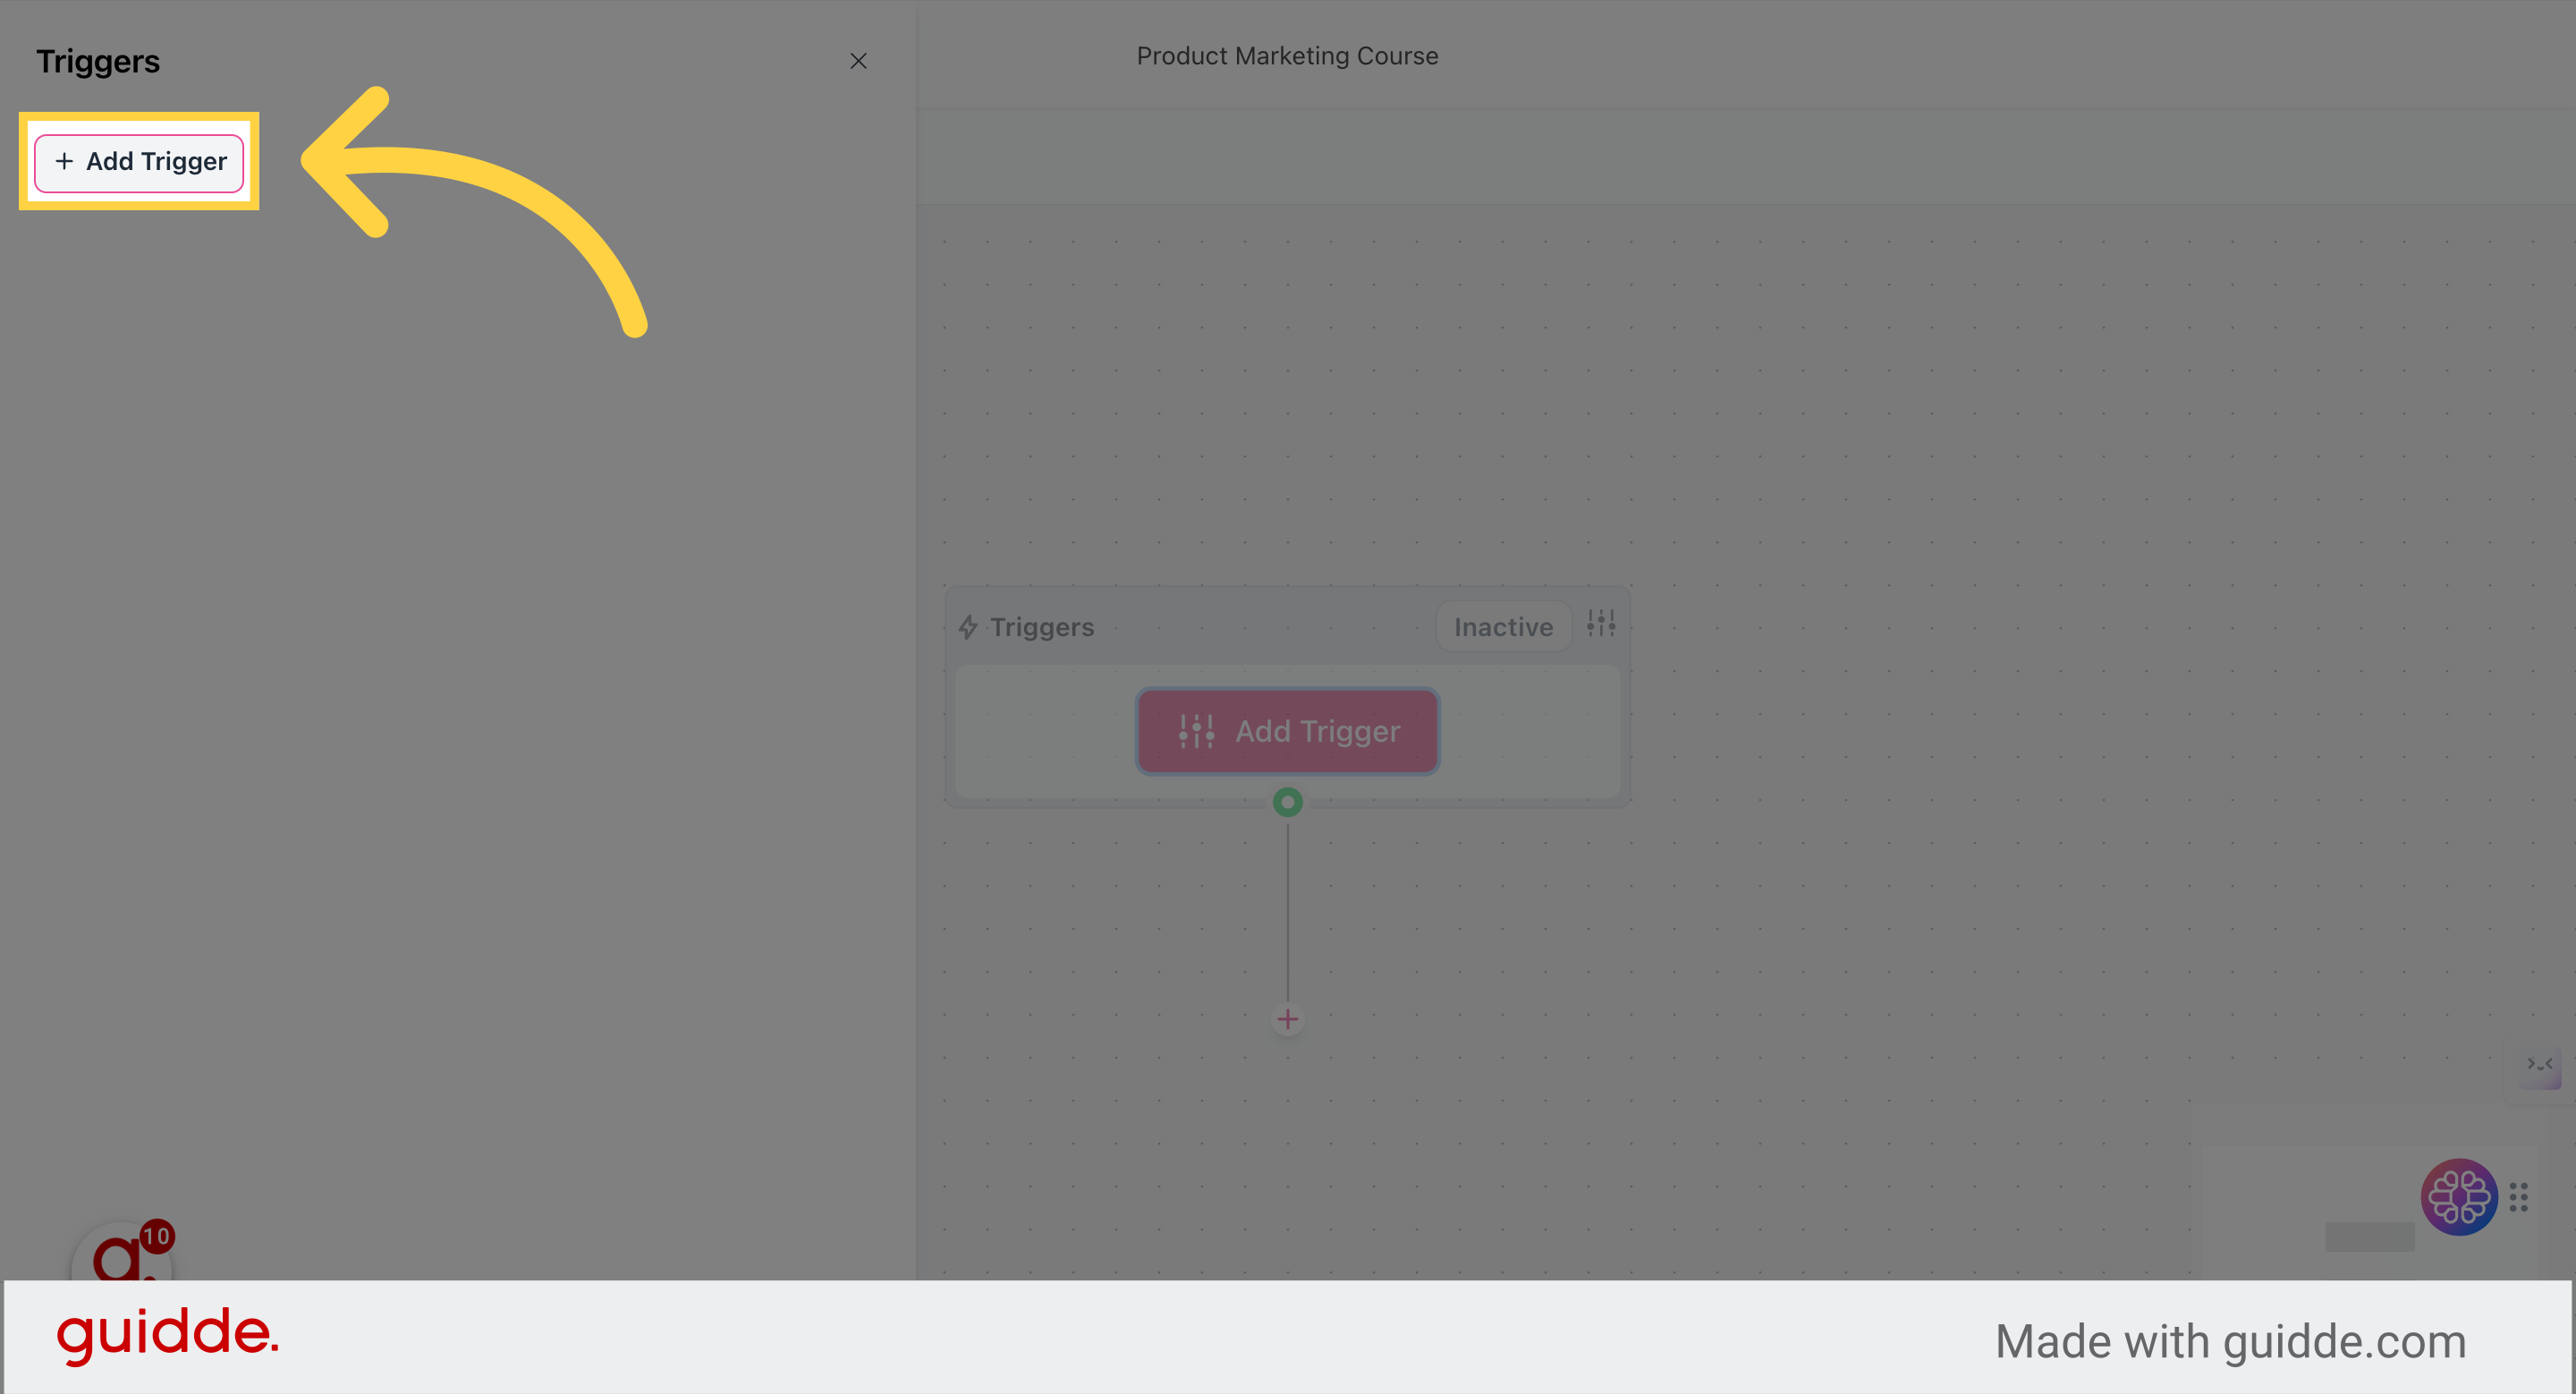
3. Build the Trigger
Begin by adding a trigger for the automation
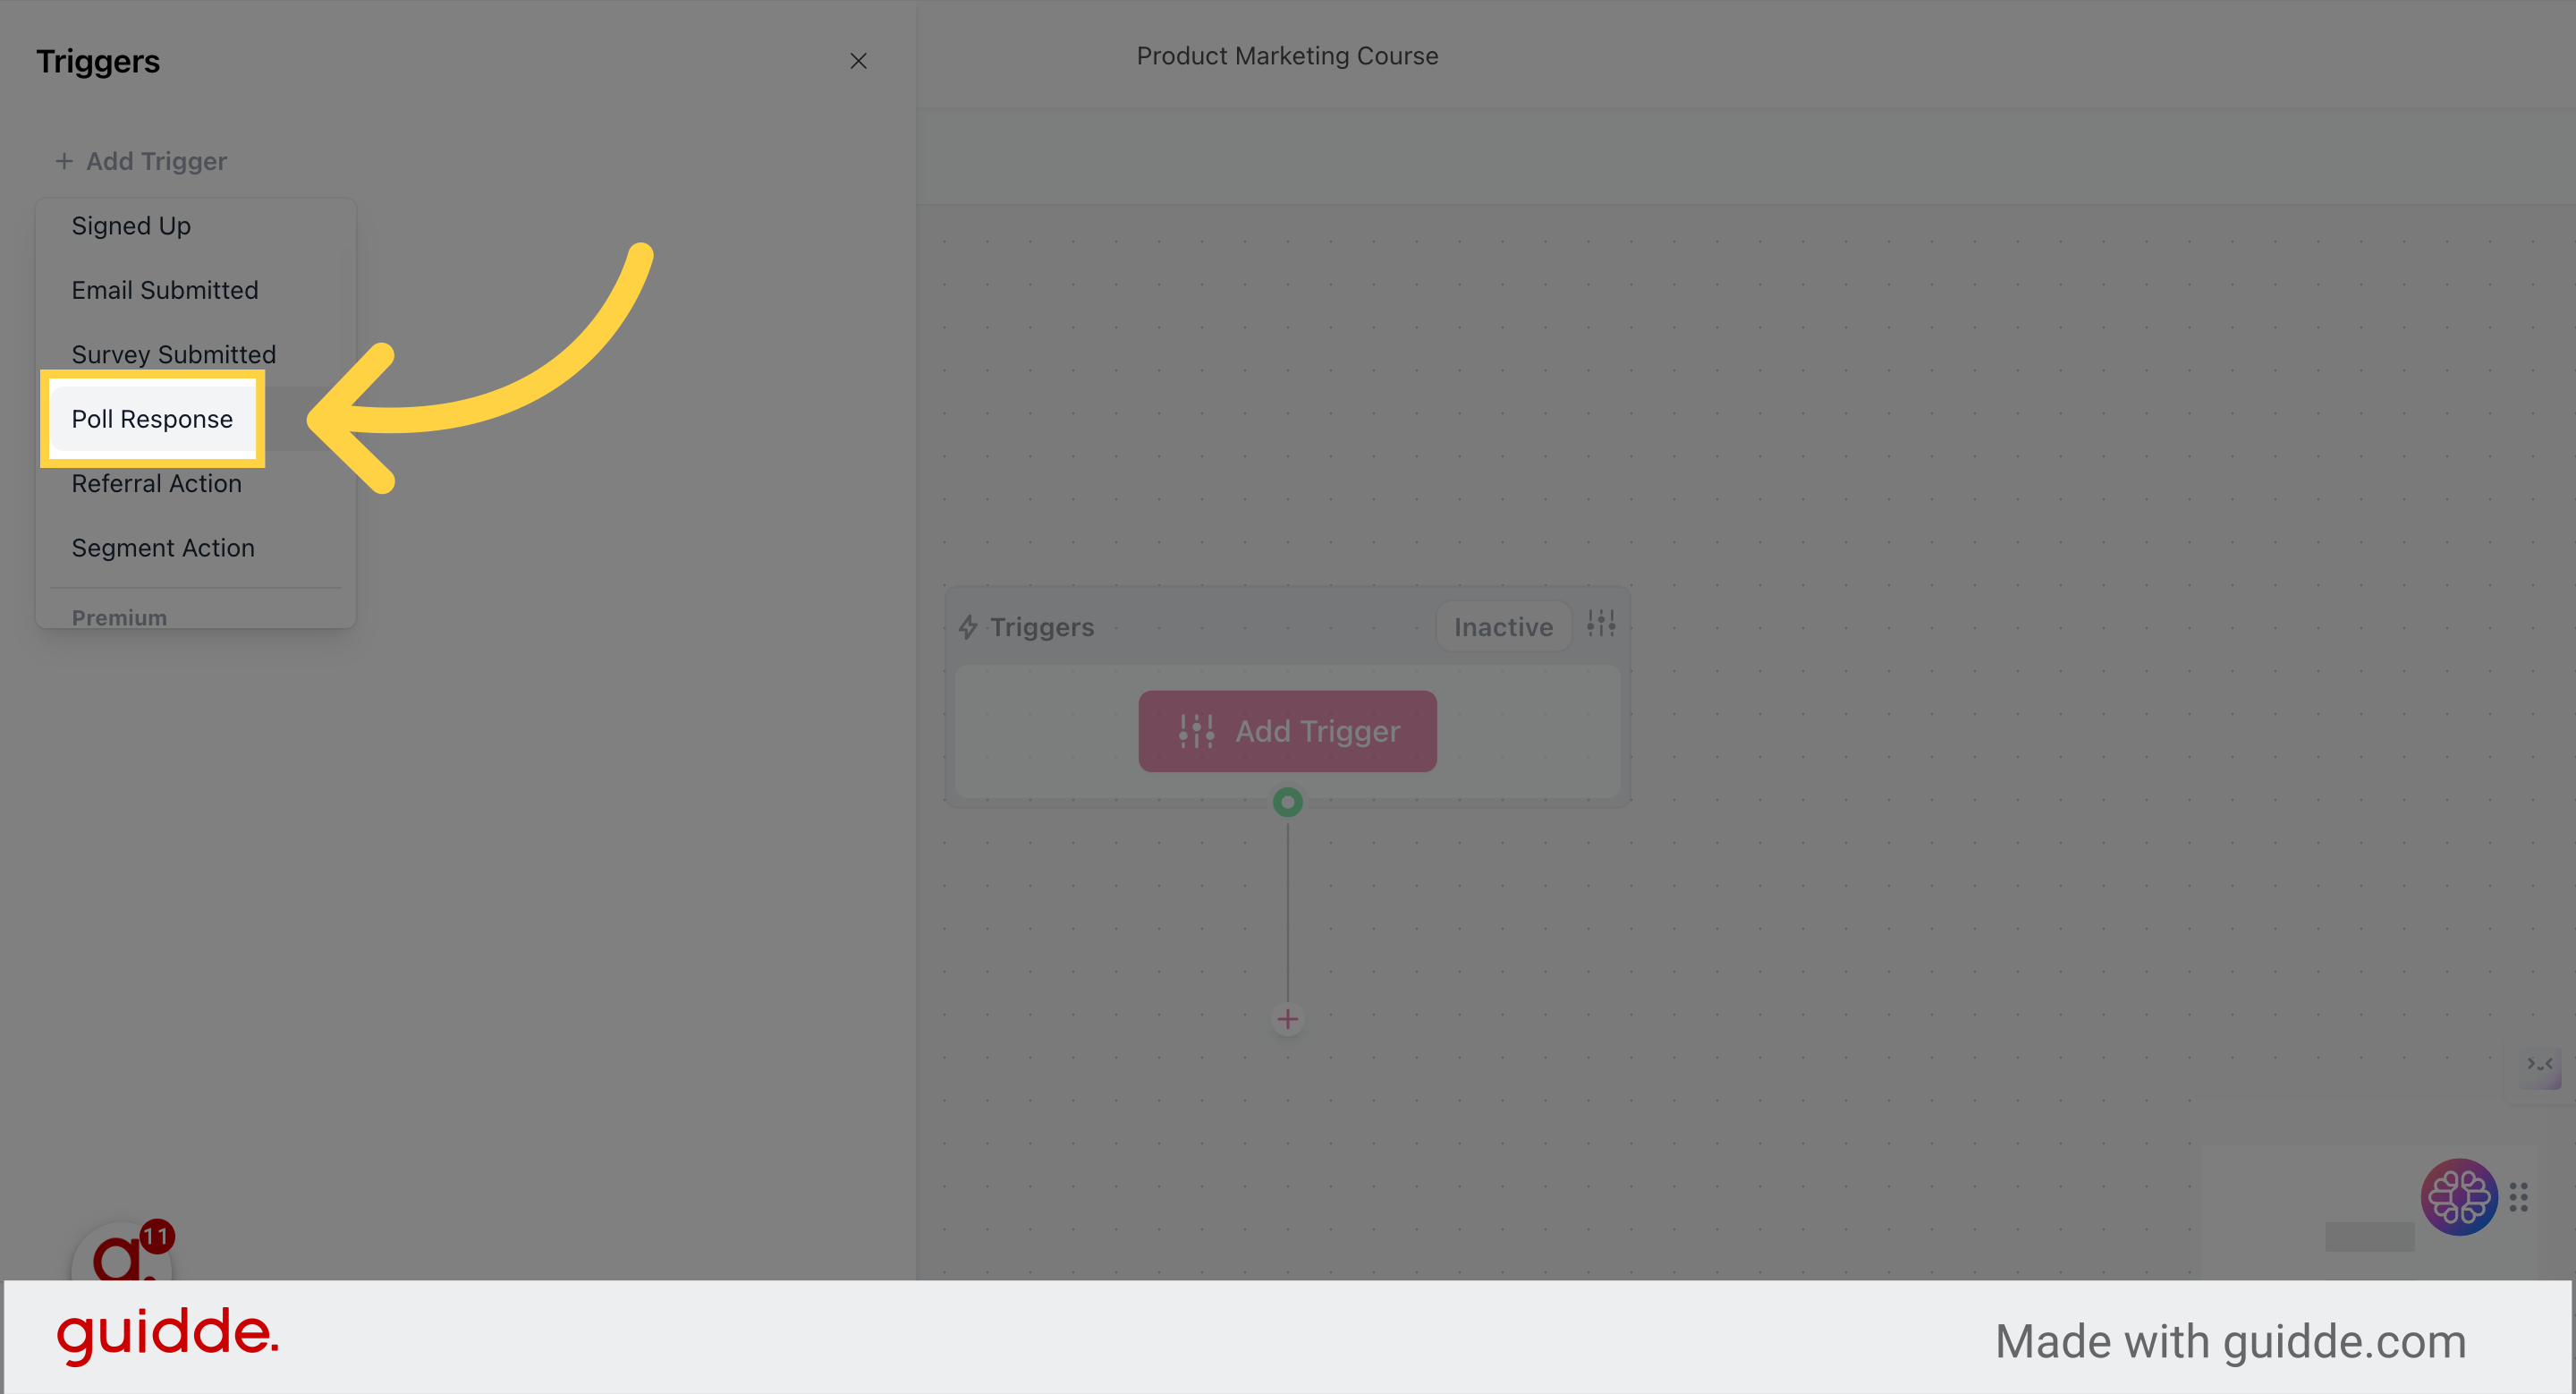
In this example, I am using "Poll Response" as the trigger type. The poll directly relates to the course and is the entry point.
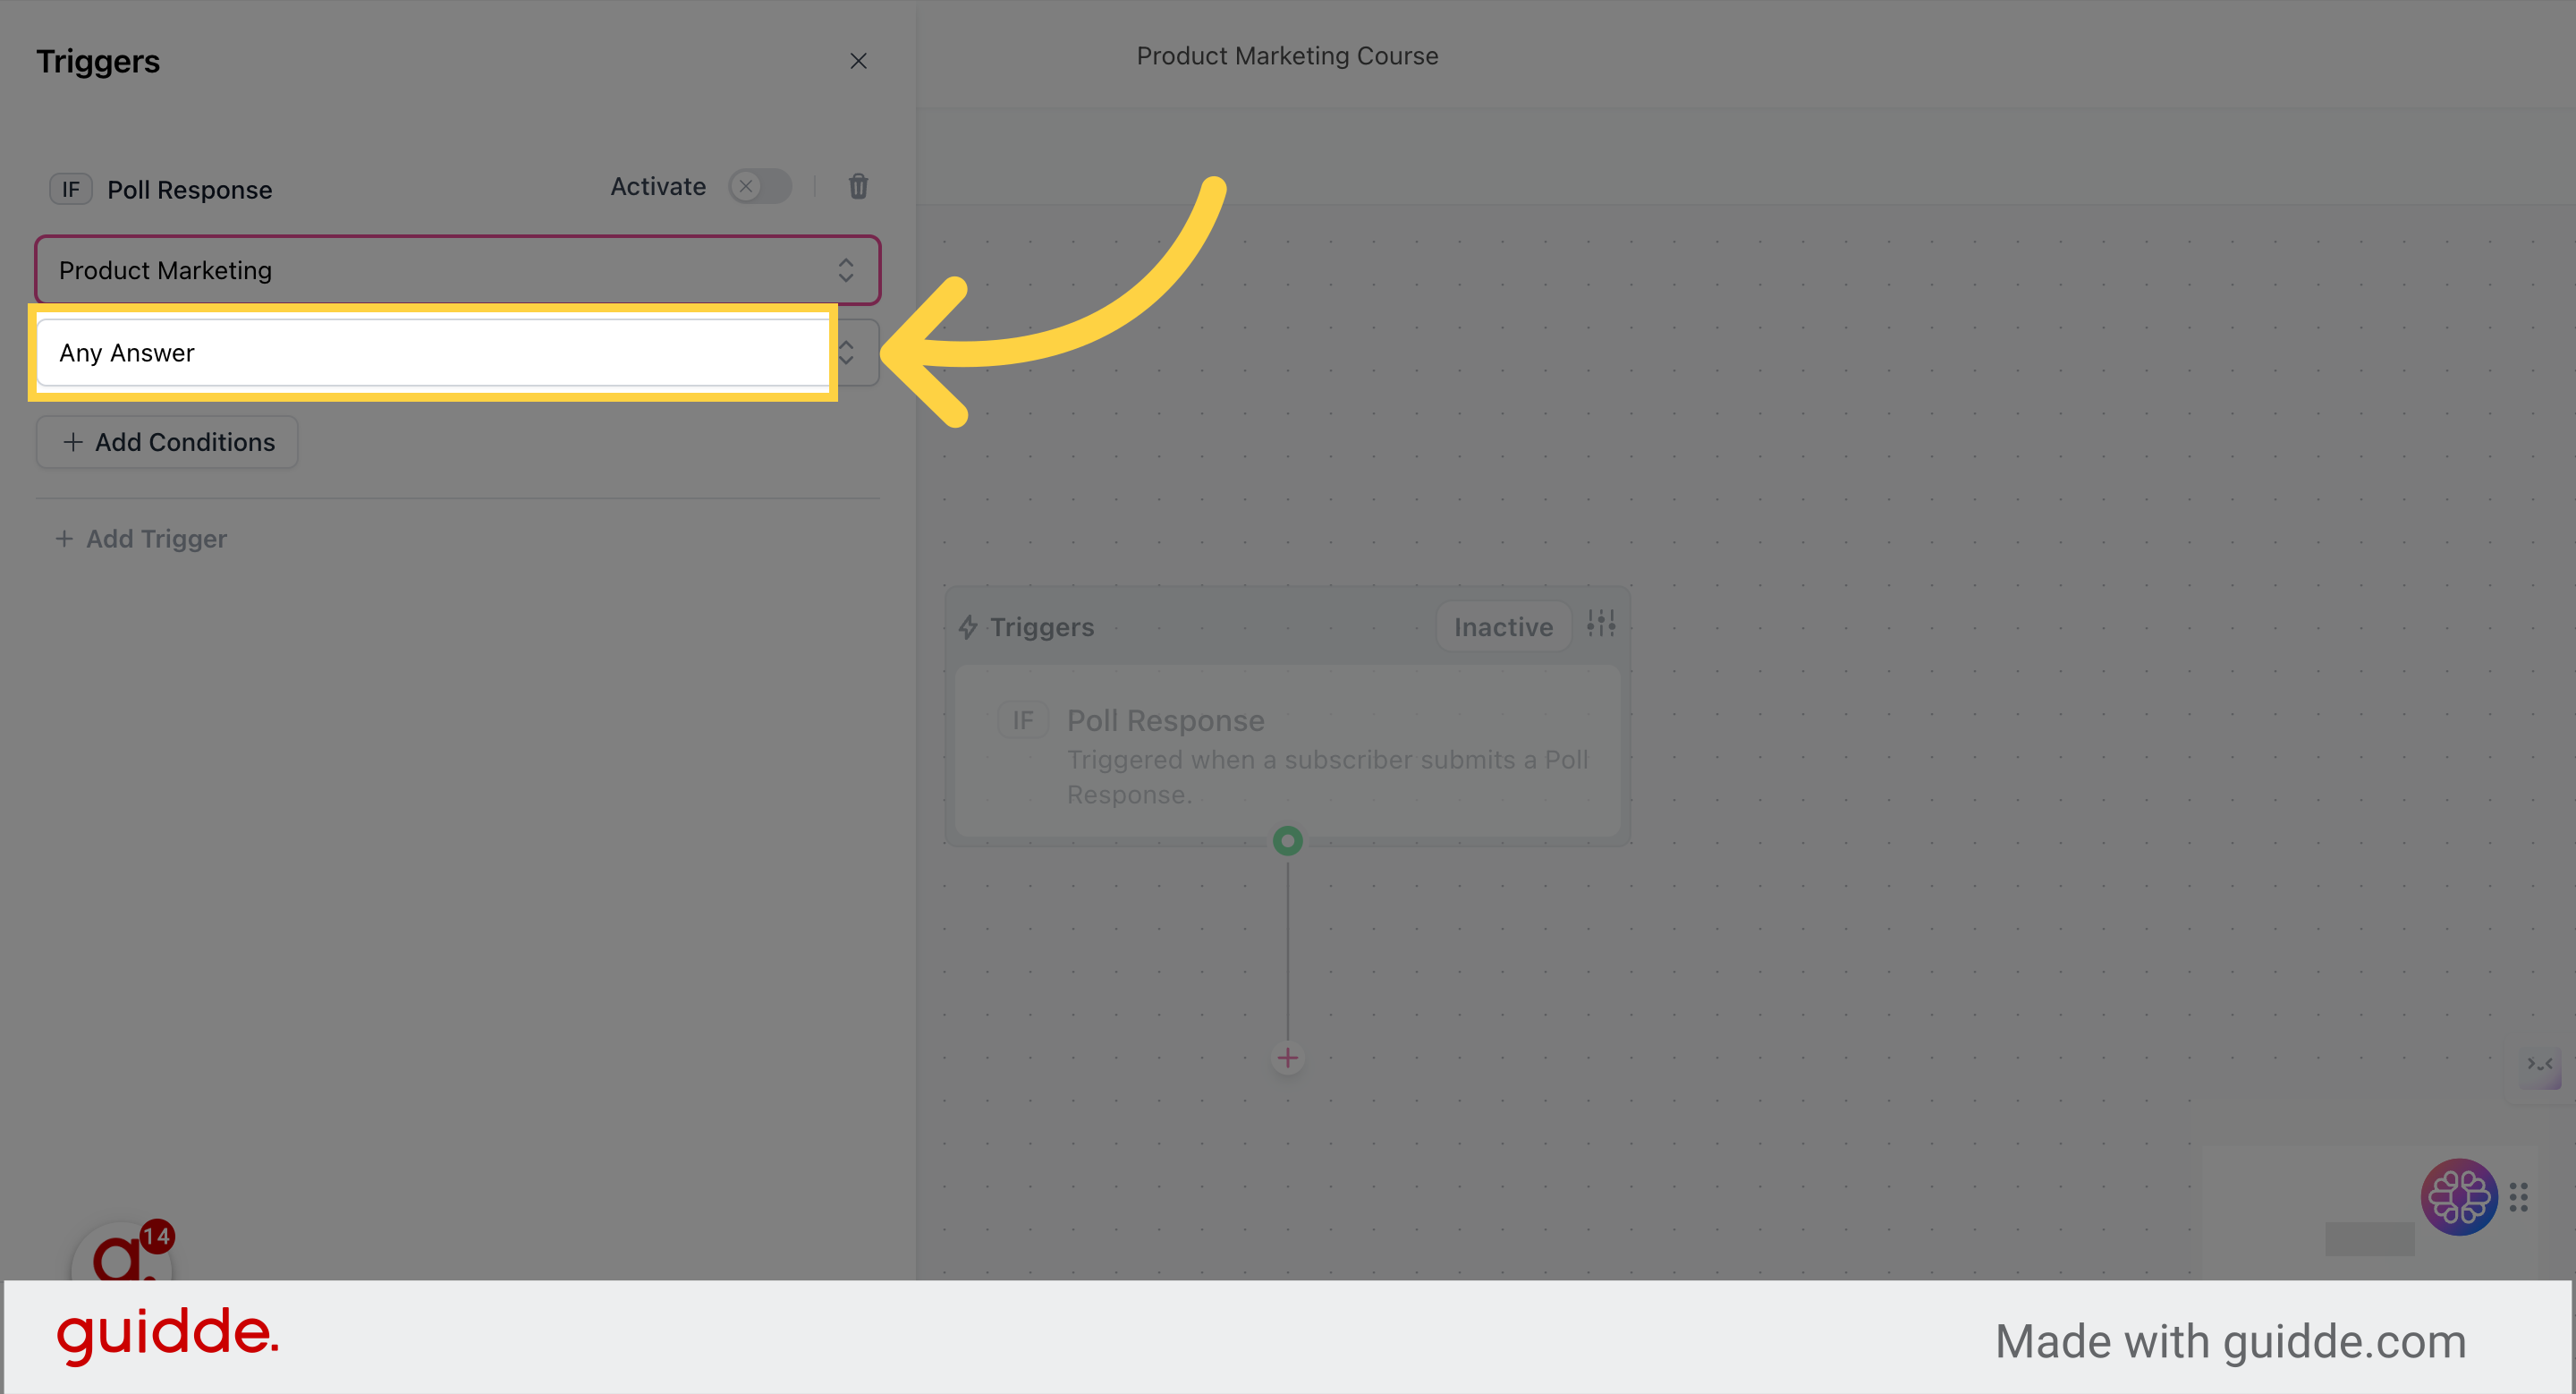
Choose the poll and the desired response
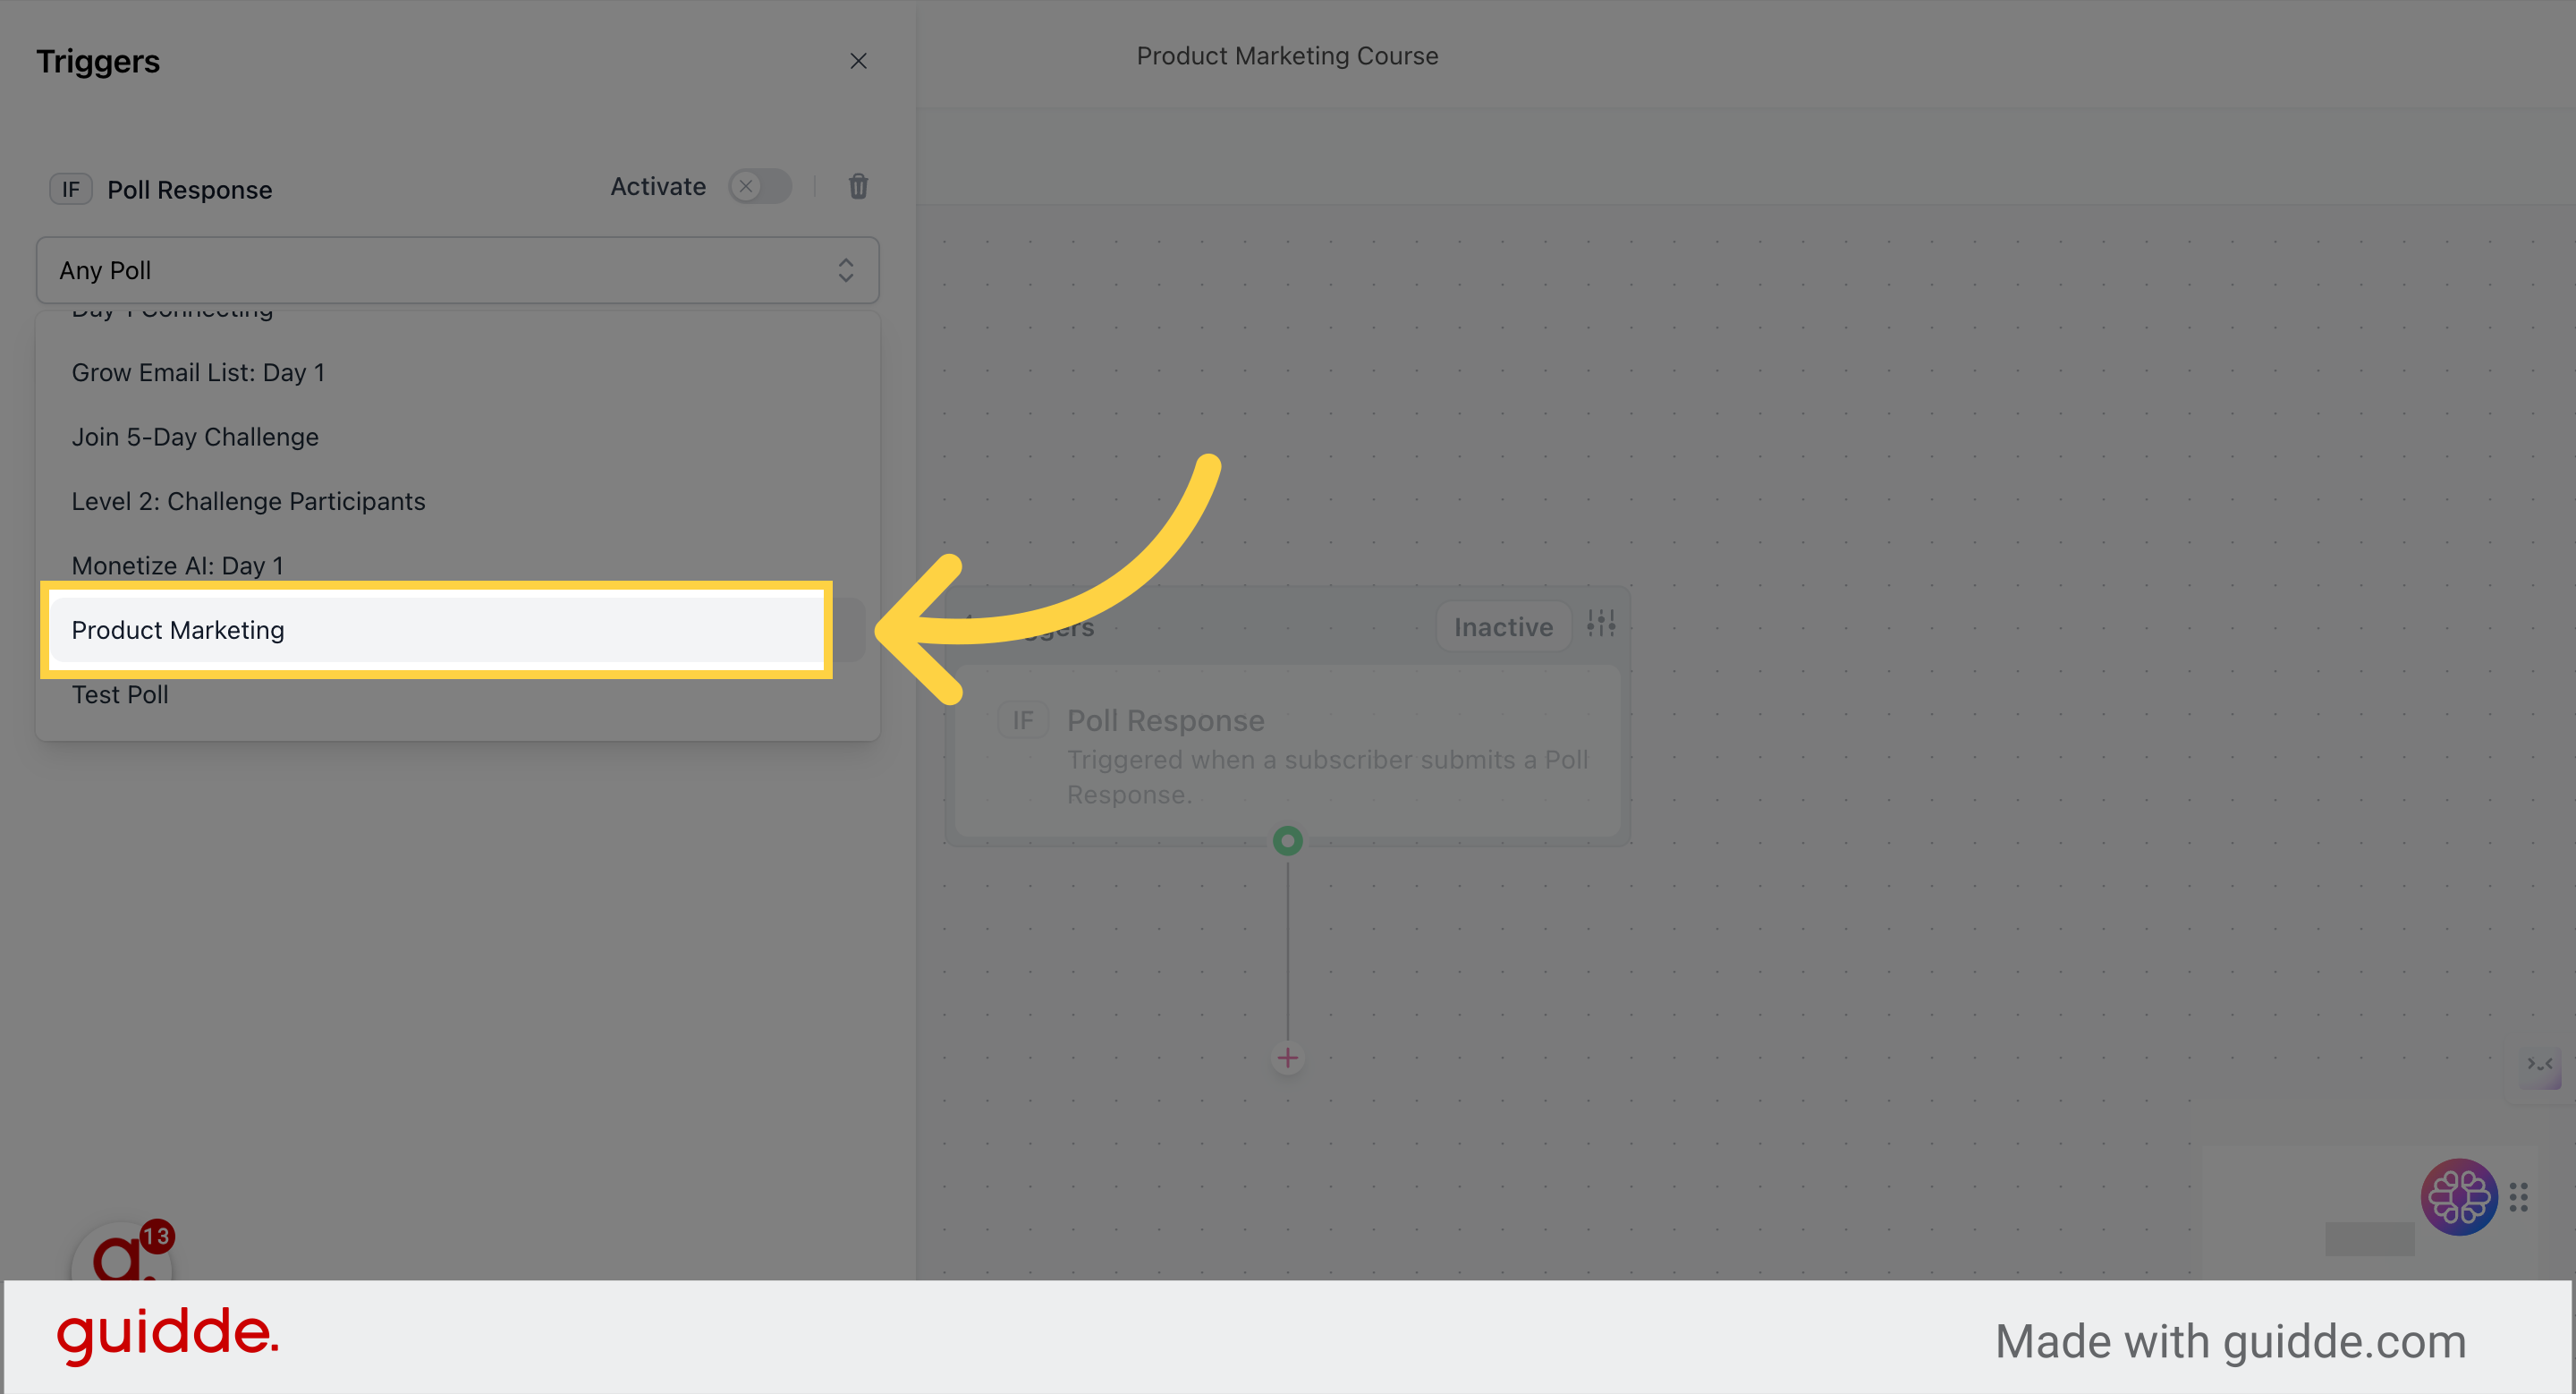
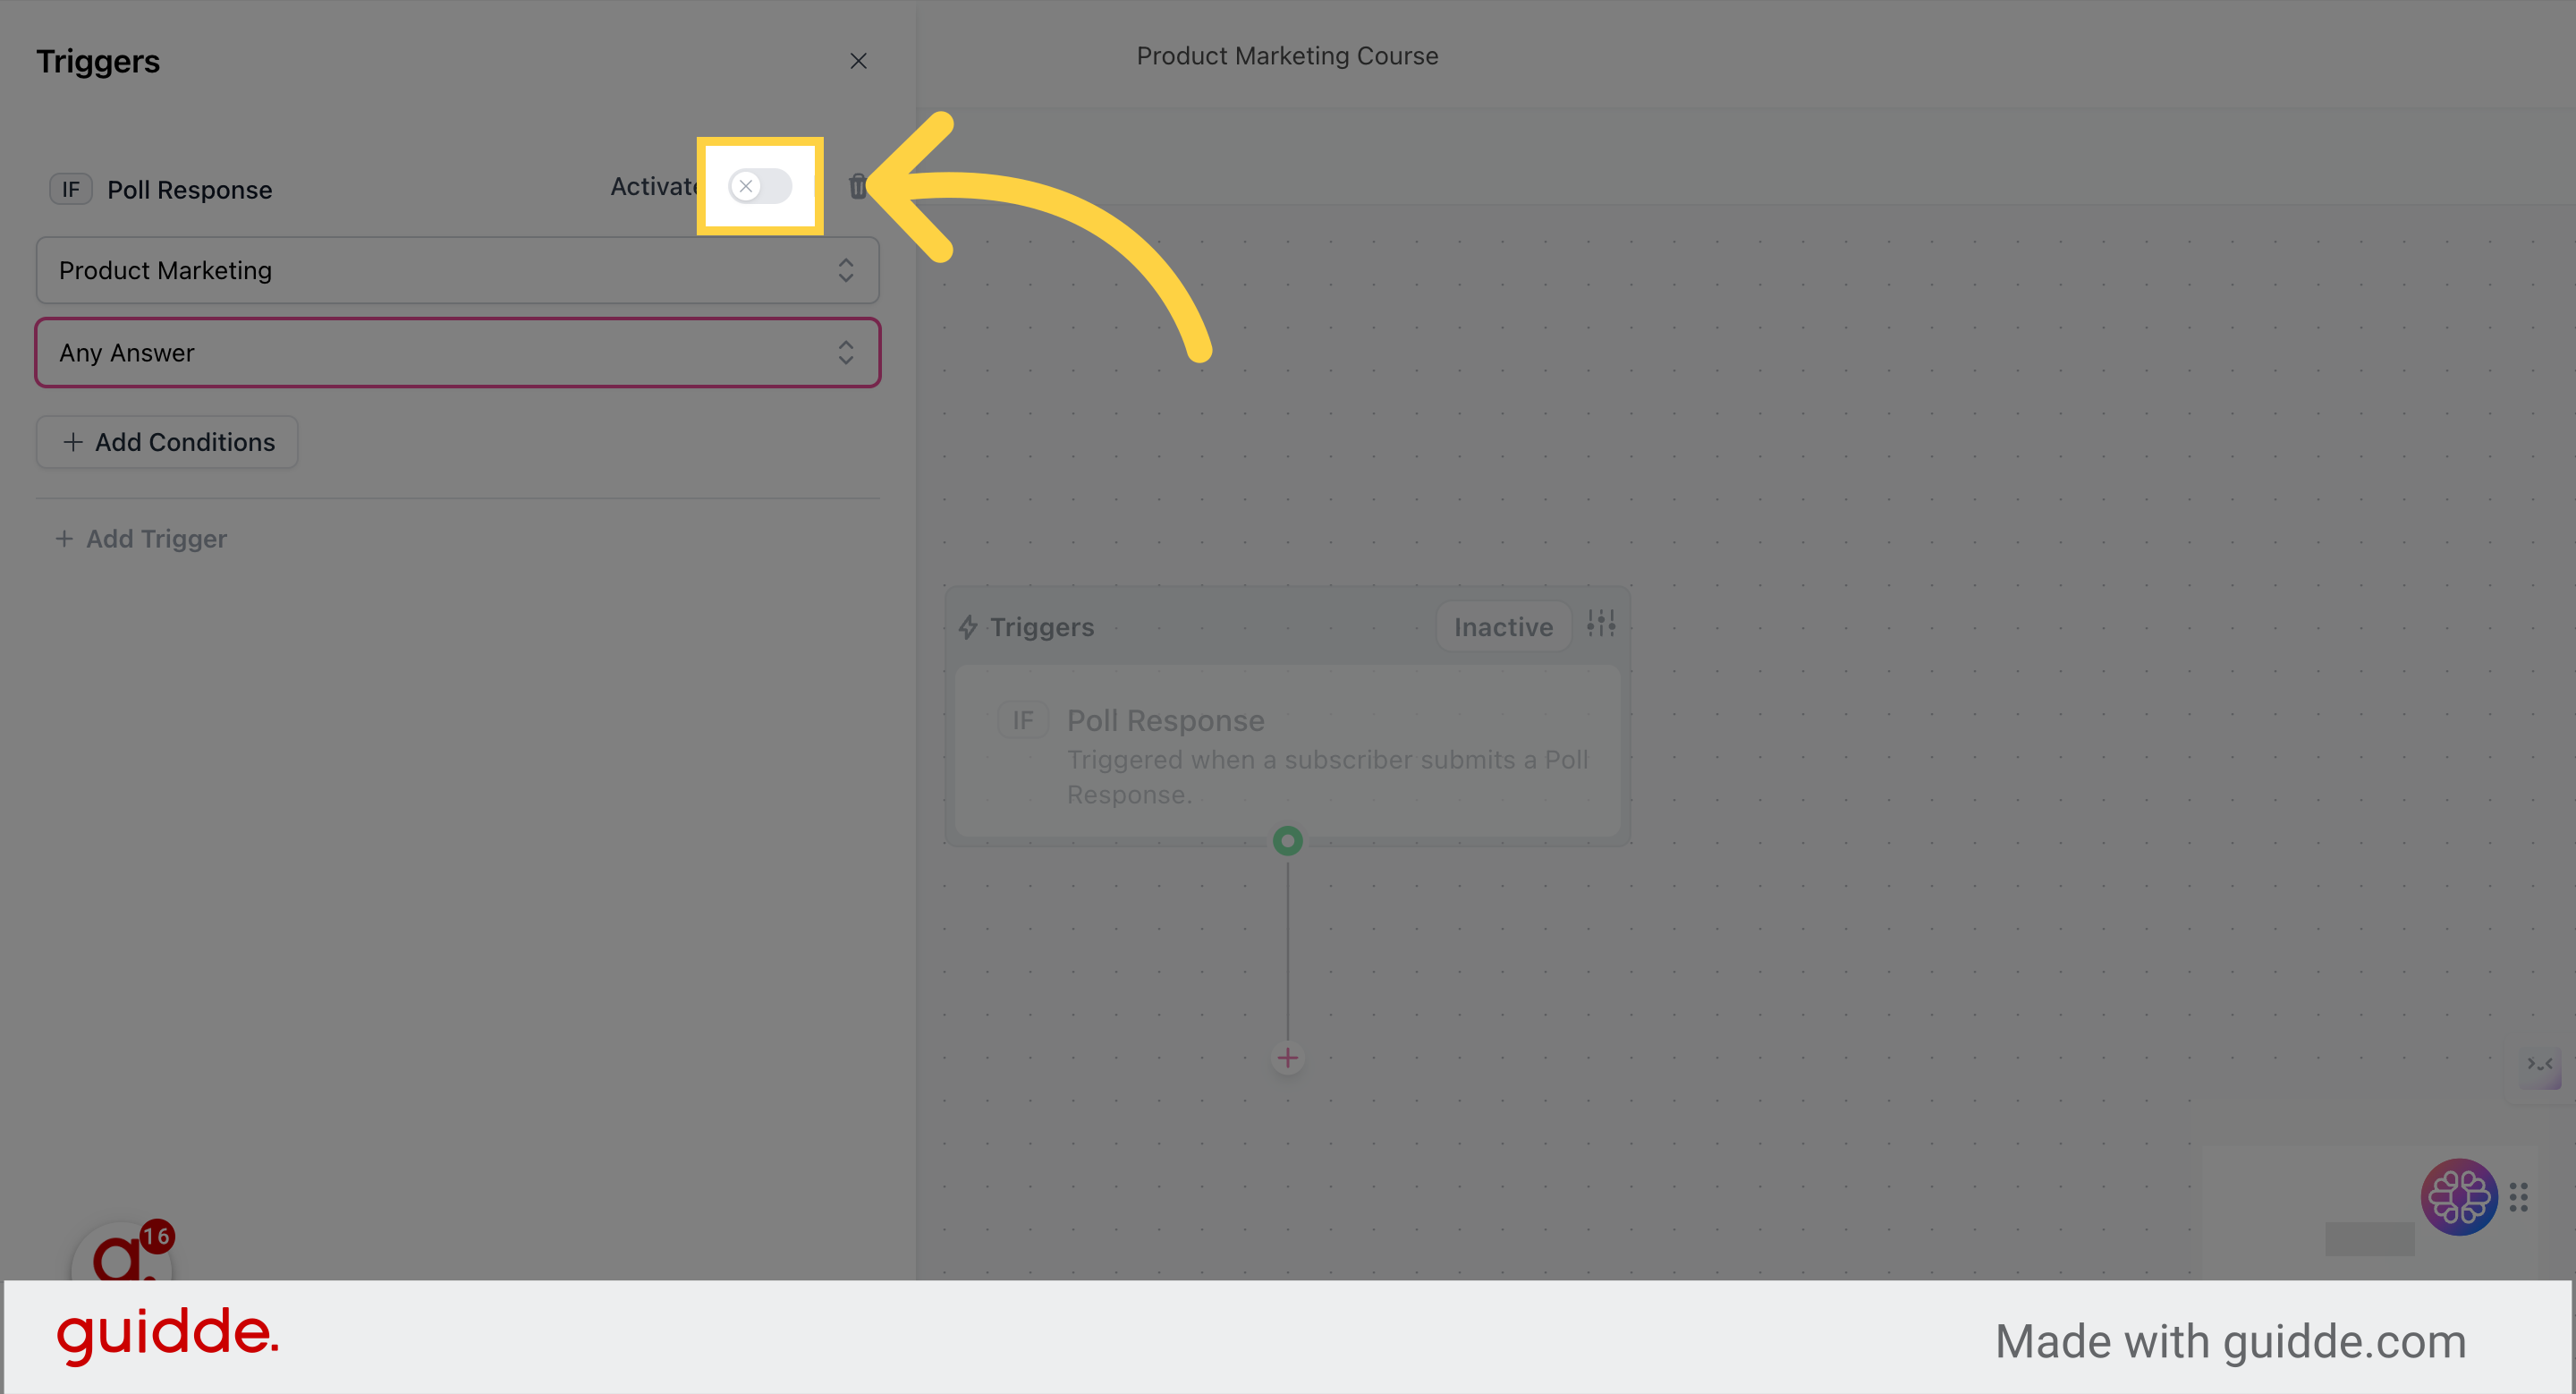
4. Activate the Trigger
Toggle to activate
Confirm the trigger activation
Click “save”


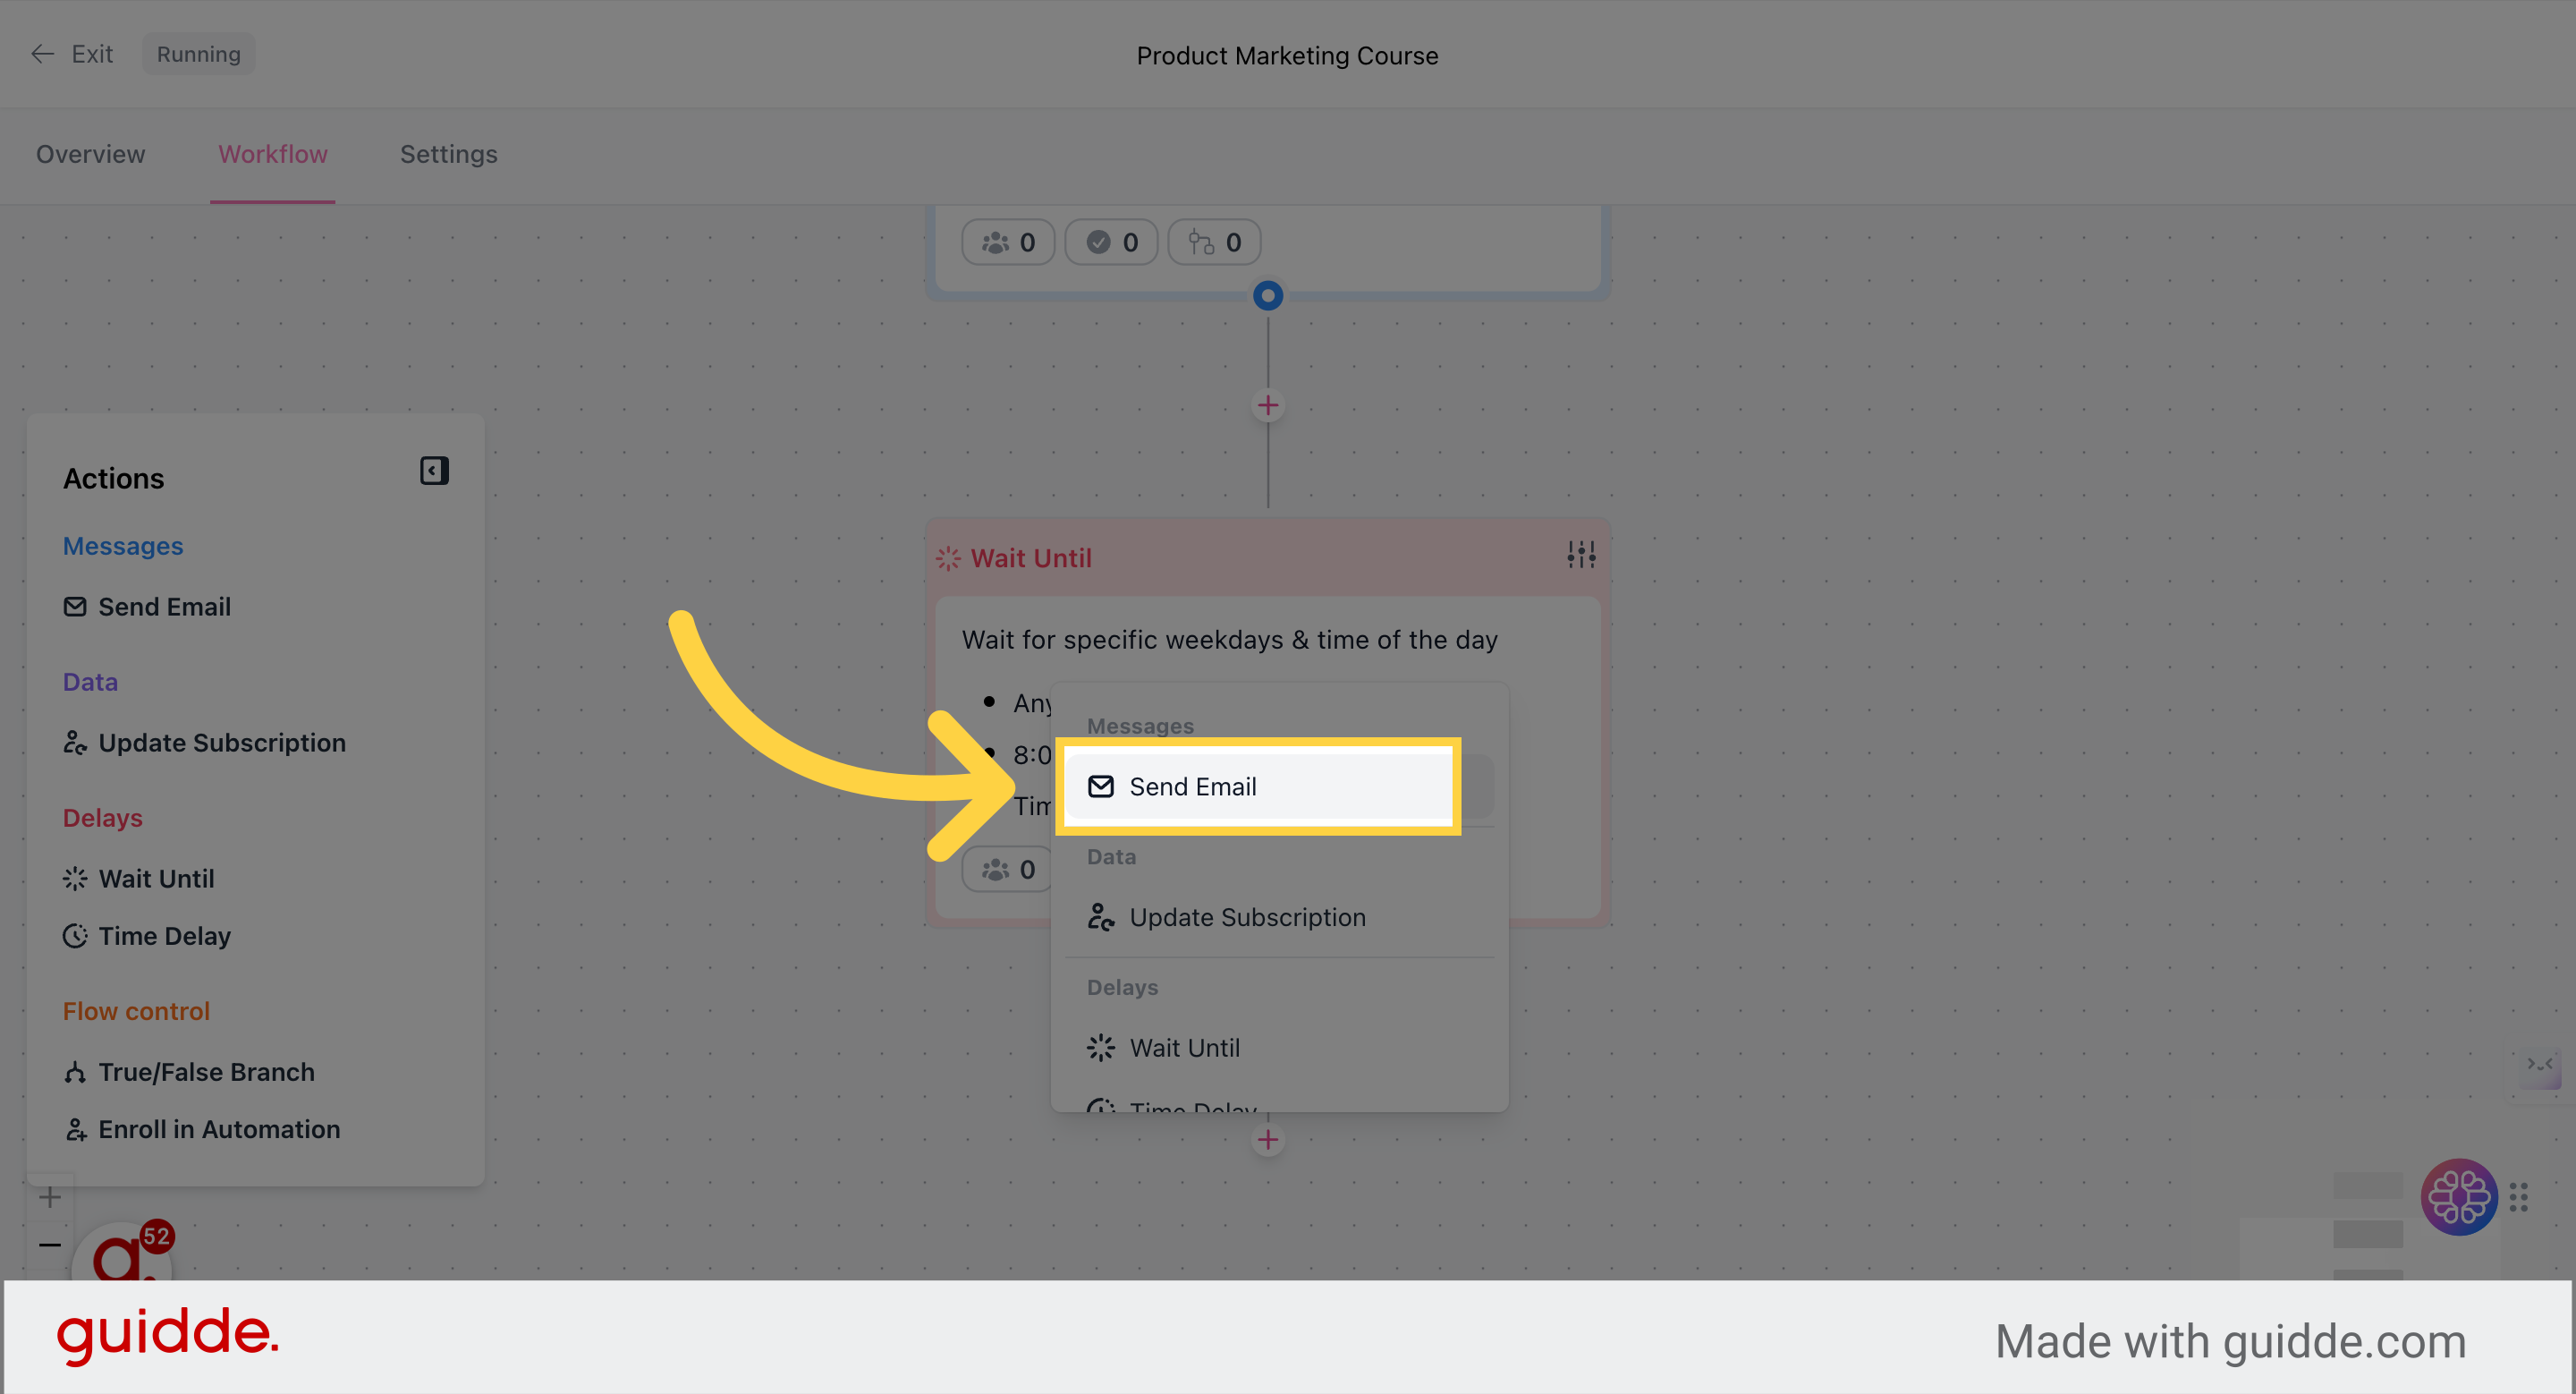
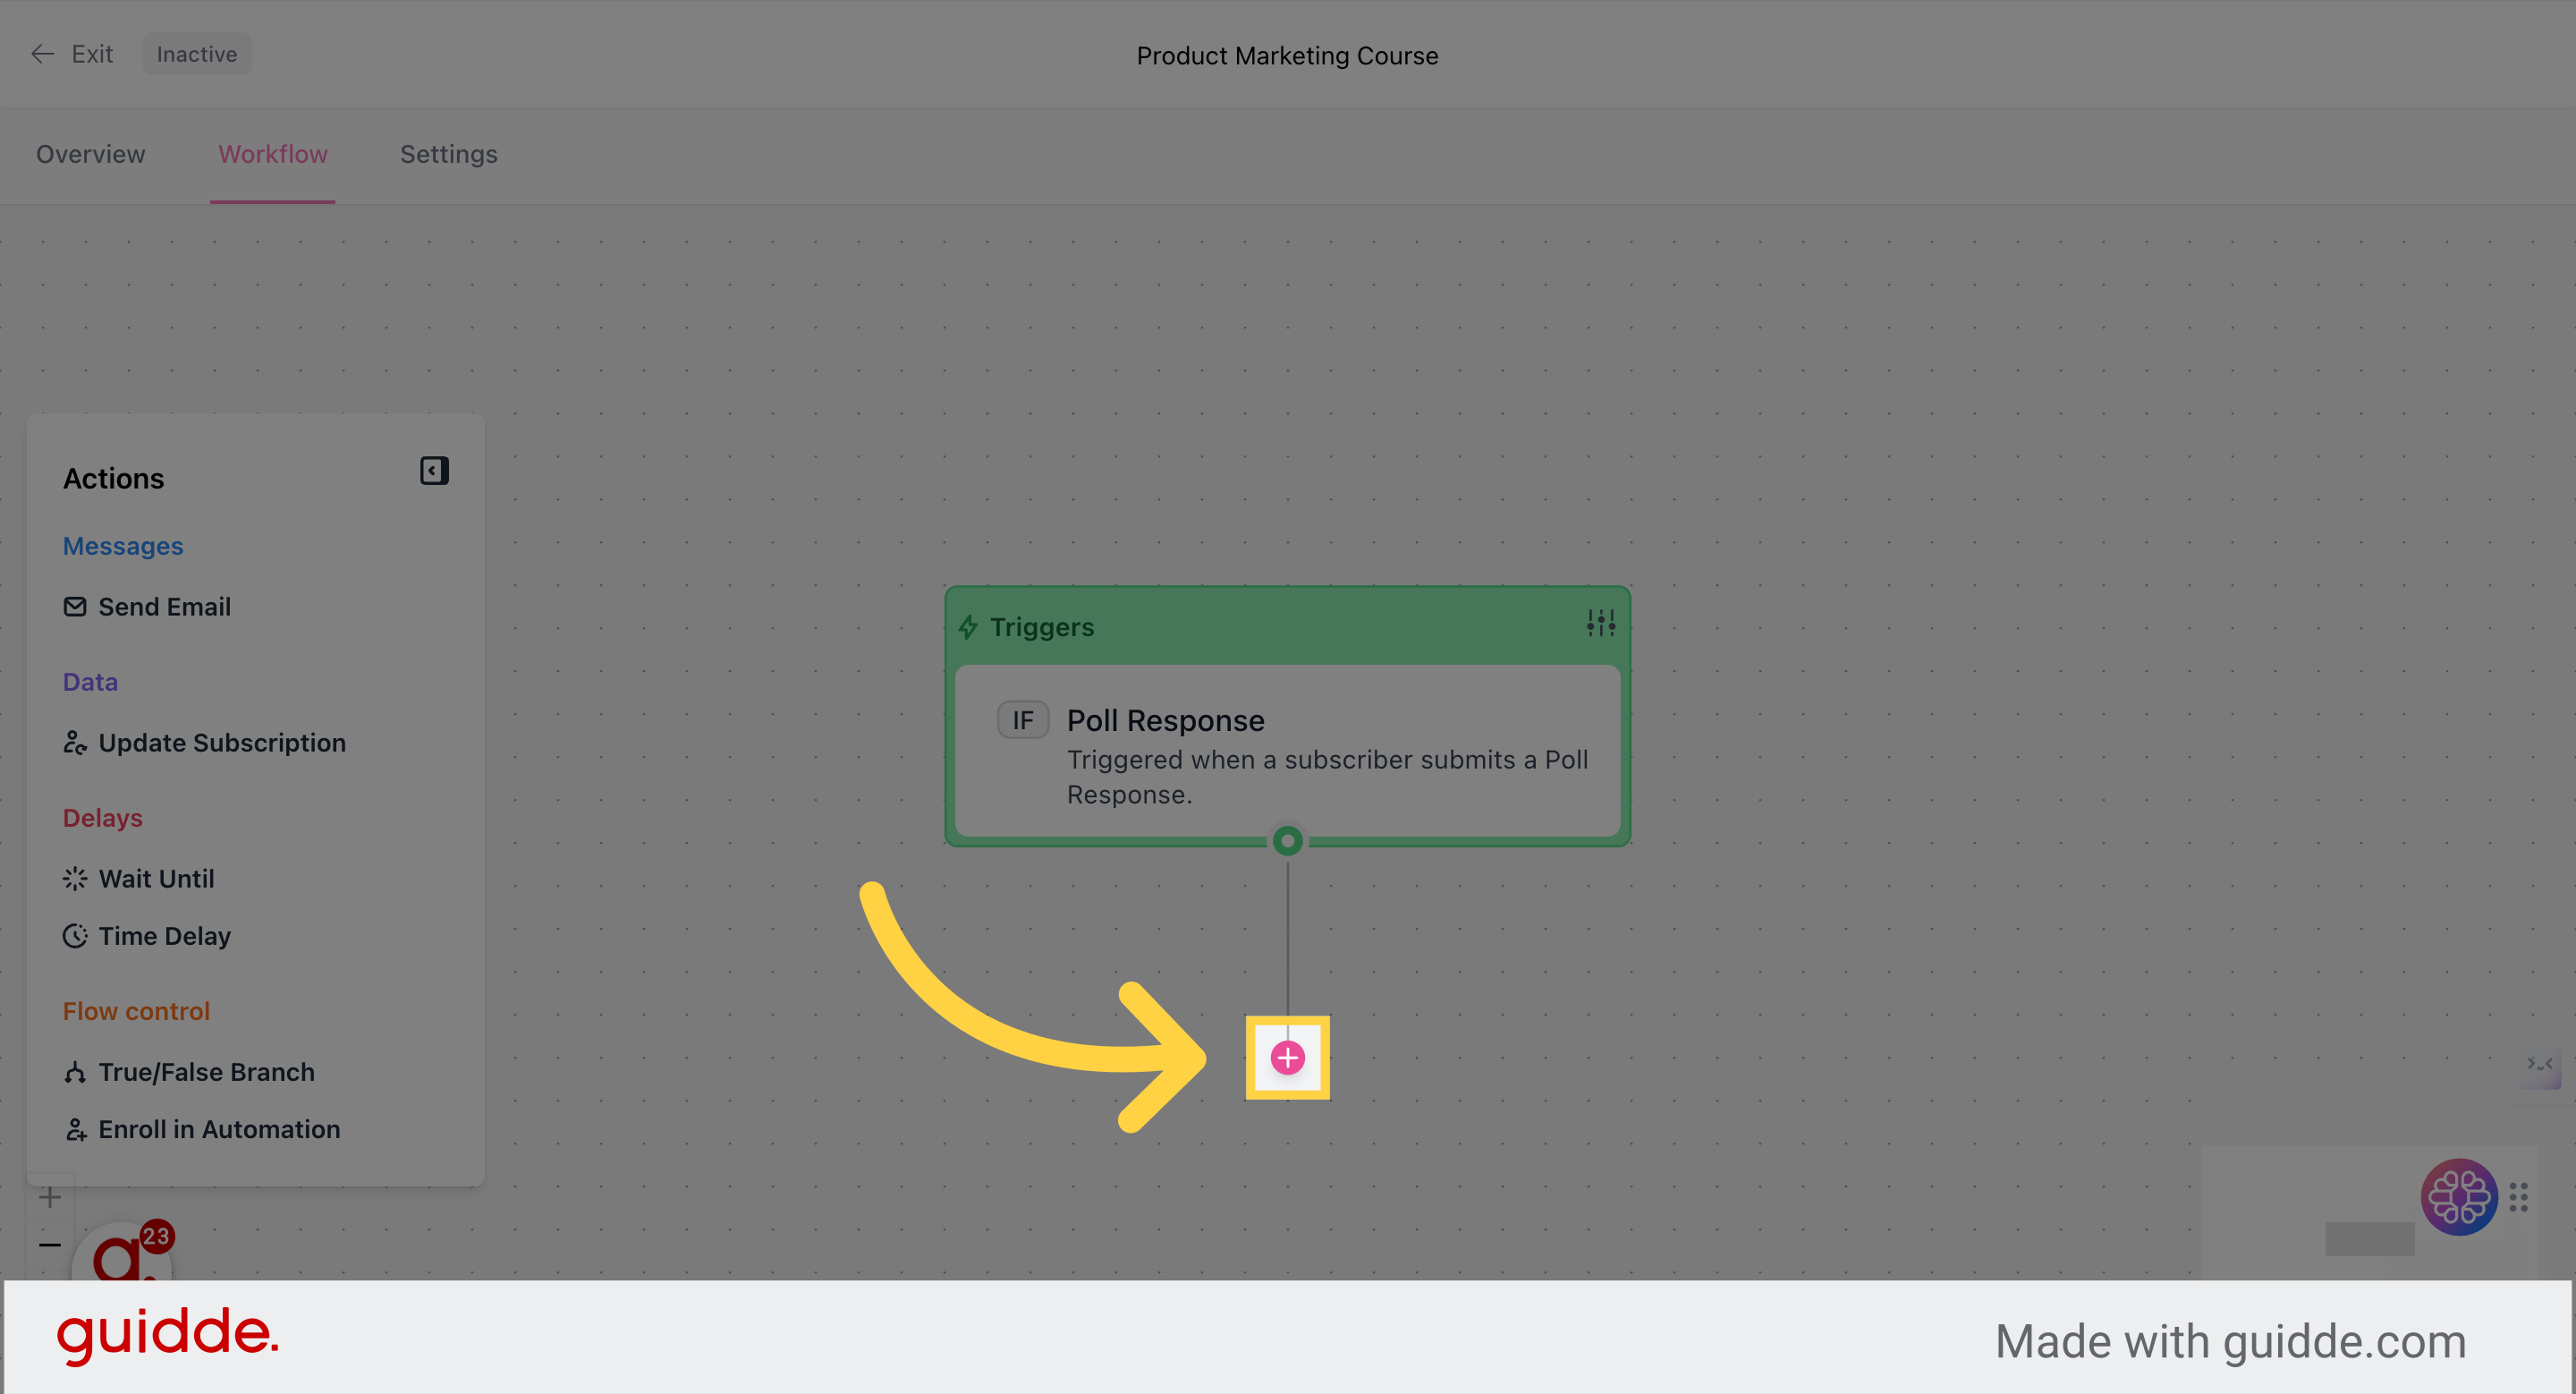
5. Build the Sequence
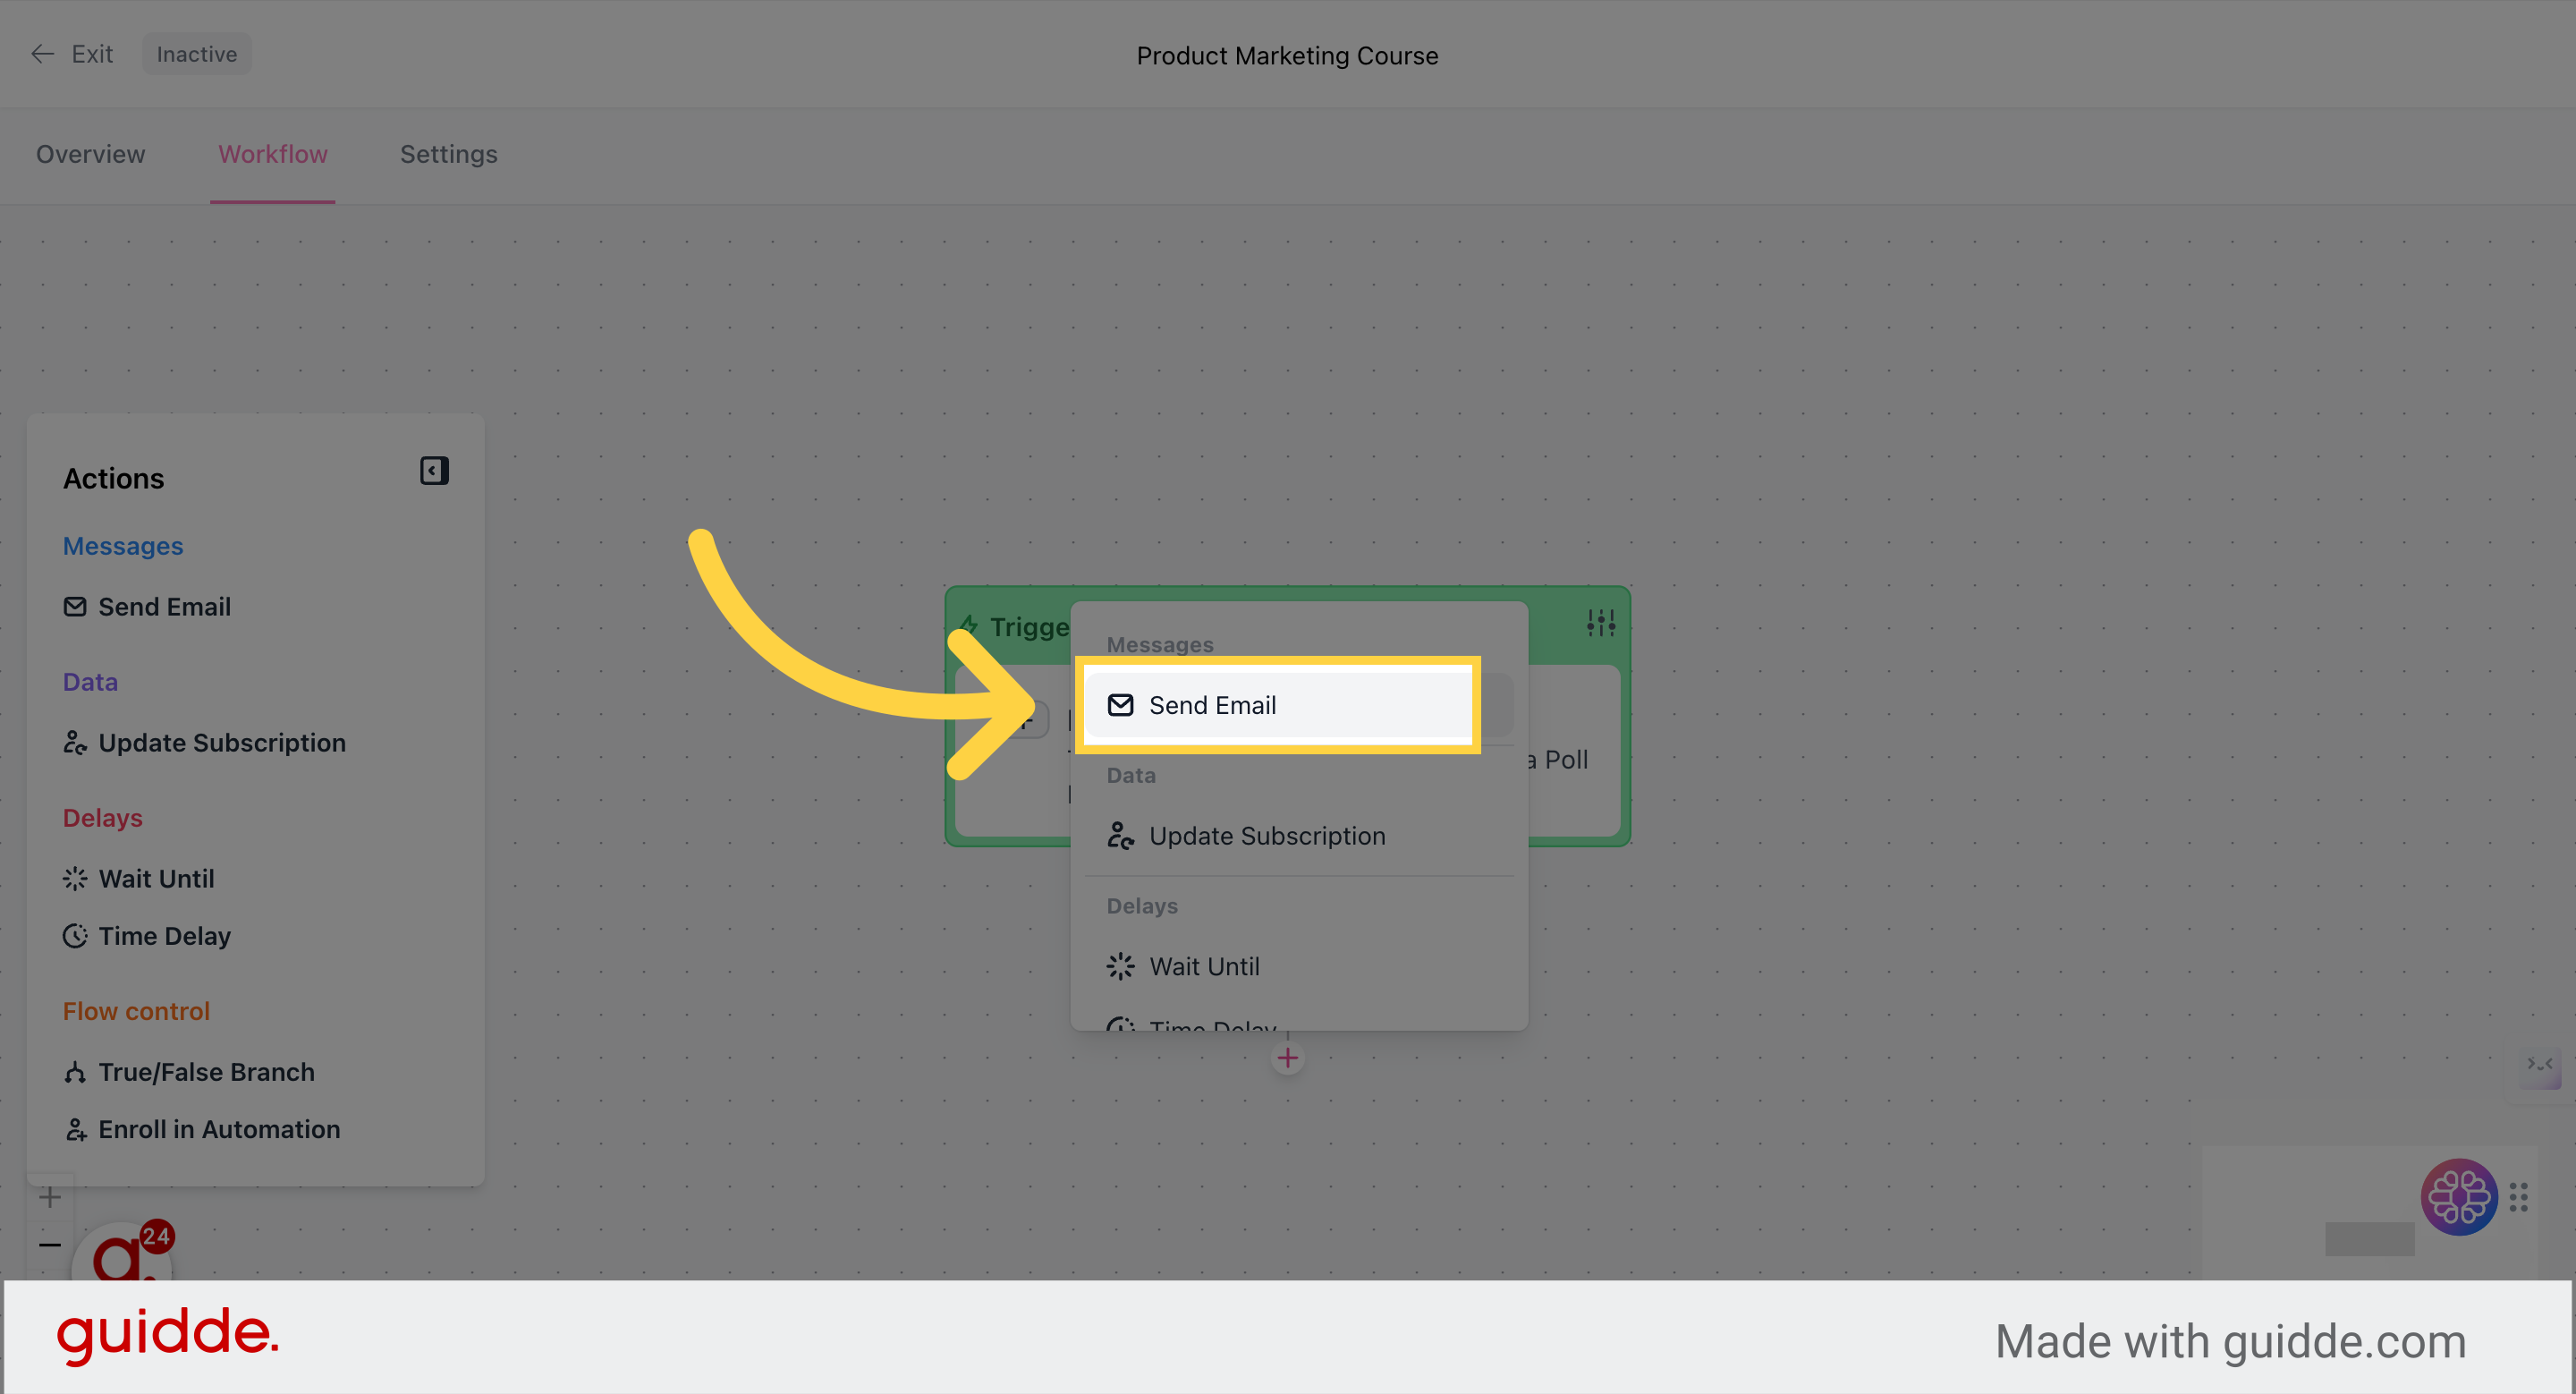
Choose the desired “Action” by clicking the plus button or selecting an action from the menu on the left
If you choose “Send email” after the trigger, it will be an automatic email with no delay. This is perfect for a welcome email.
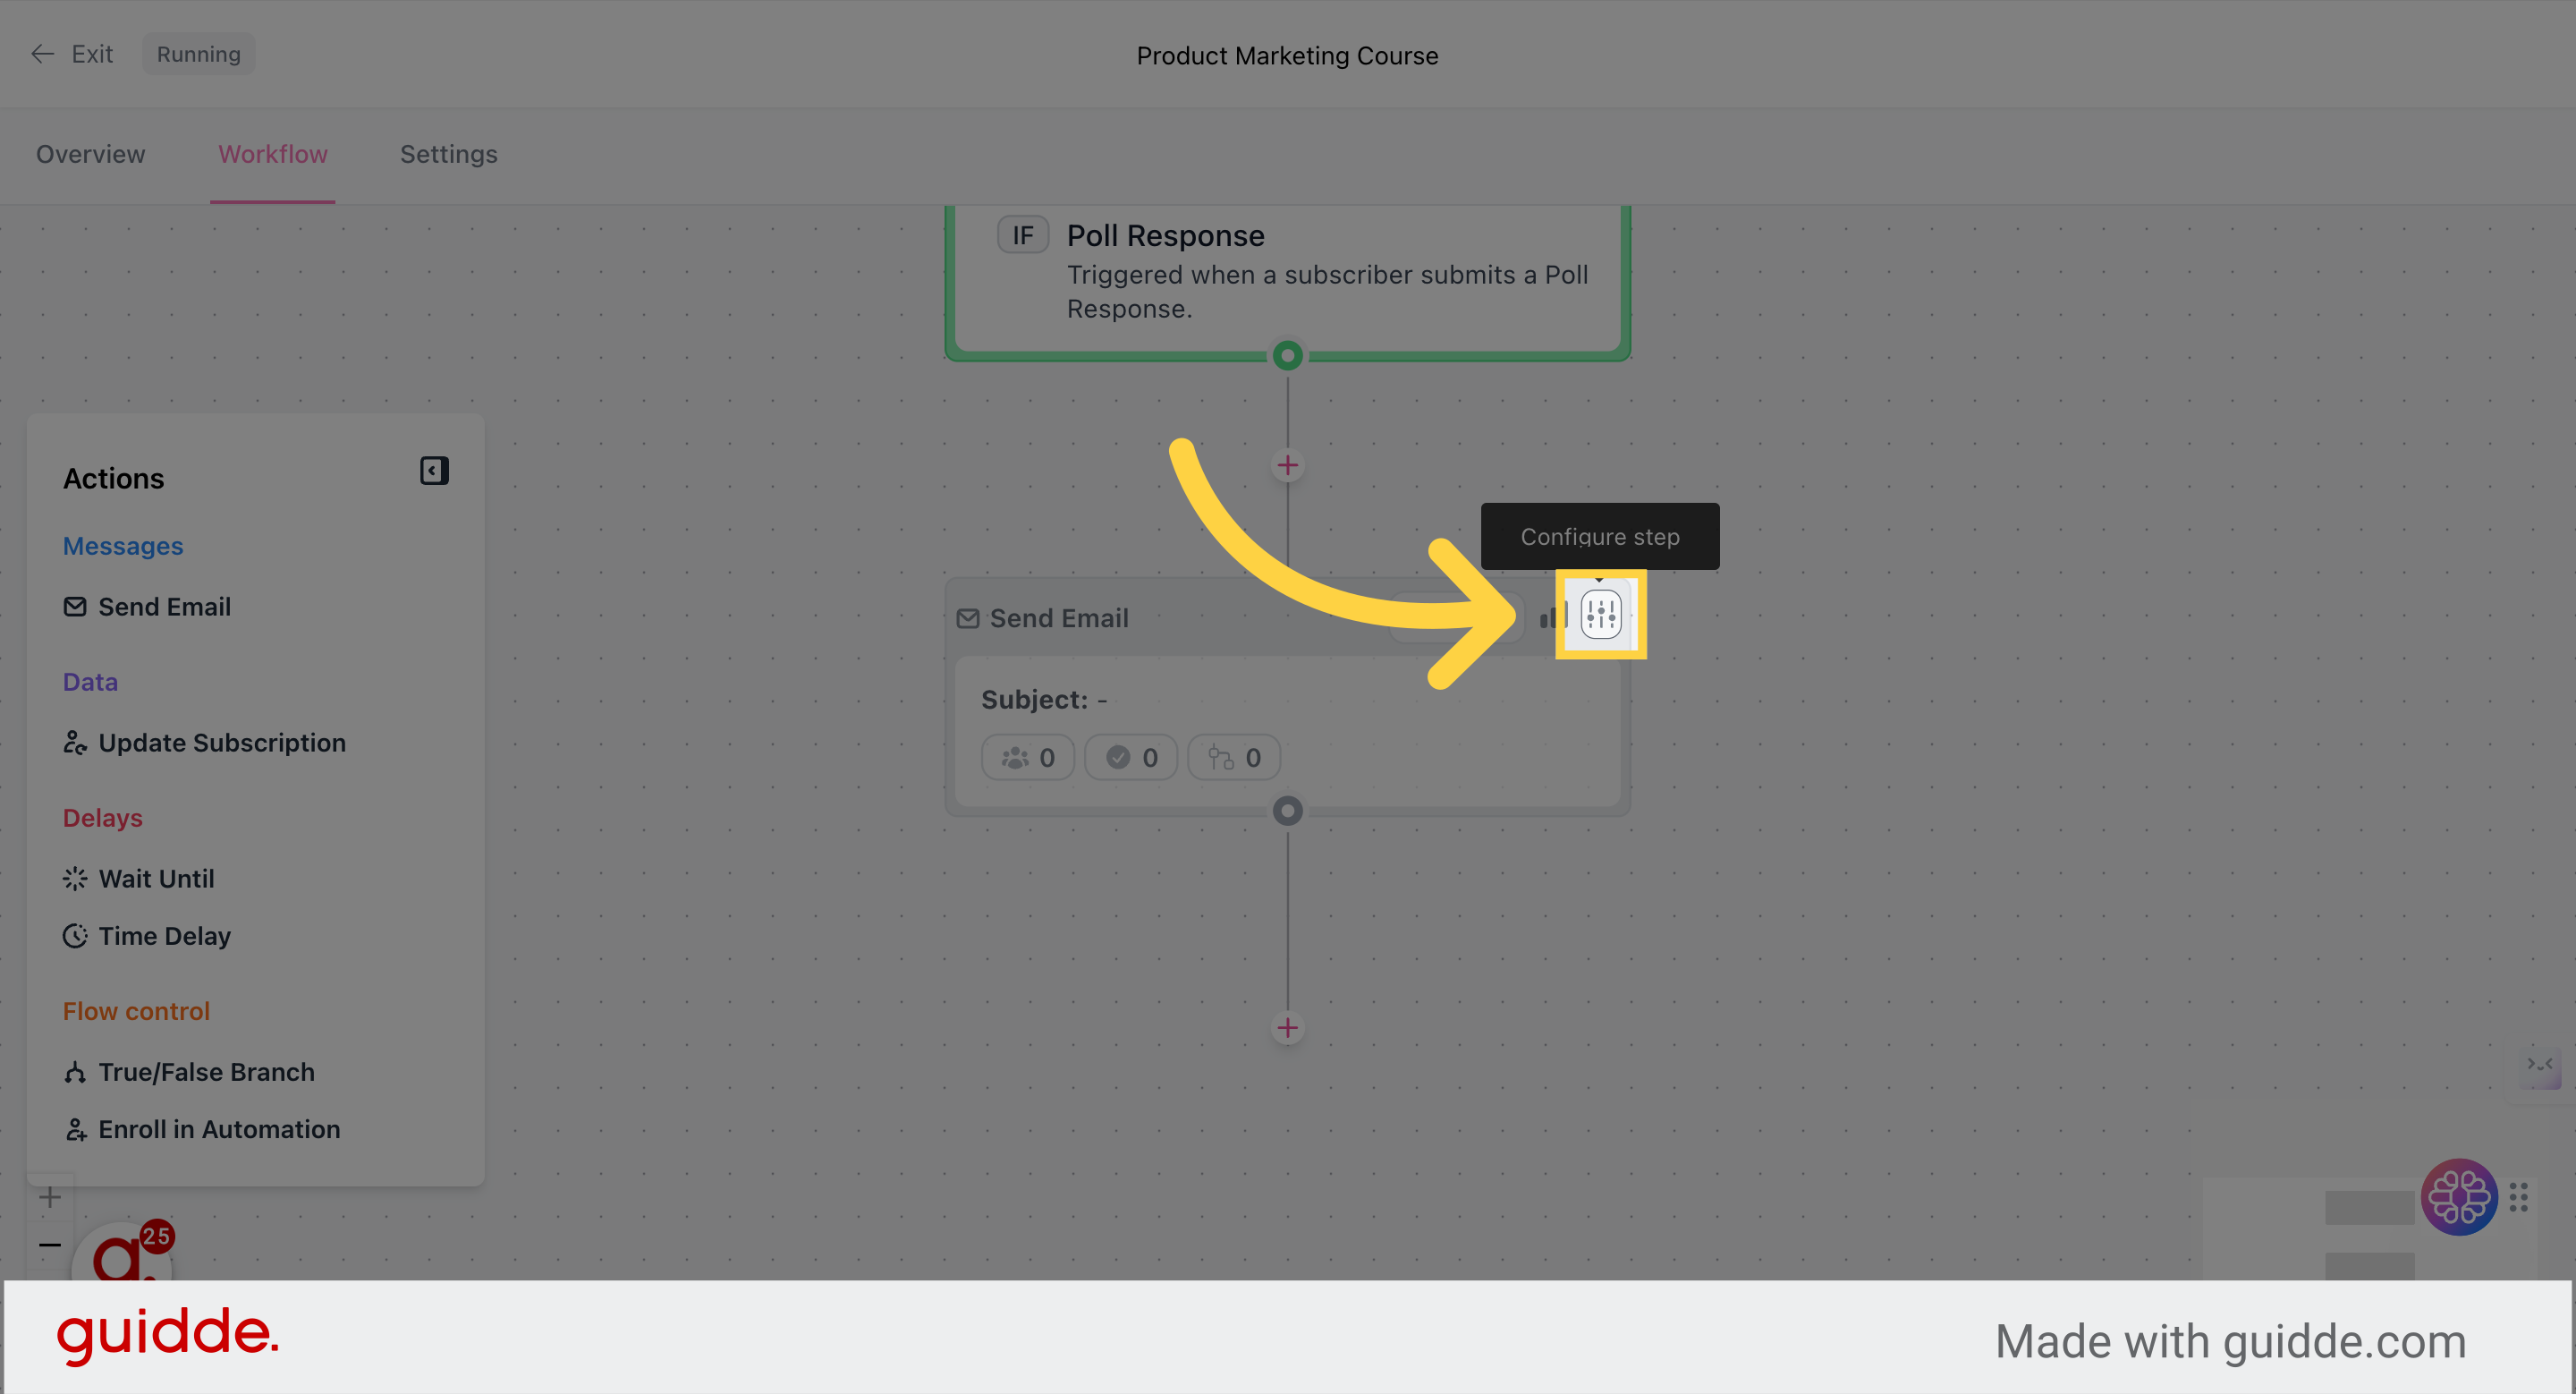
6. Create the Email
Click the “Configure step” option
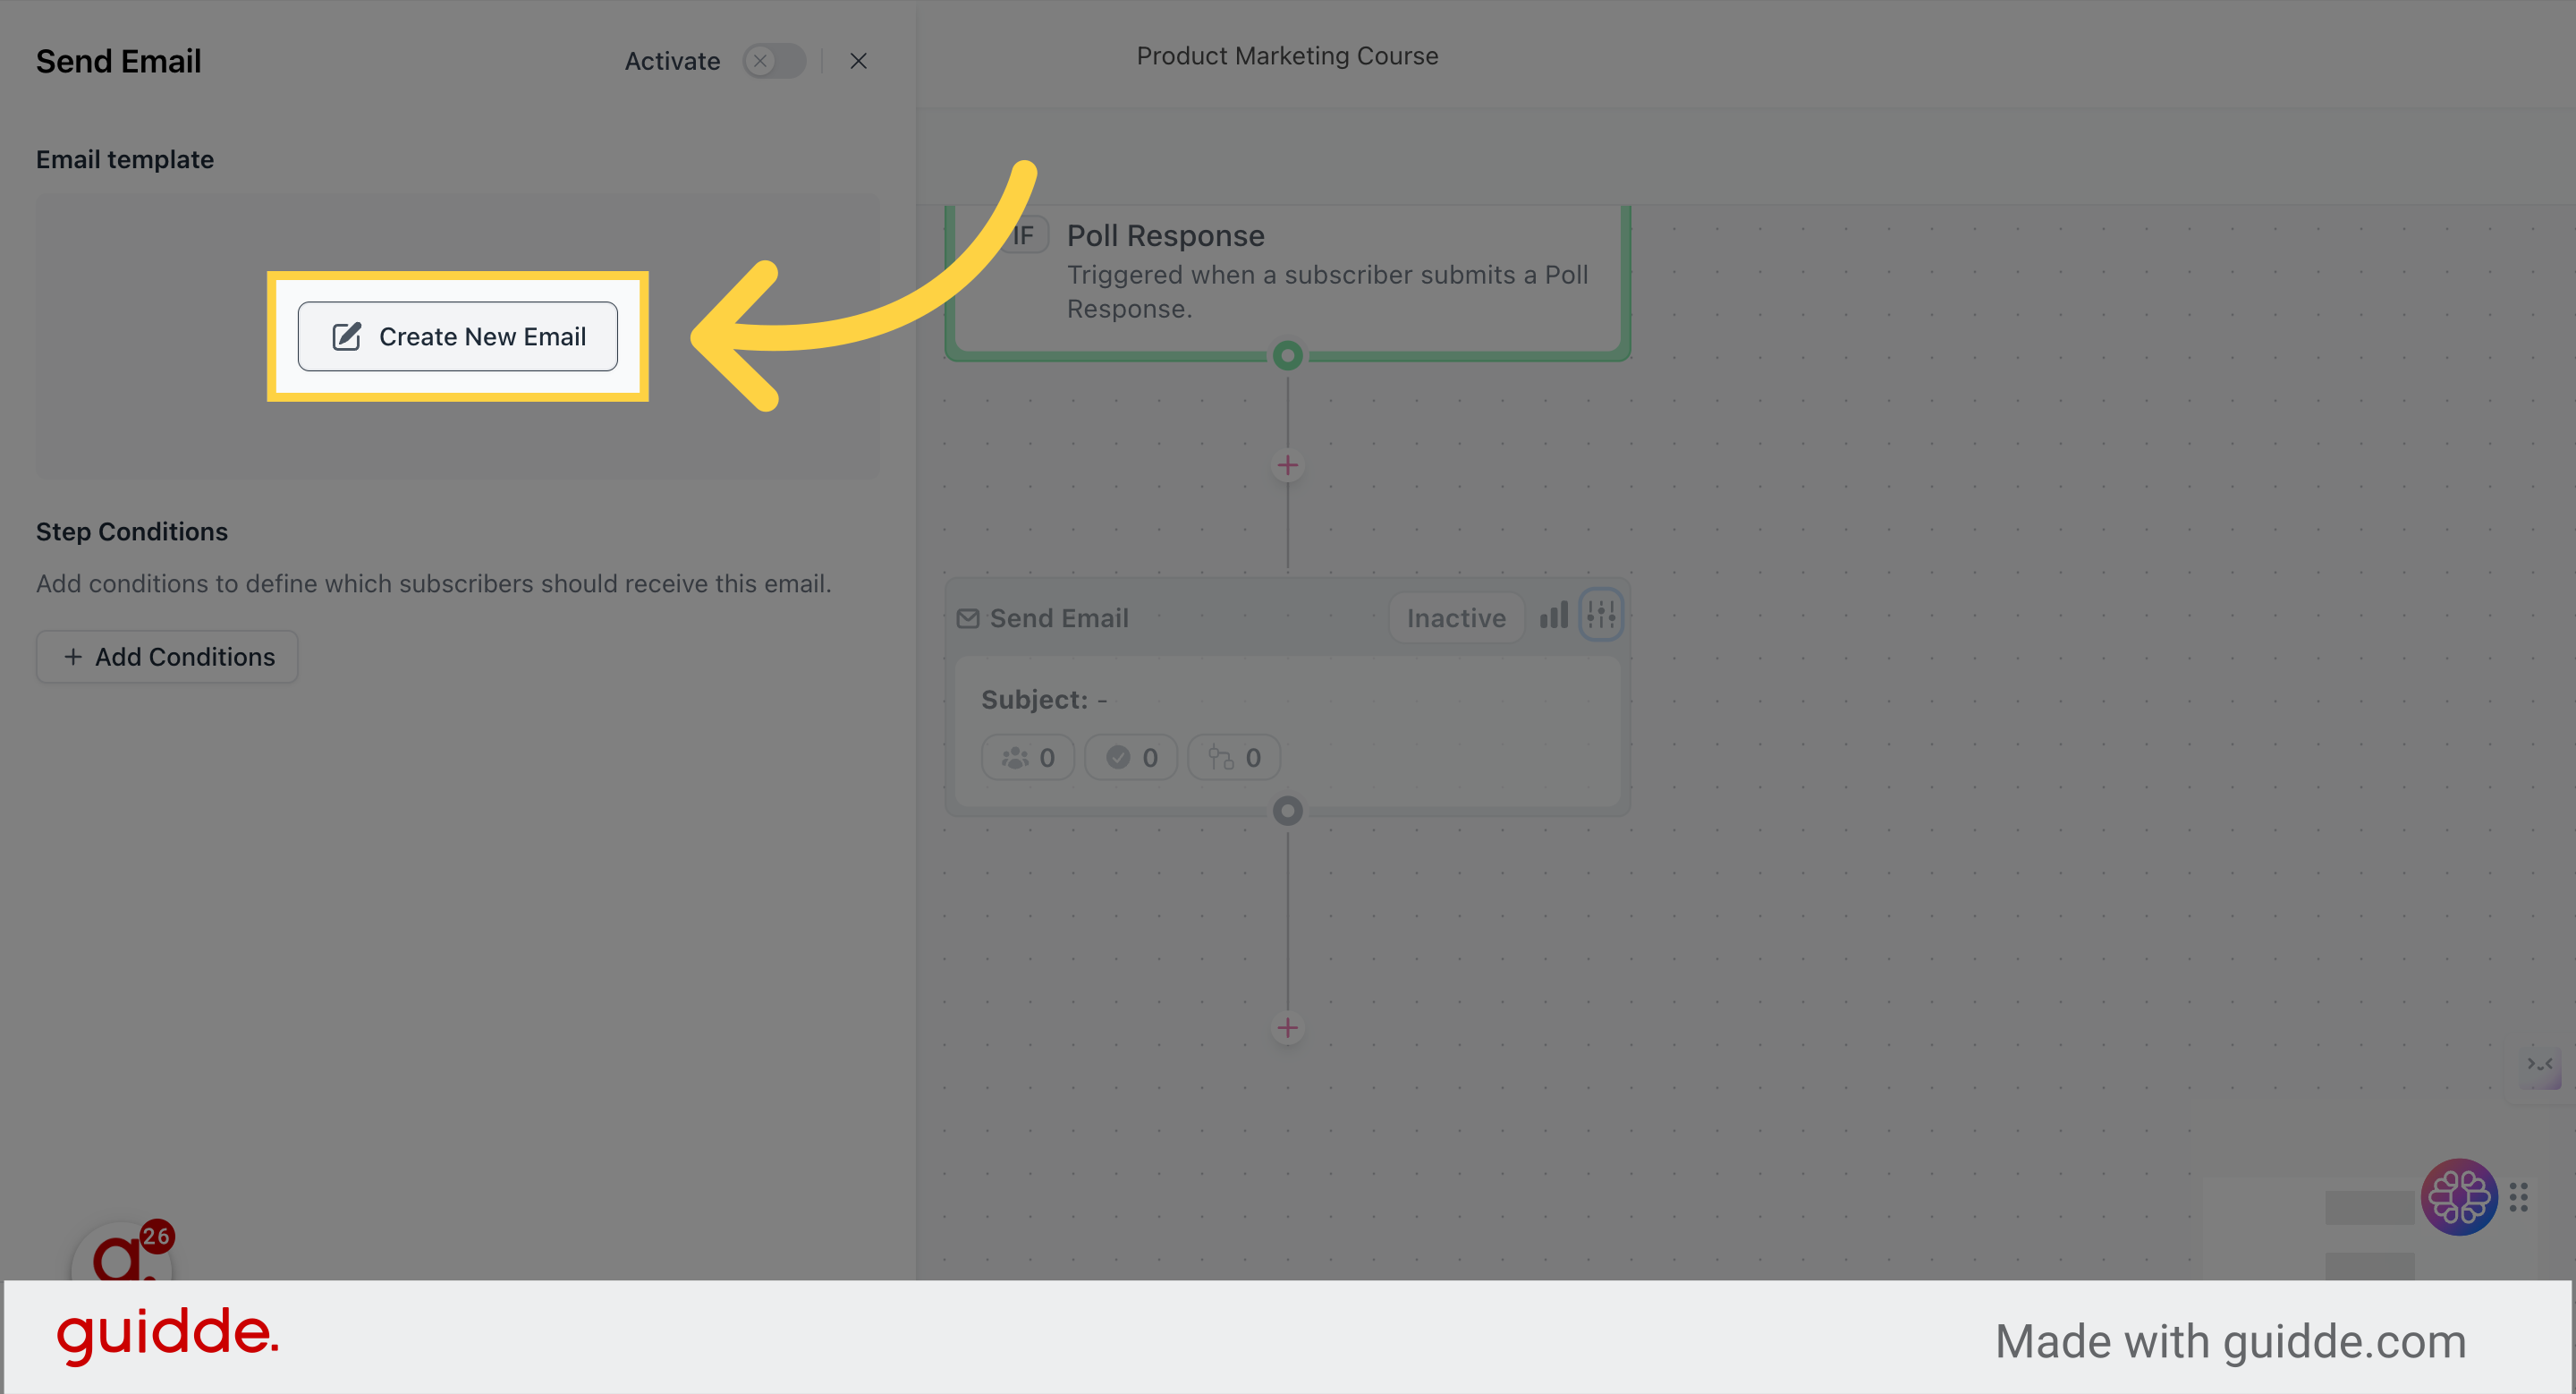
Select “Create new email”
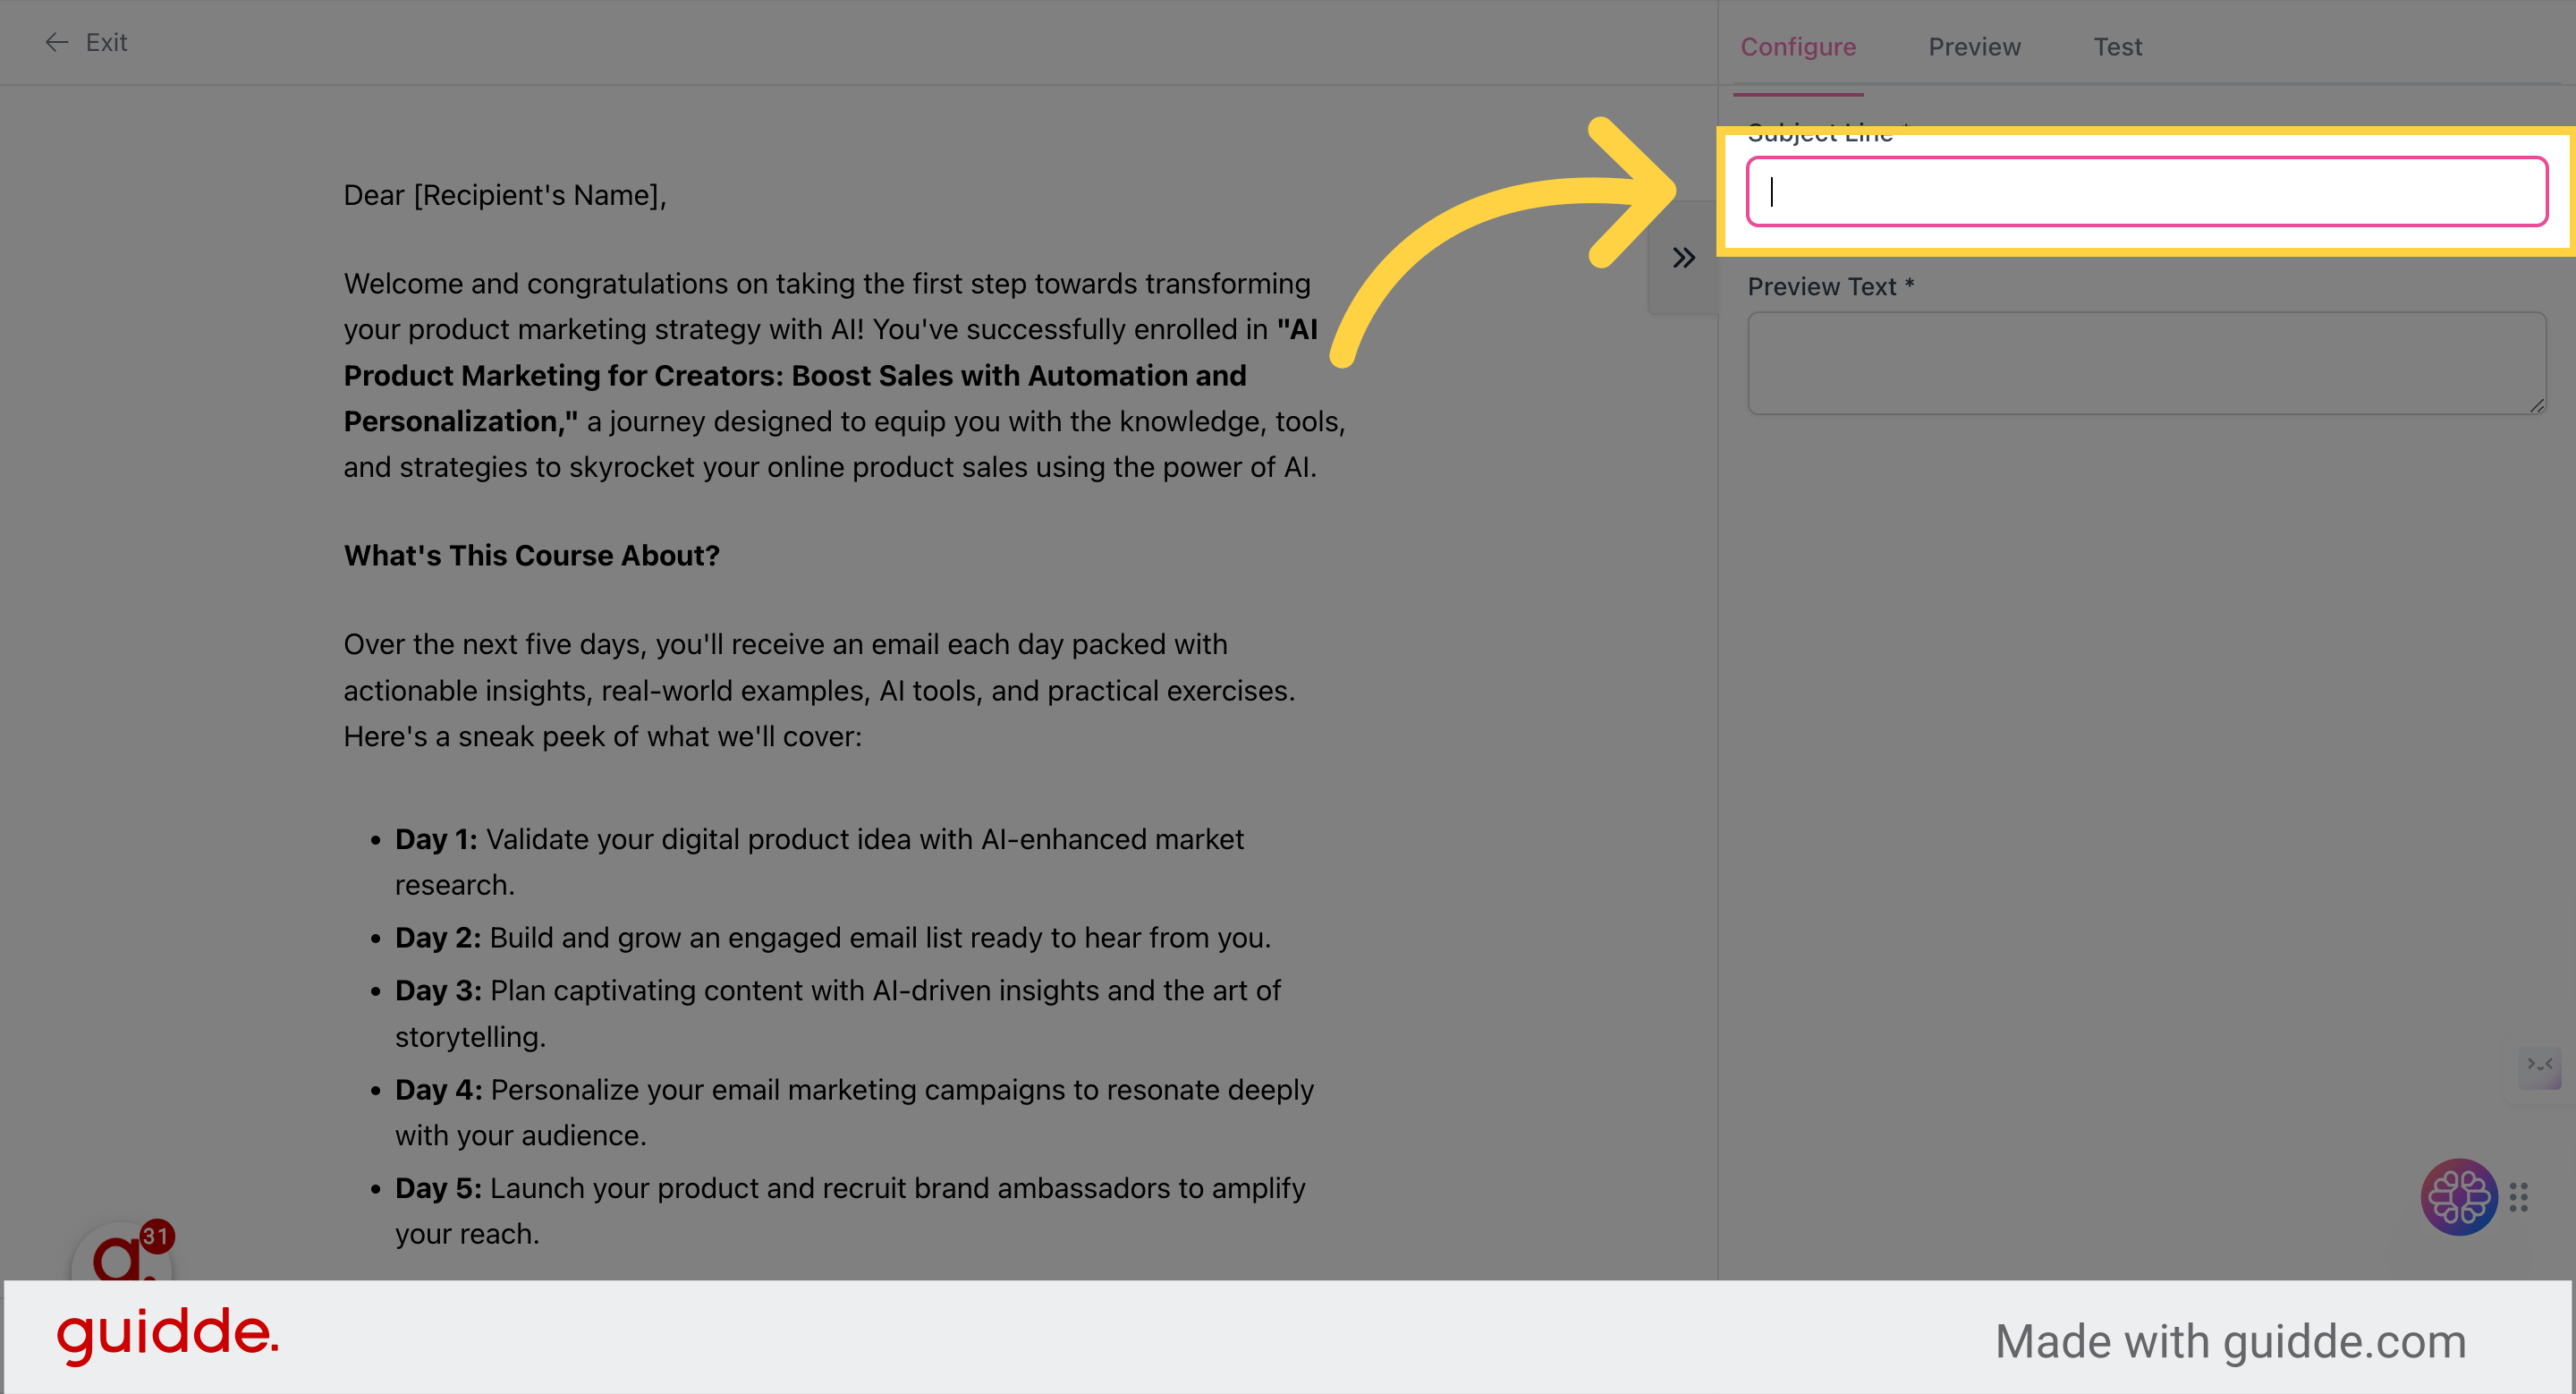
Paste your email into the writing area
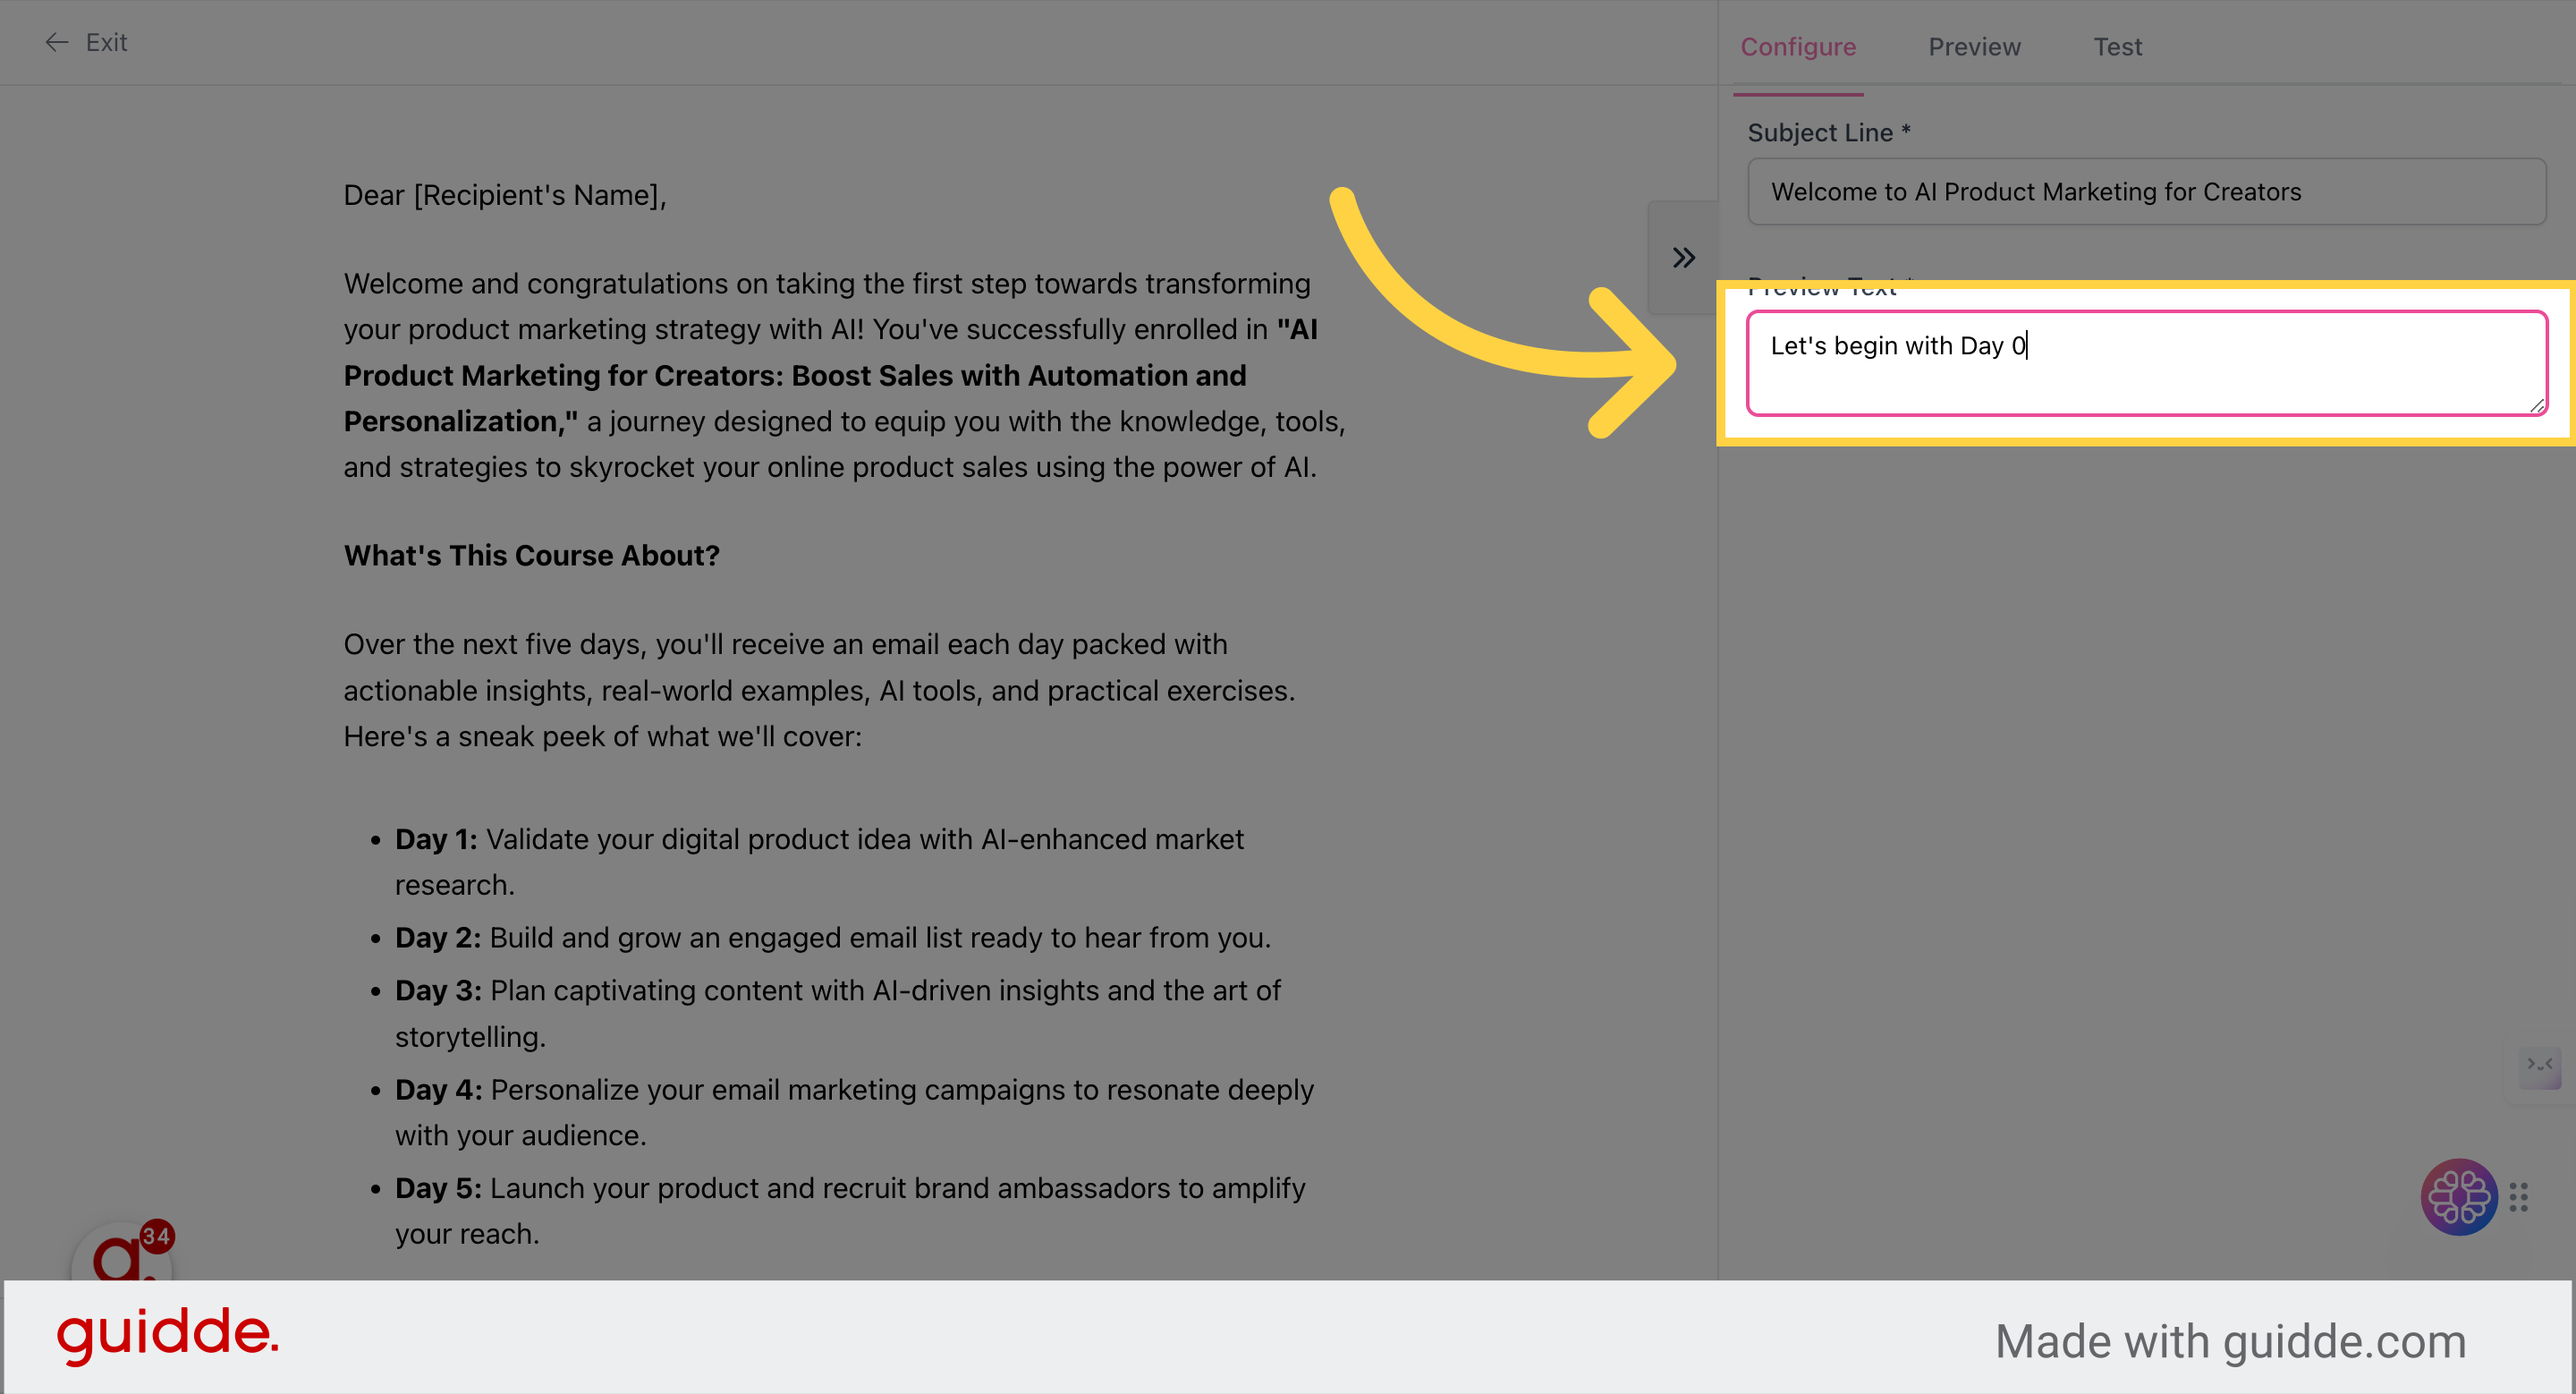
Be sure to add a subject line and preview
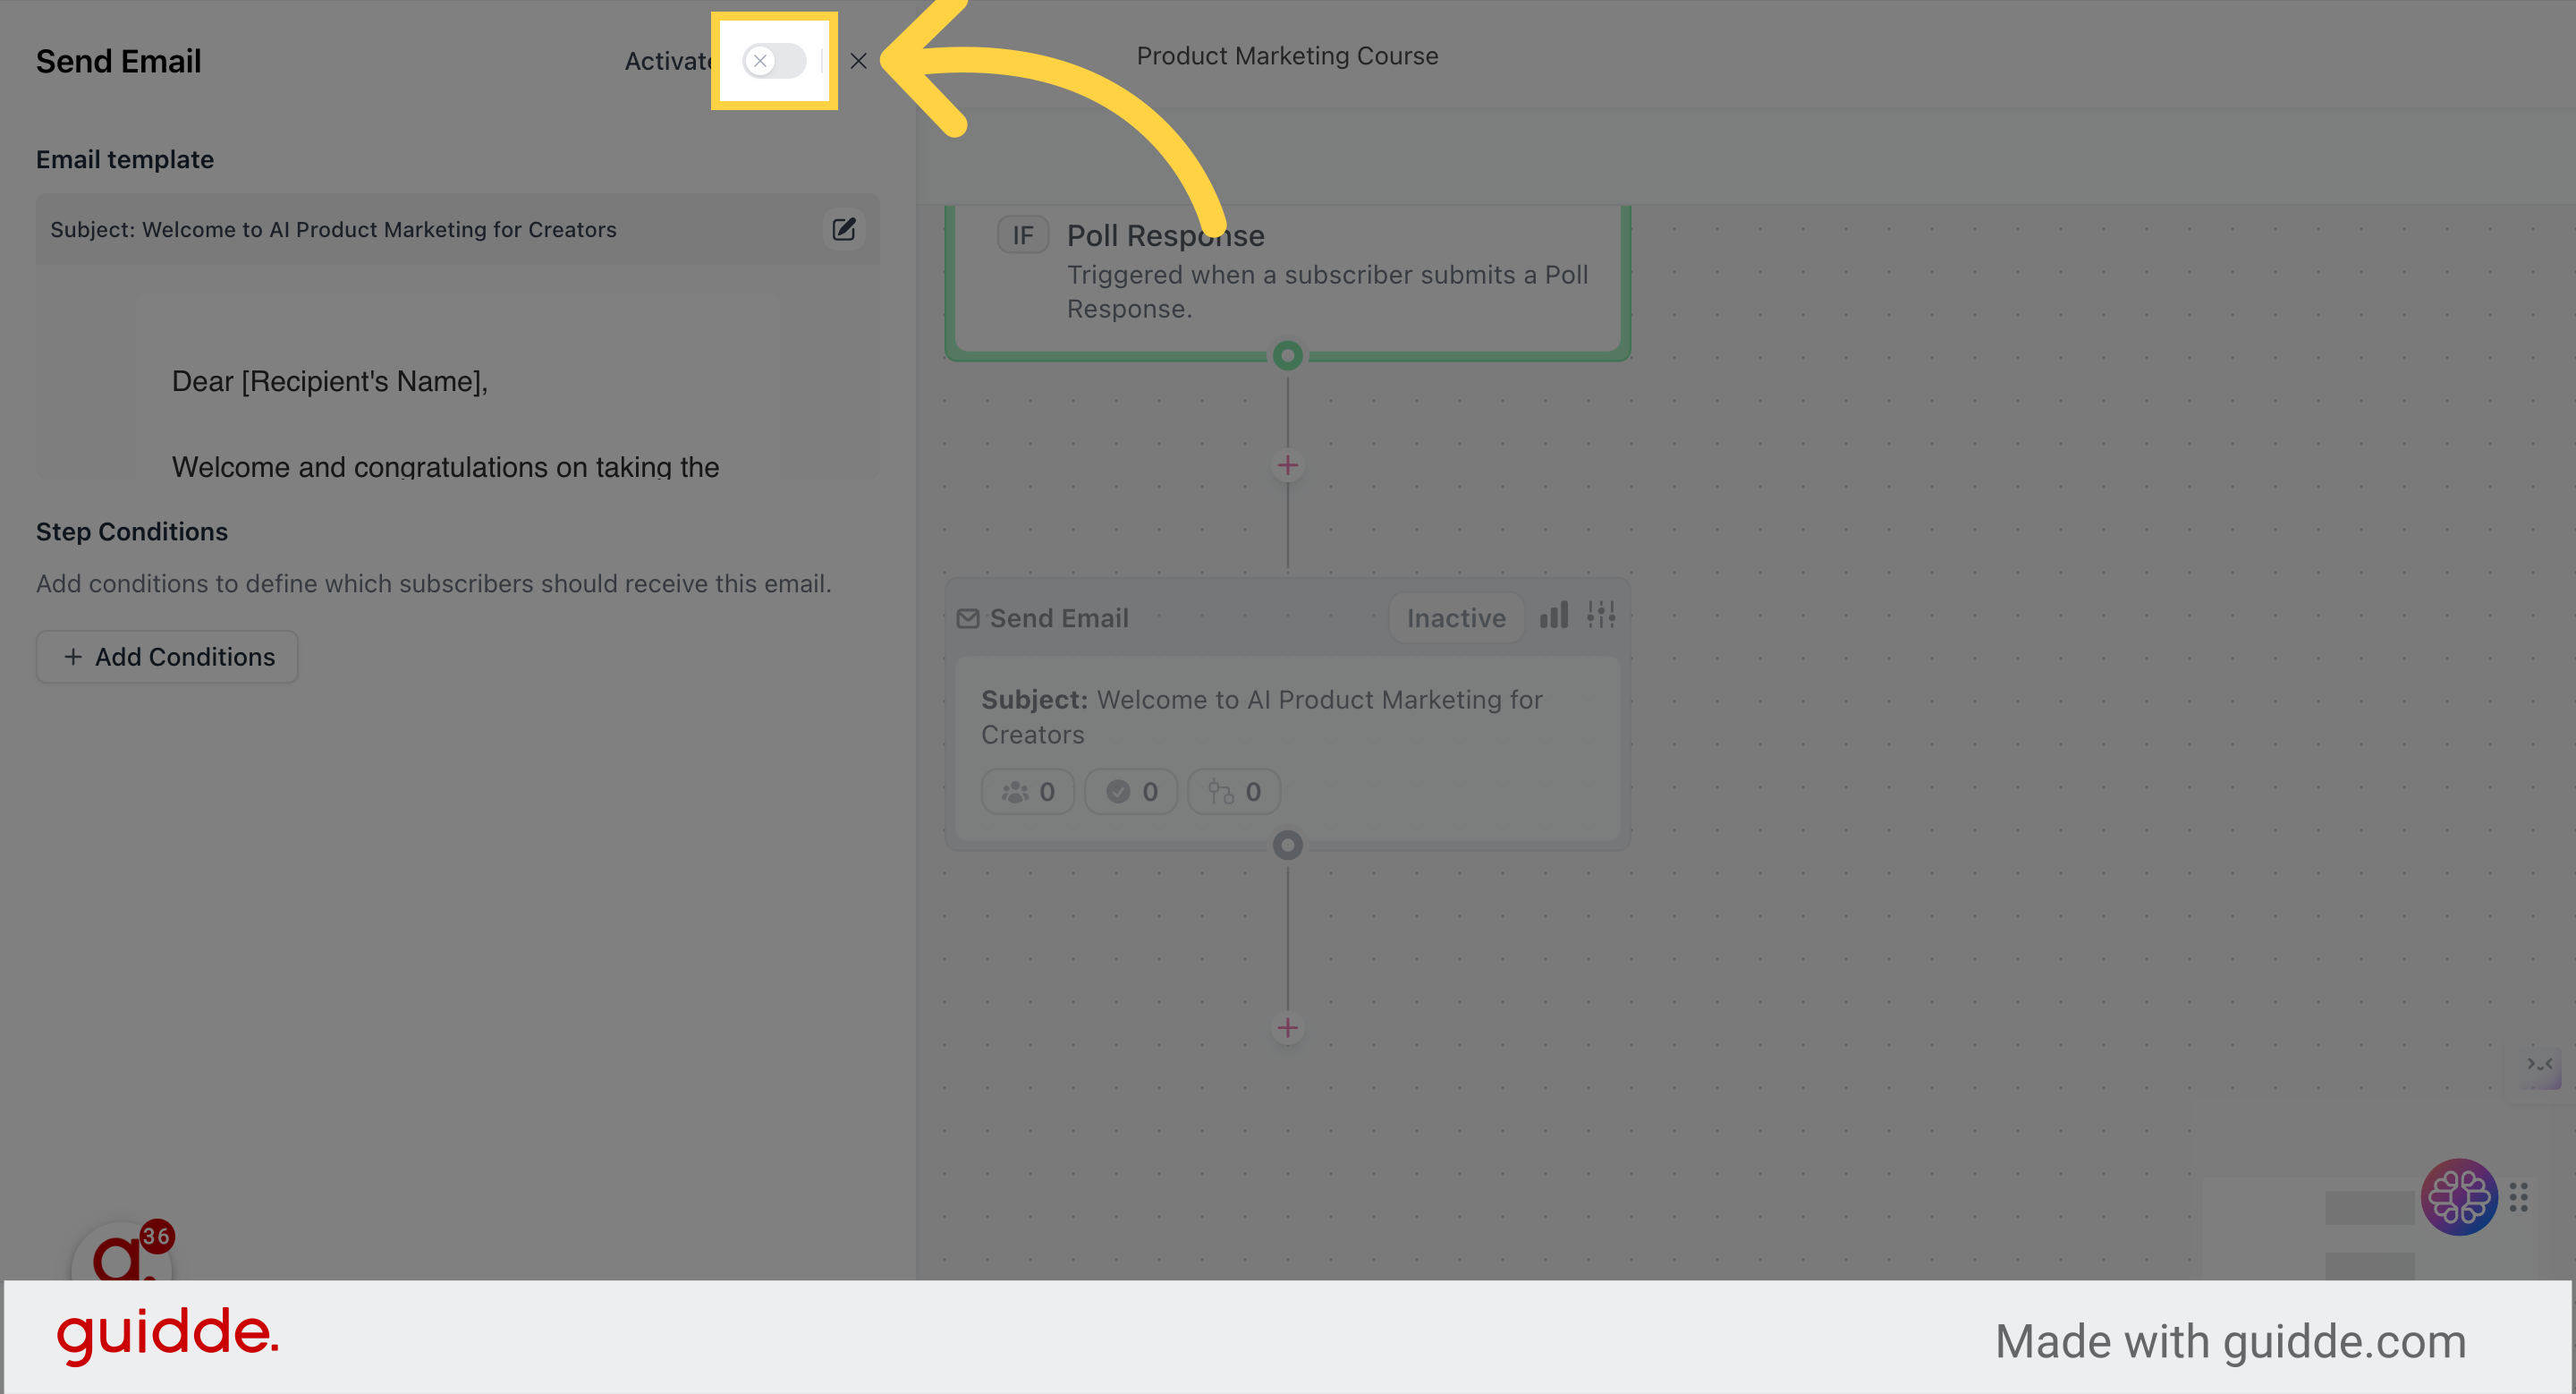
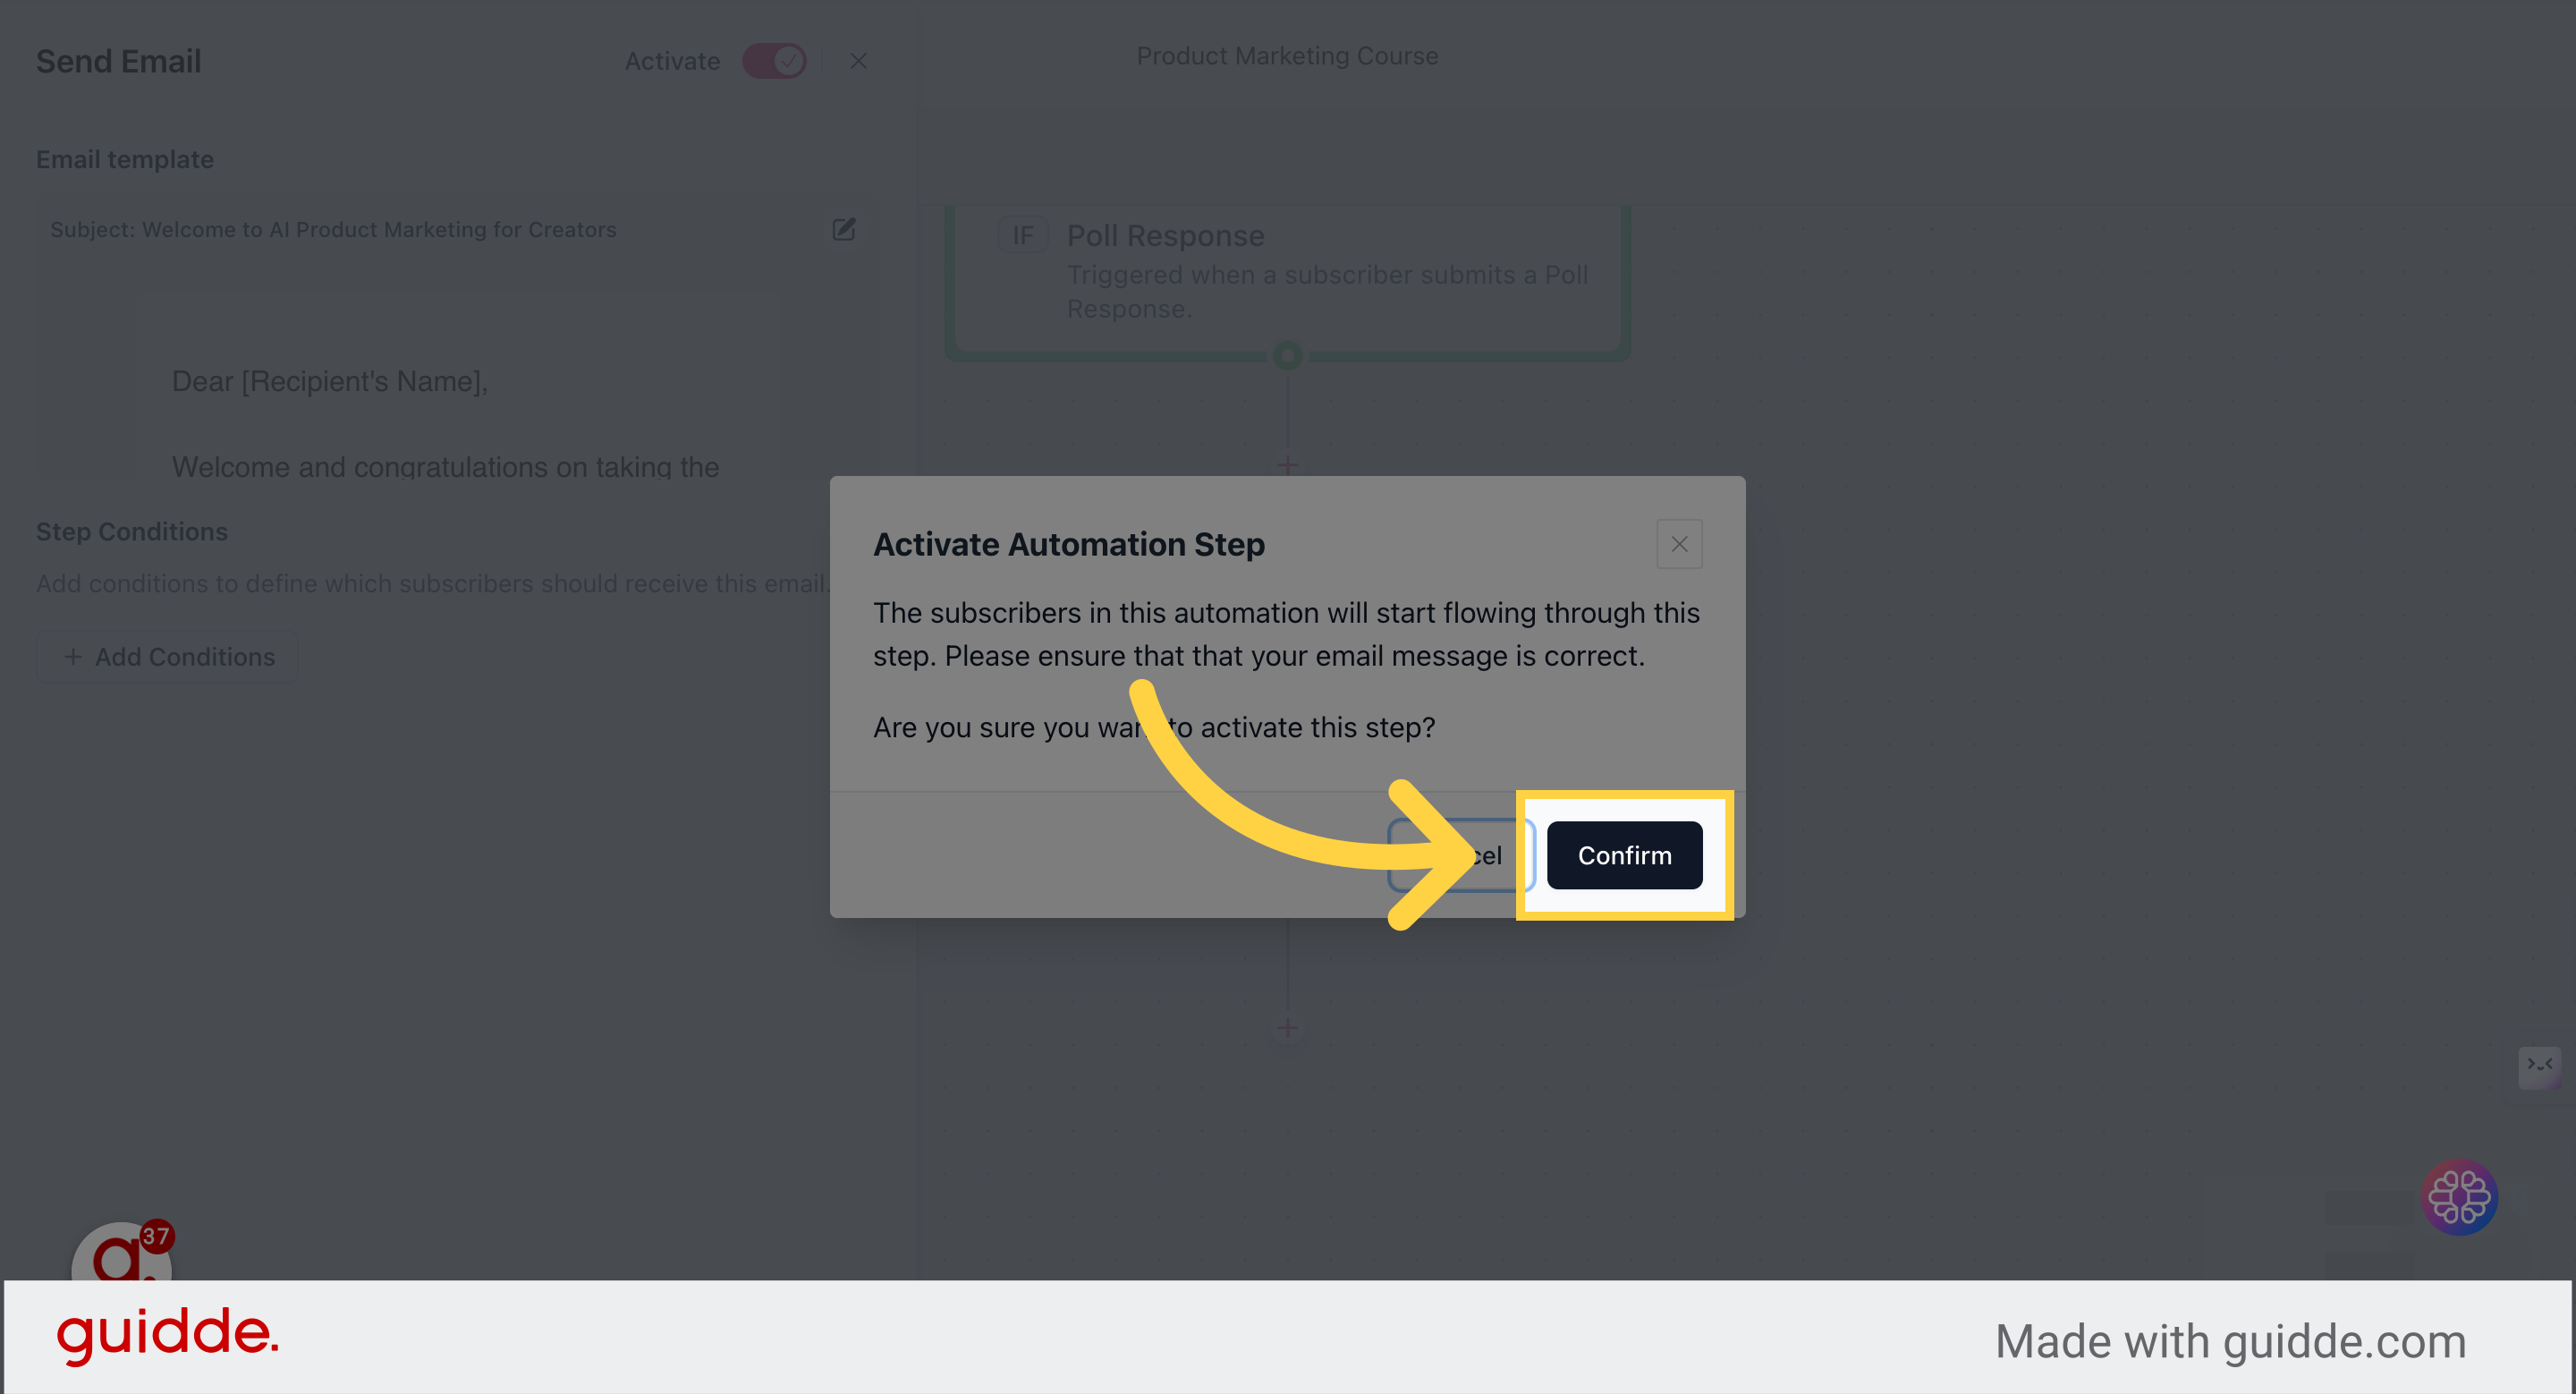
7. Activate this step
Exit the email creation screen and toggle activate. Confirm and save.


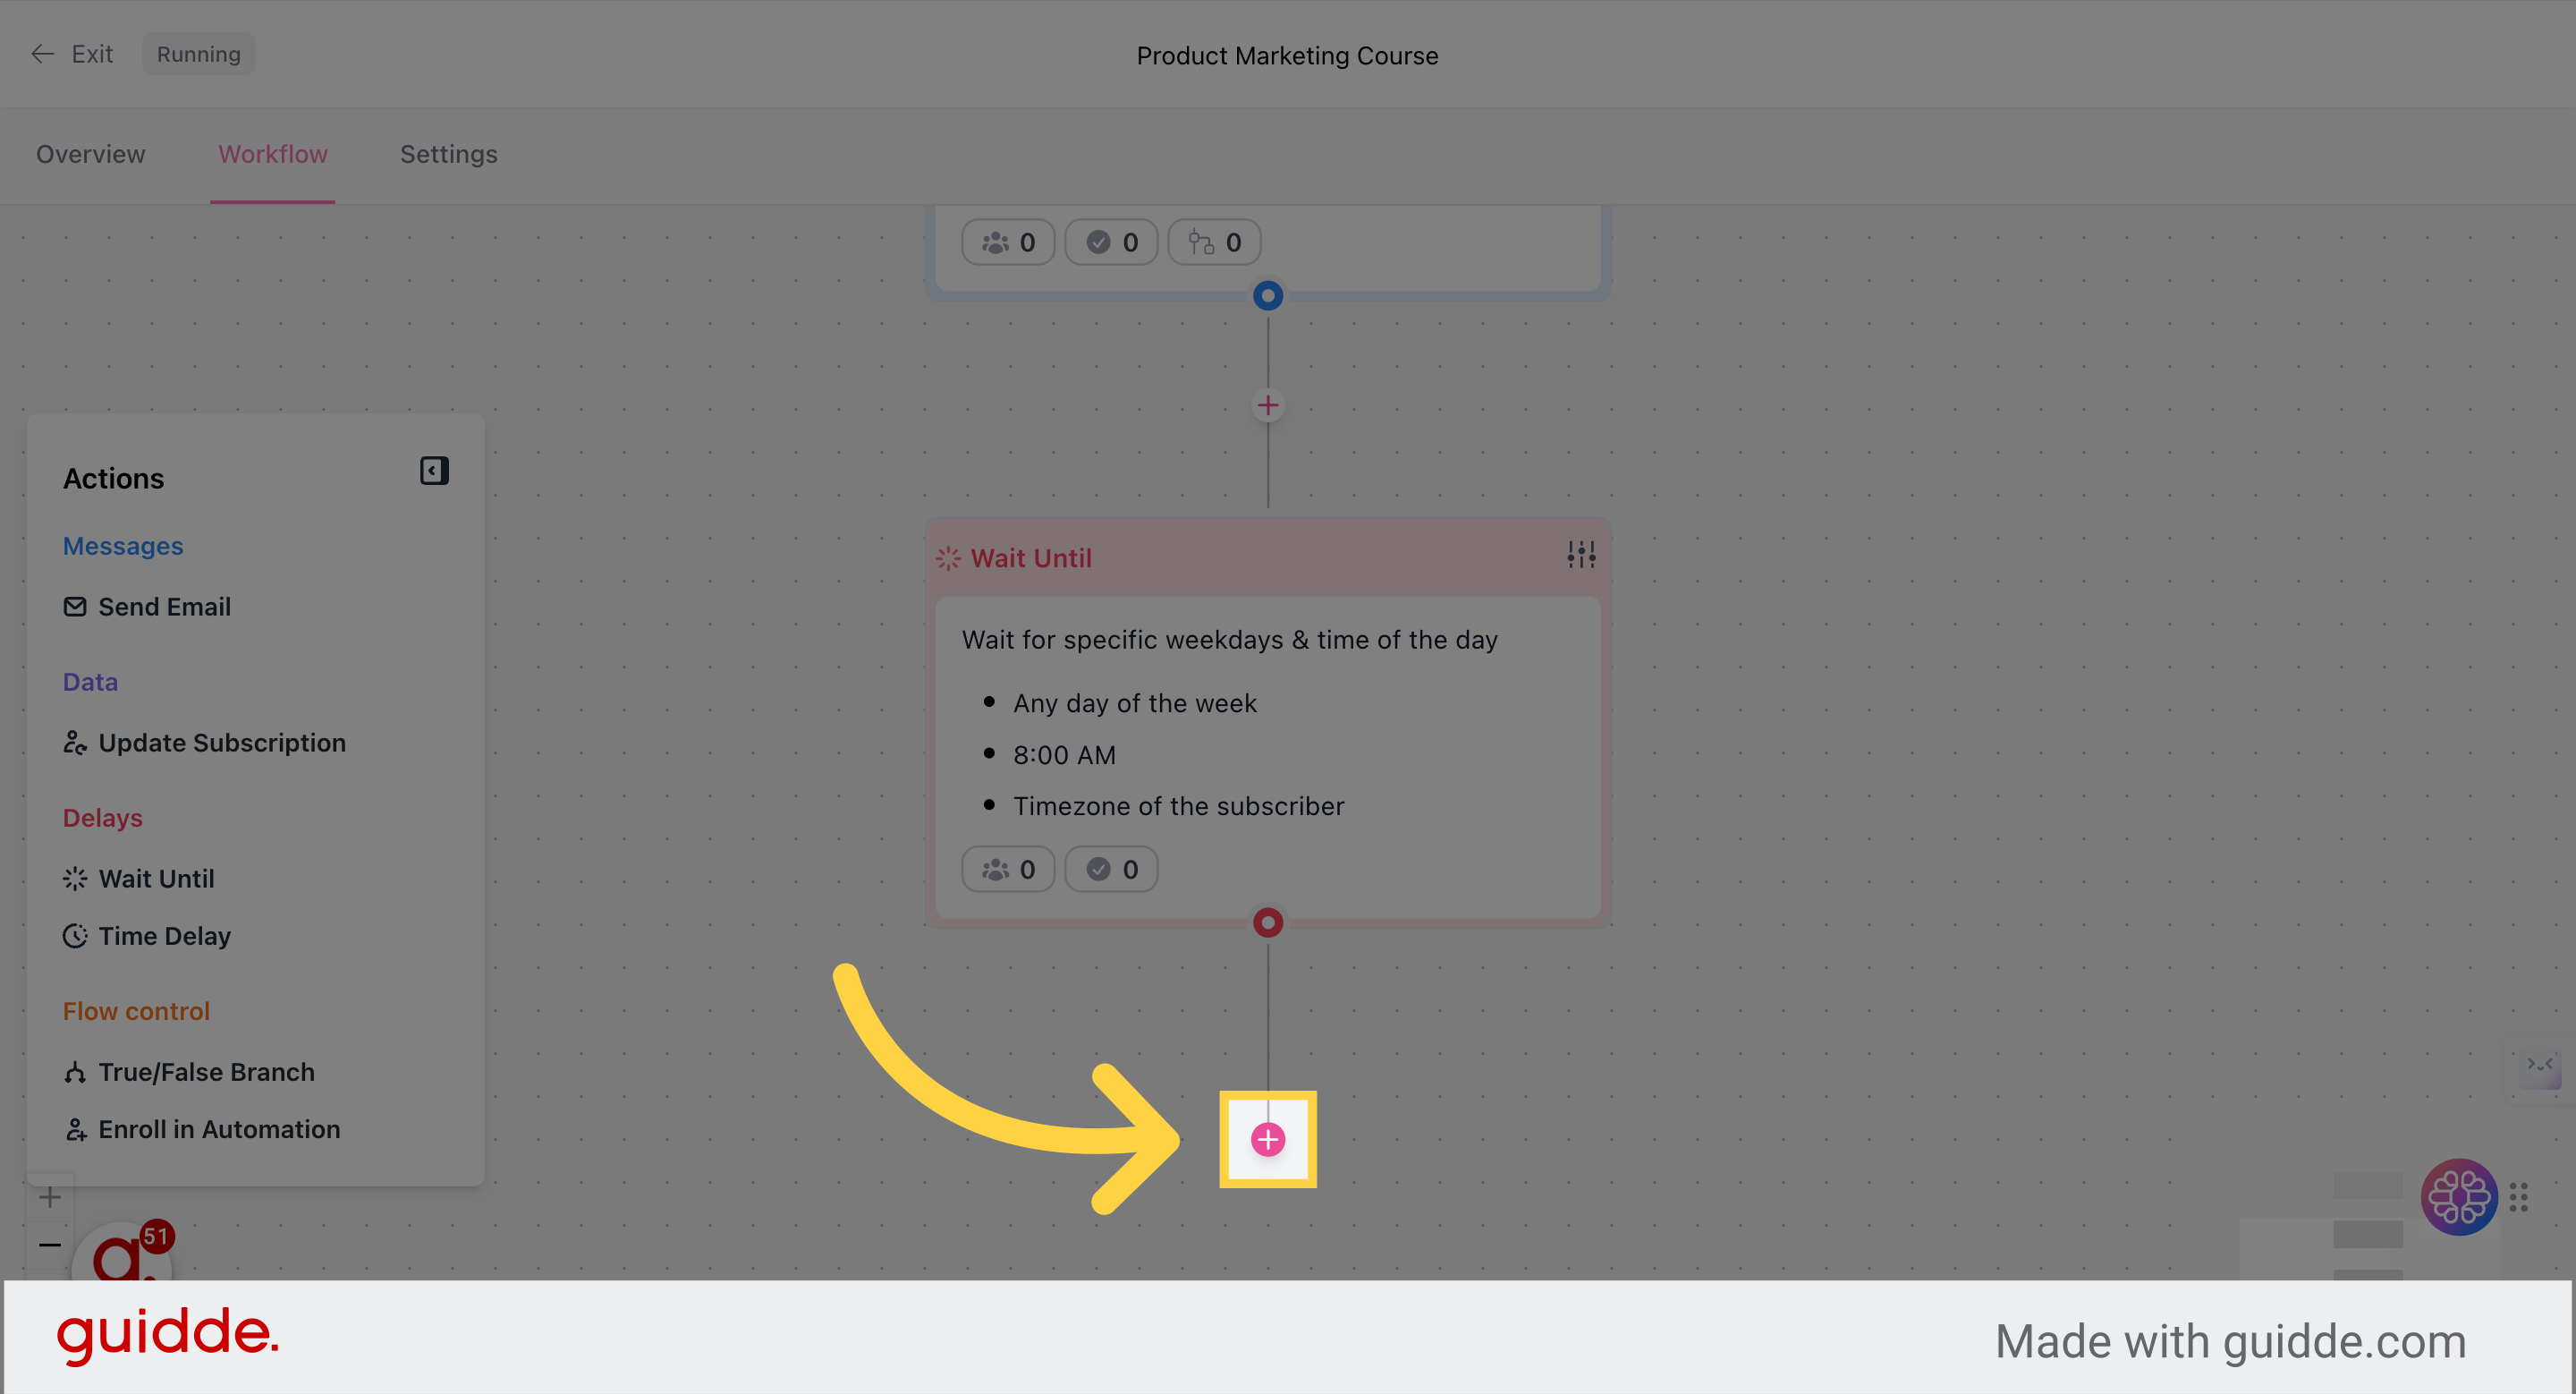
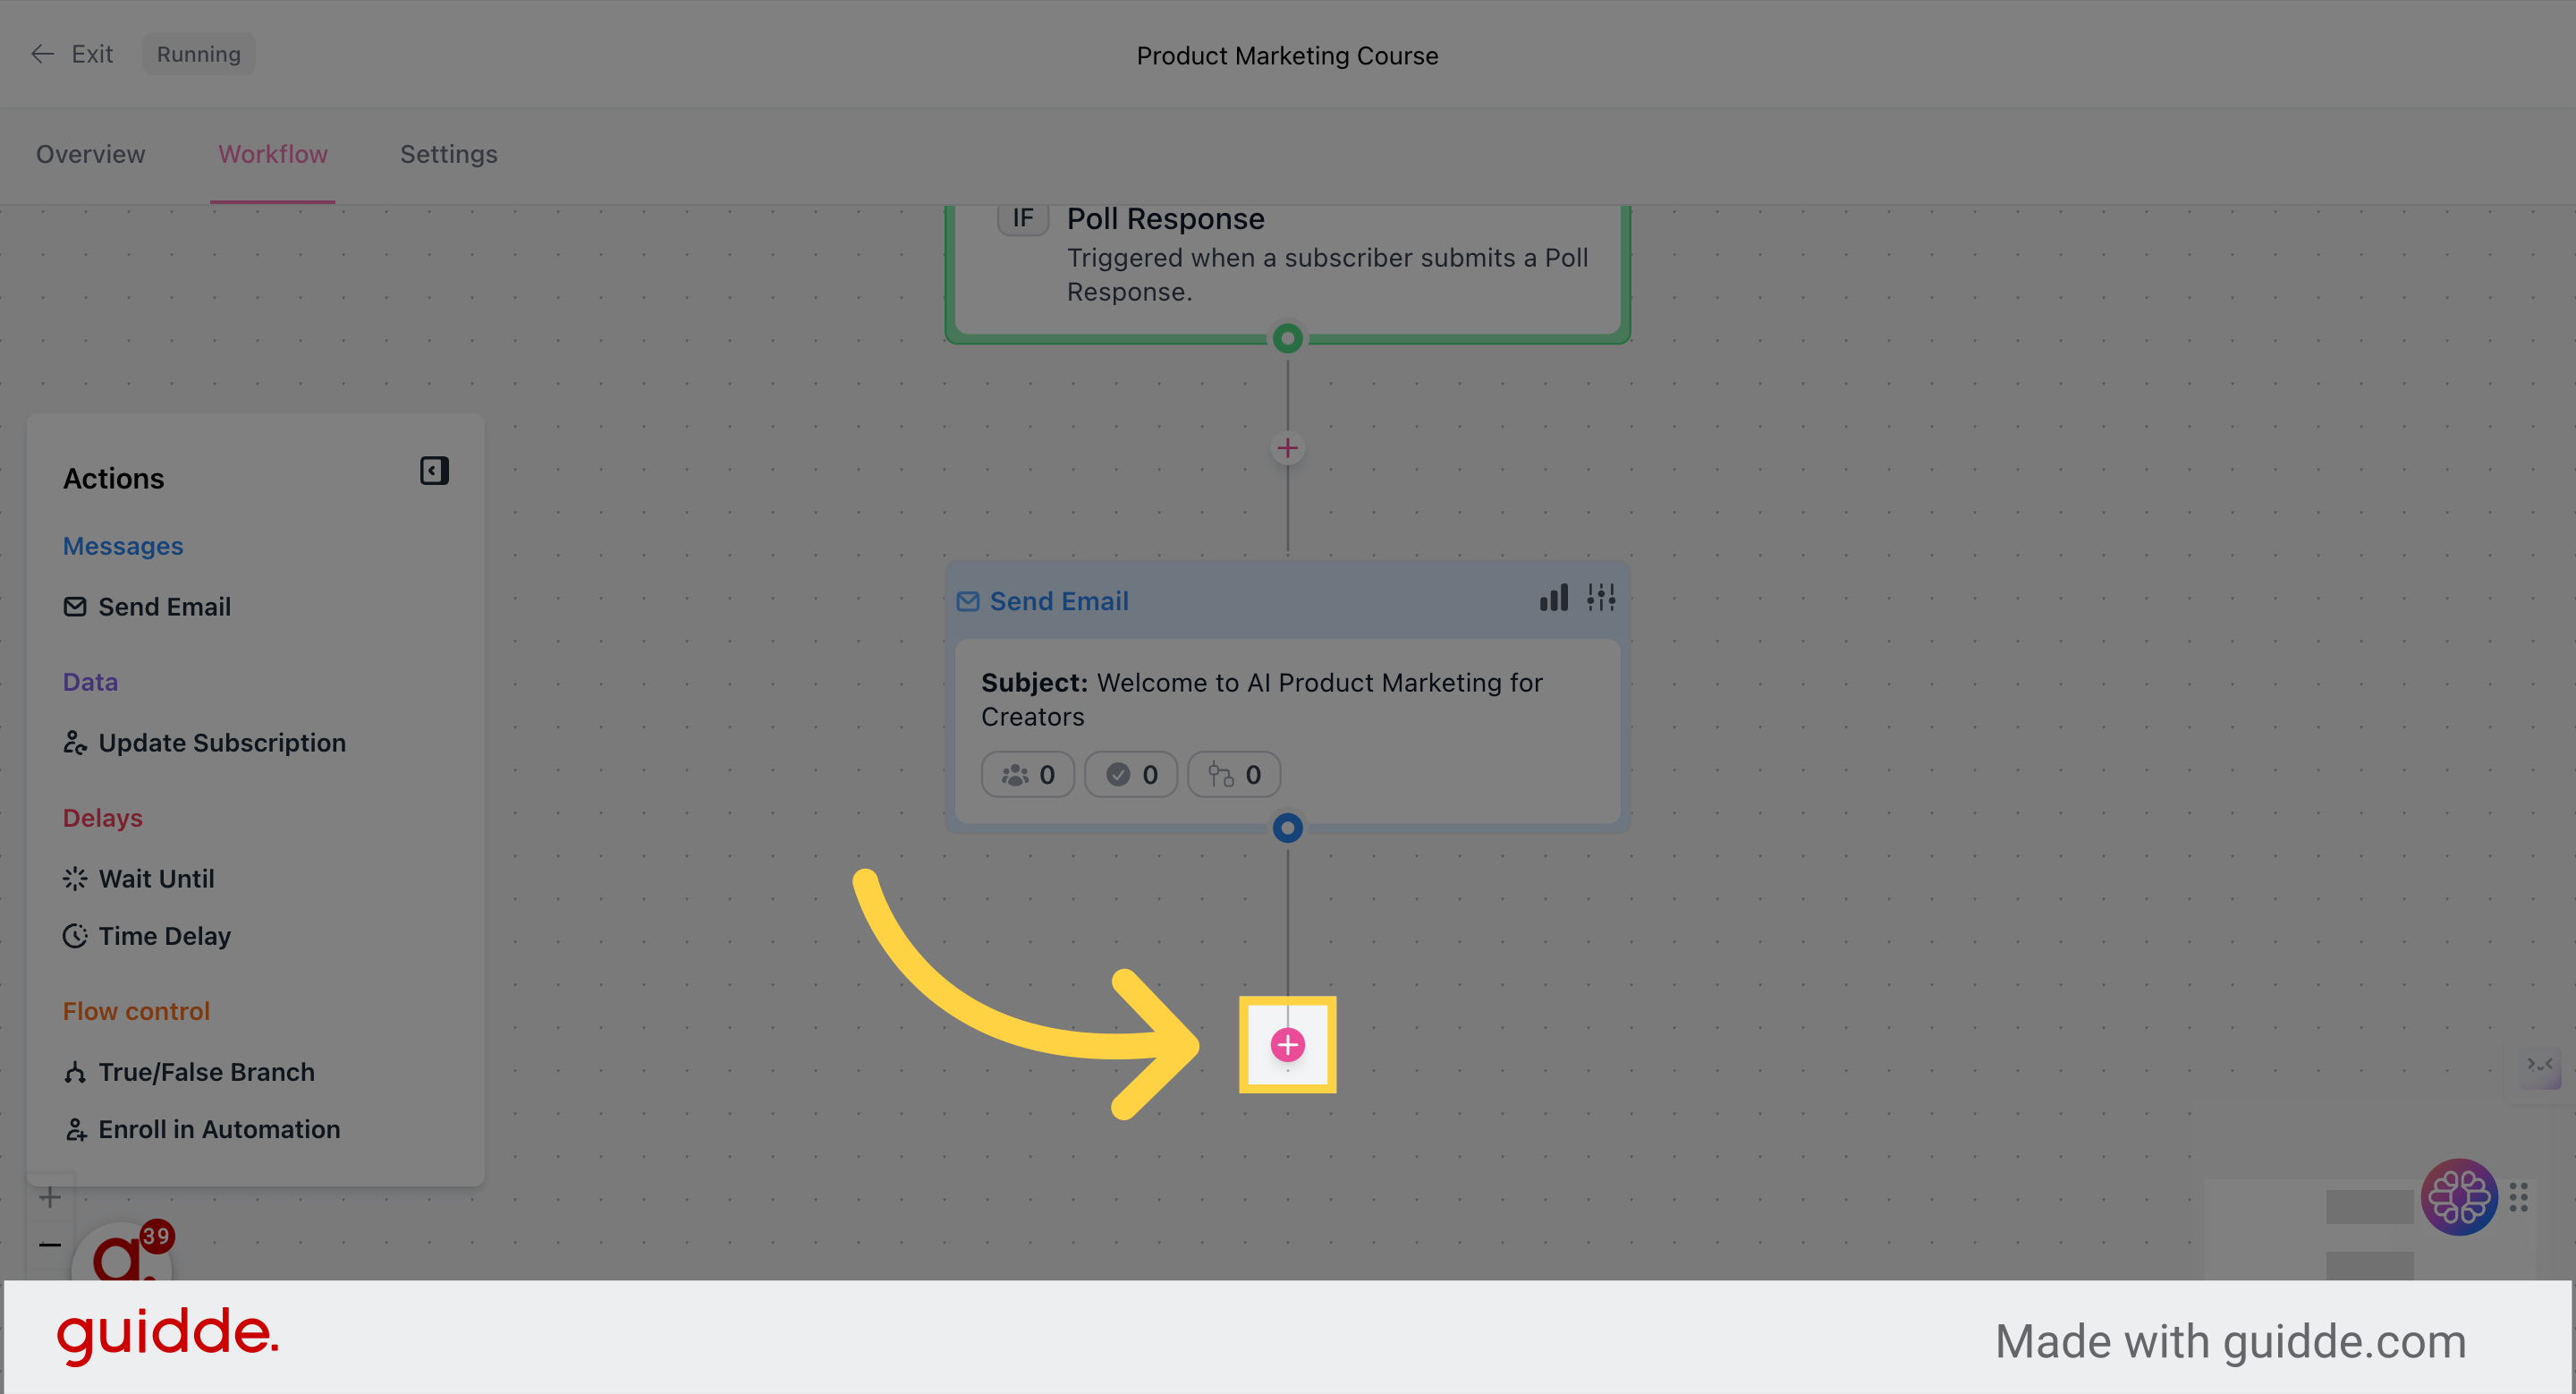
8. Create the next action in your sequence
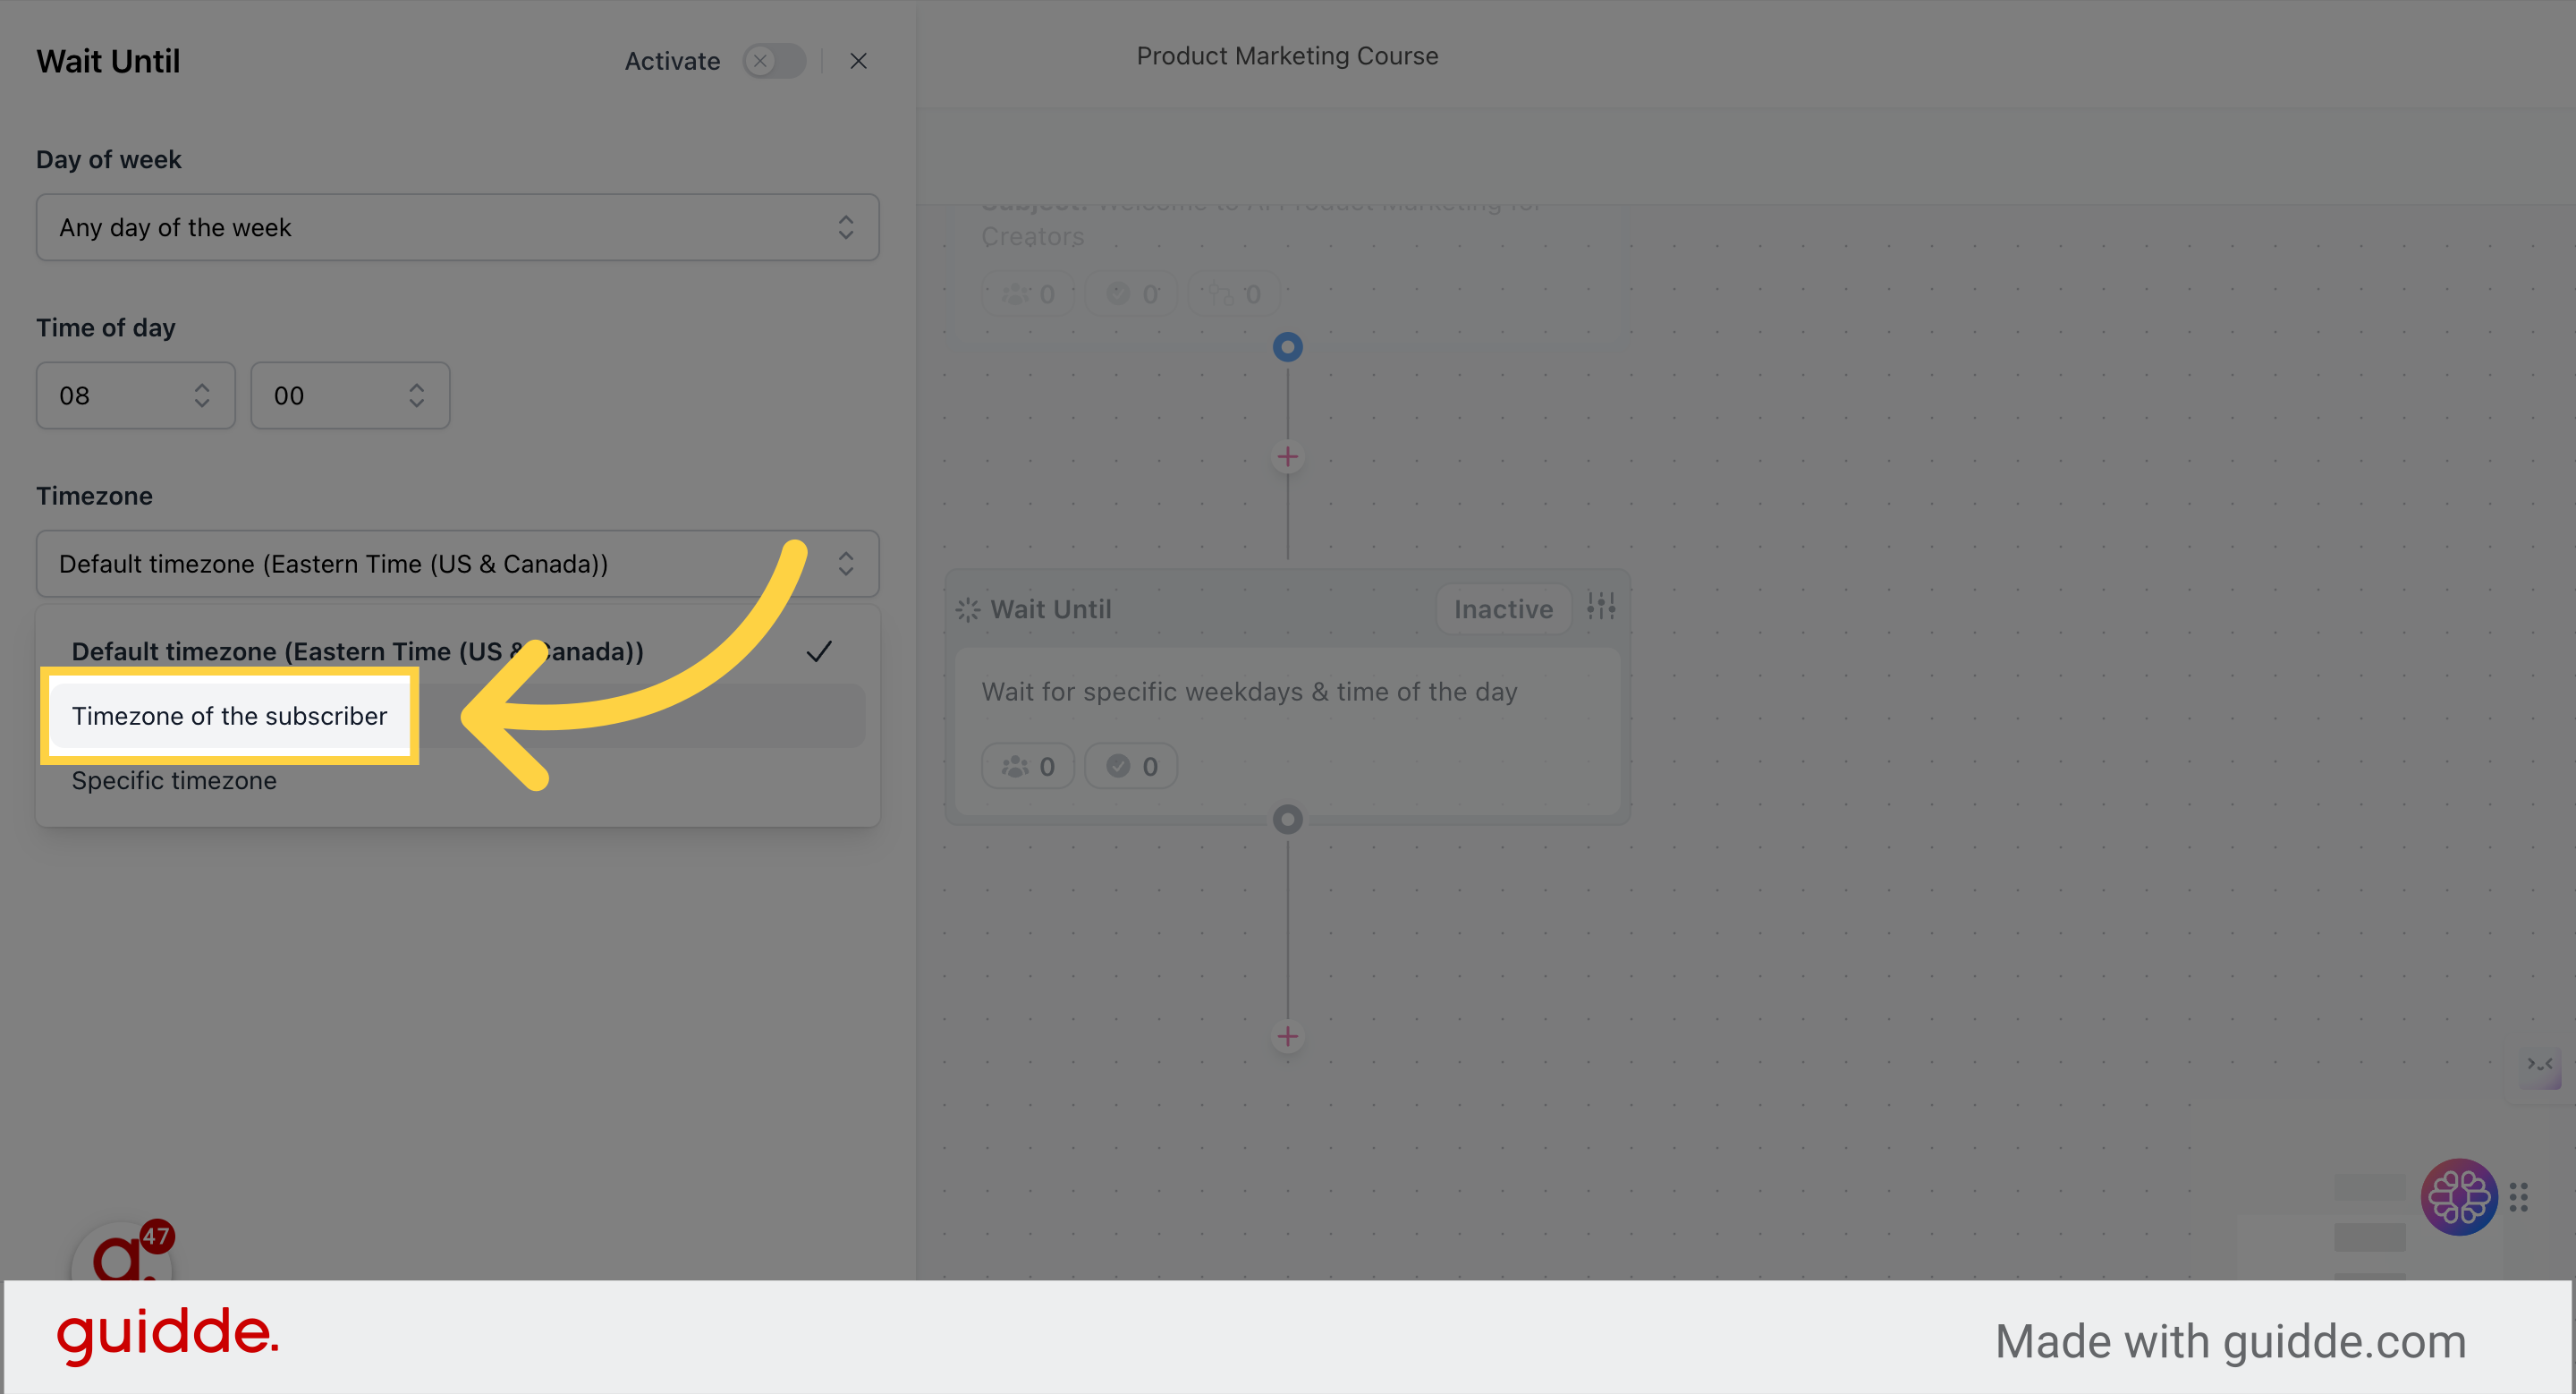
For the educational email course sequence, I deliver each day at 8am at the timezone of the subscriber. To do this, choose “Wait until” as your action.
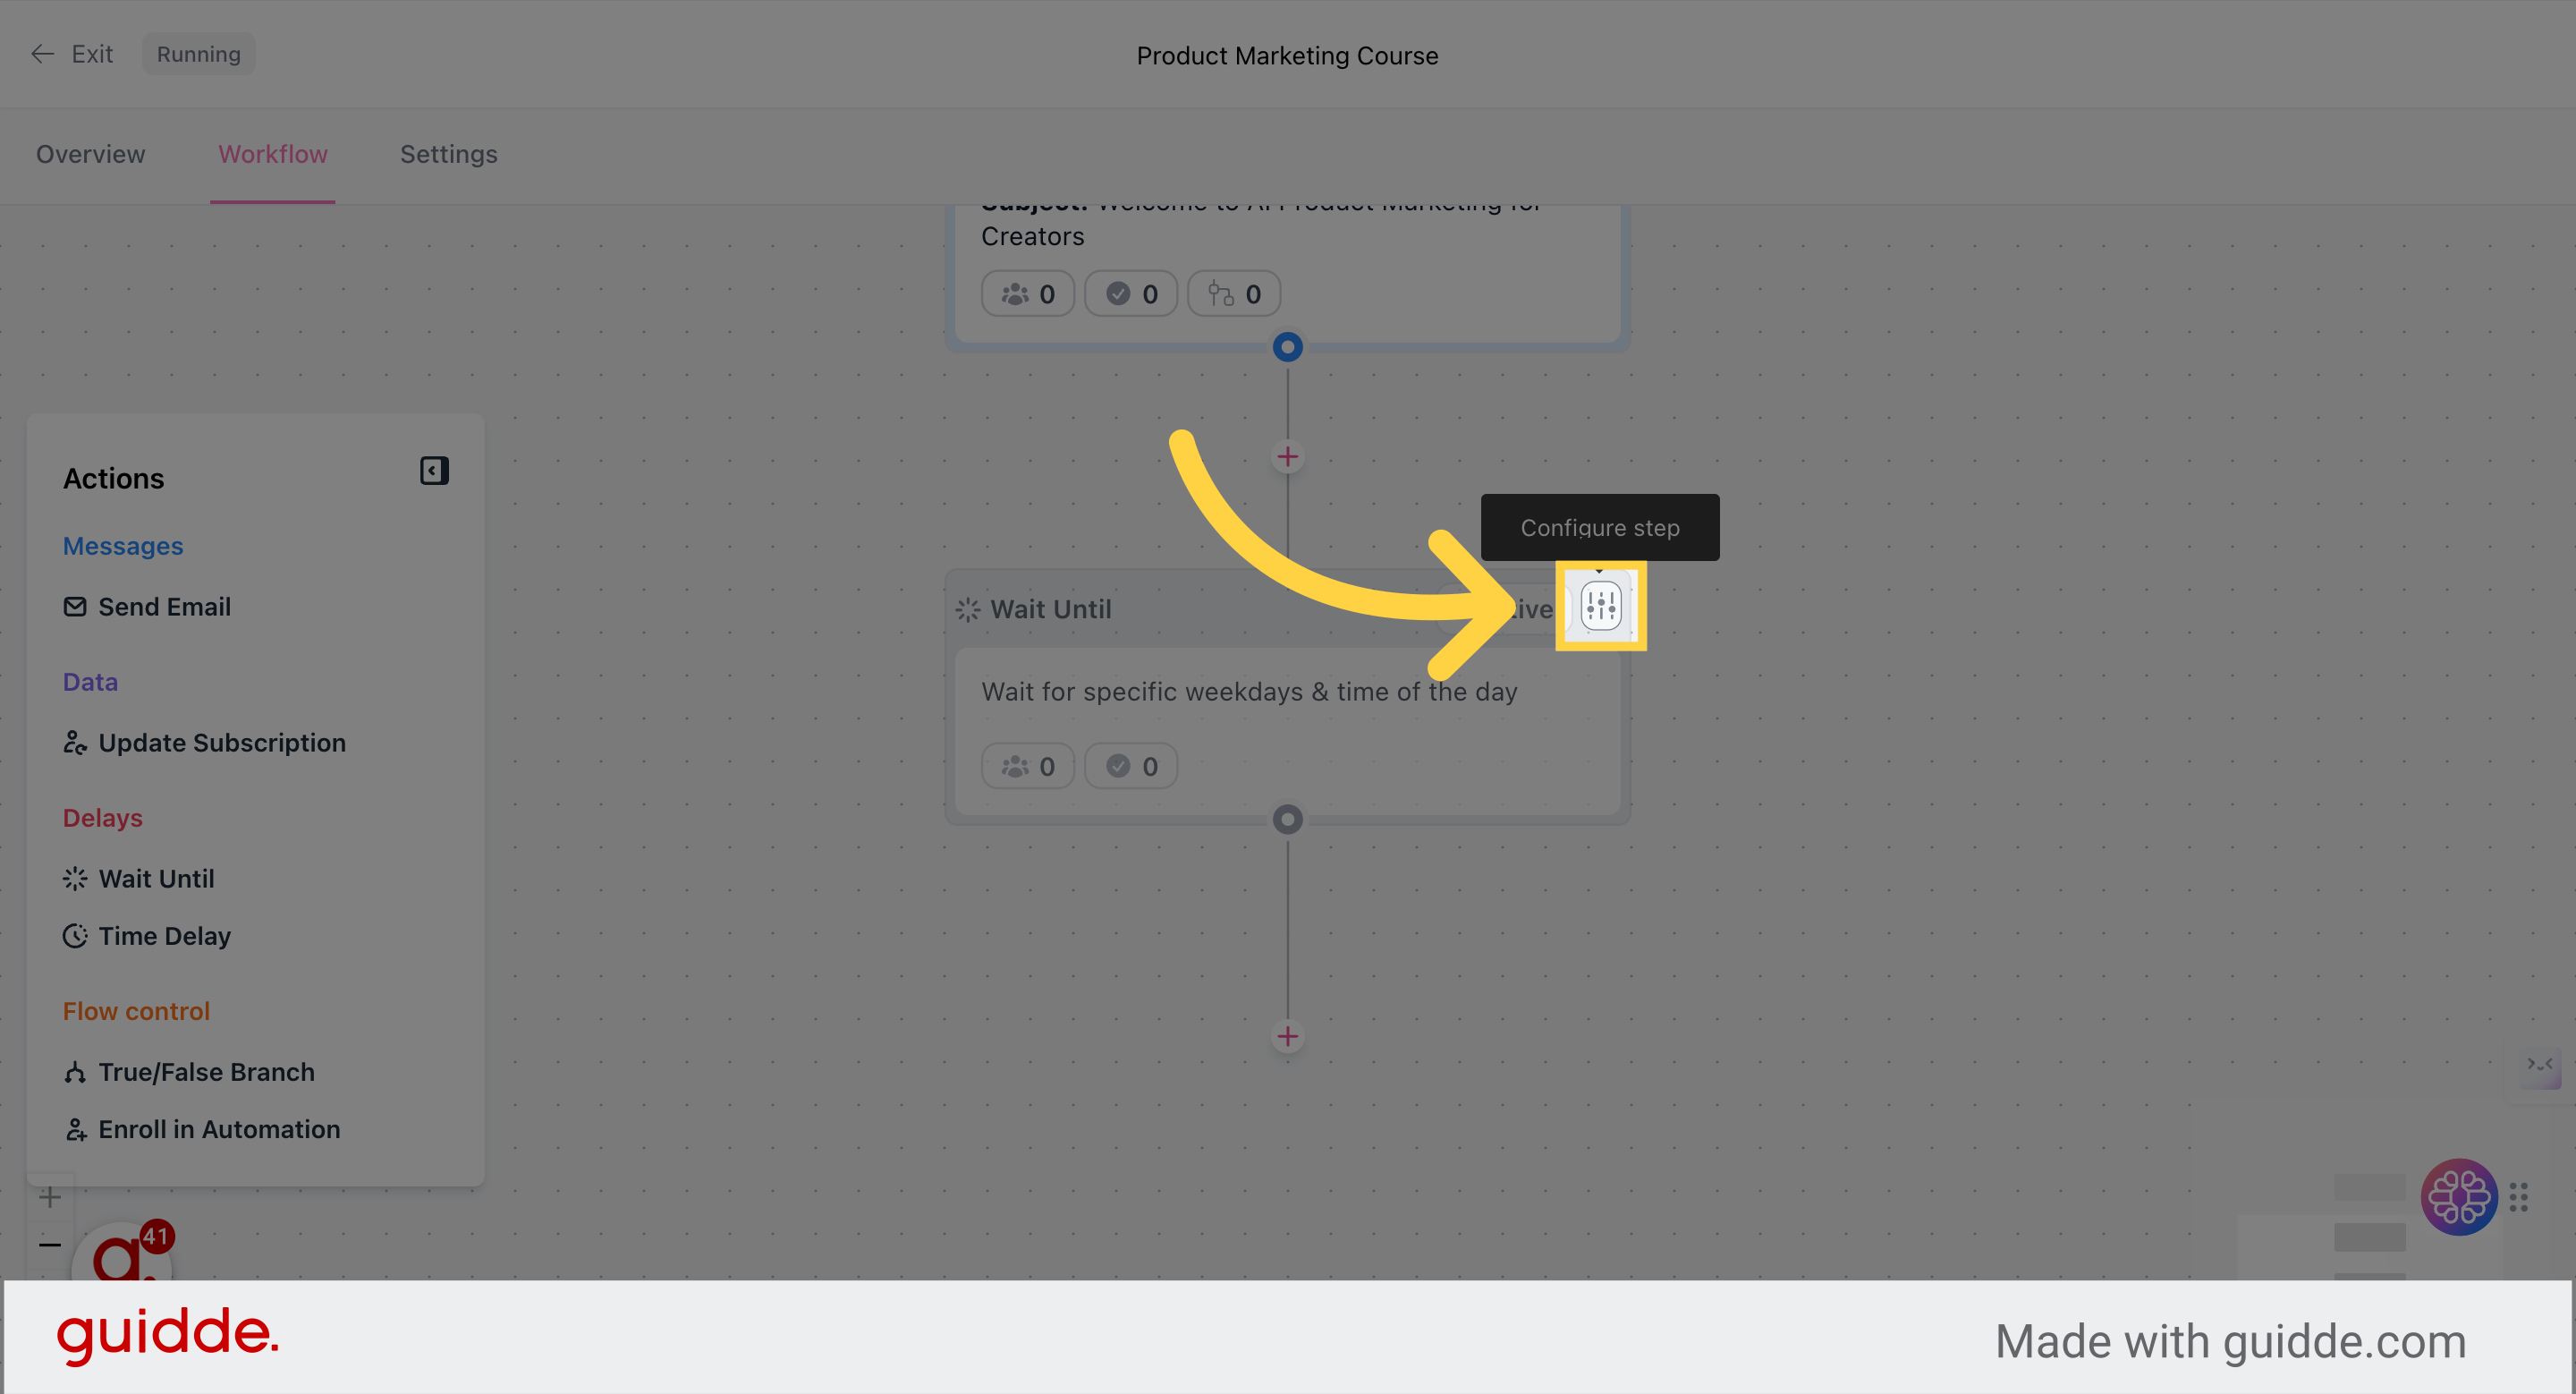
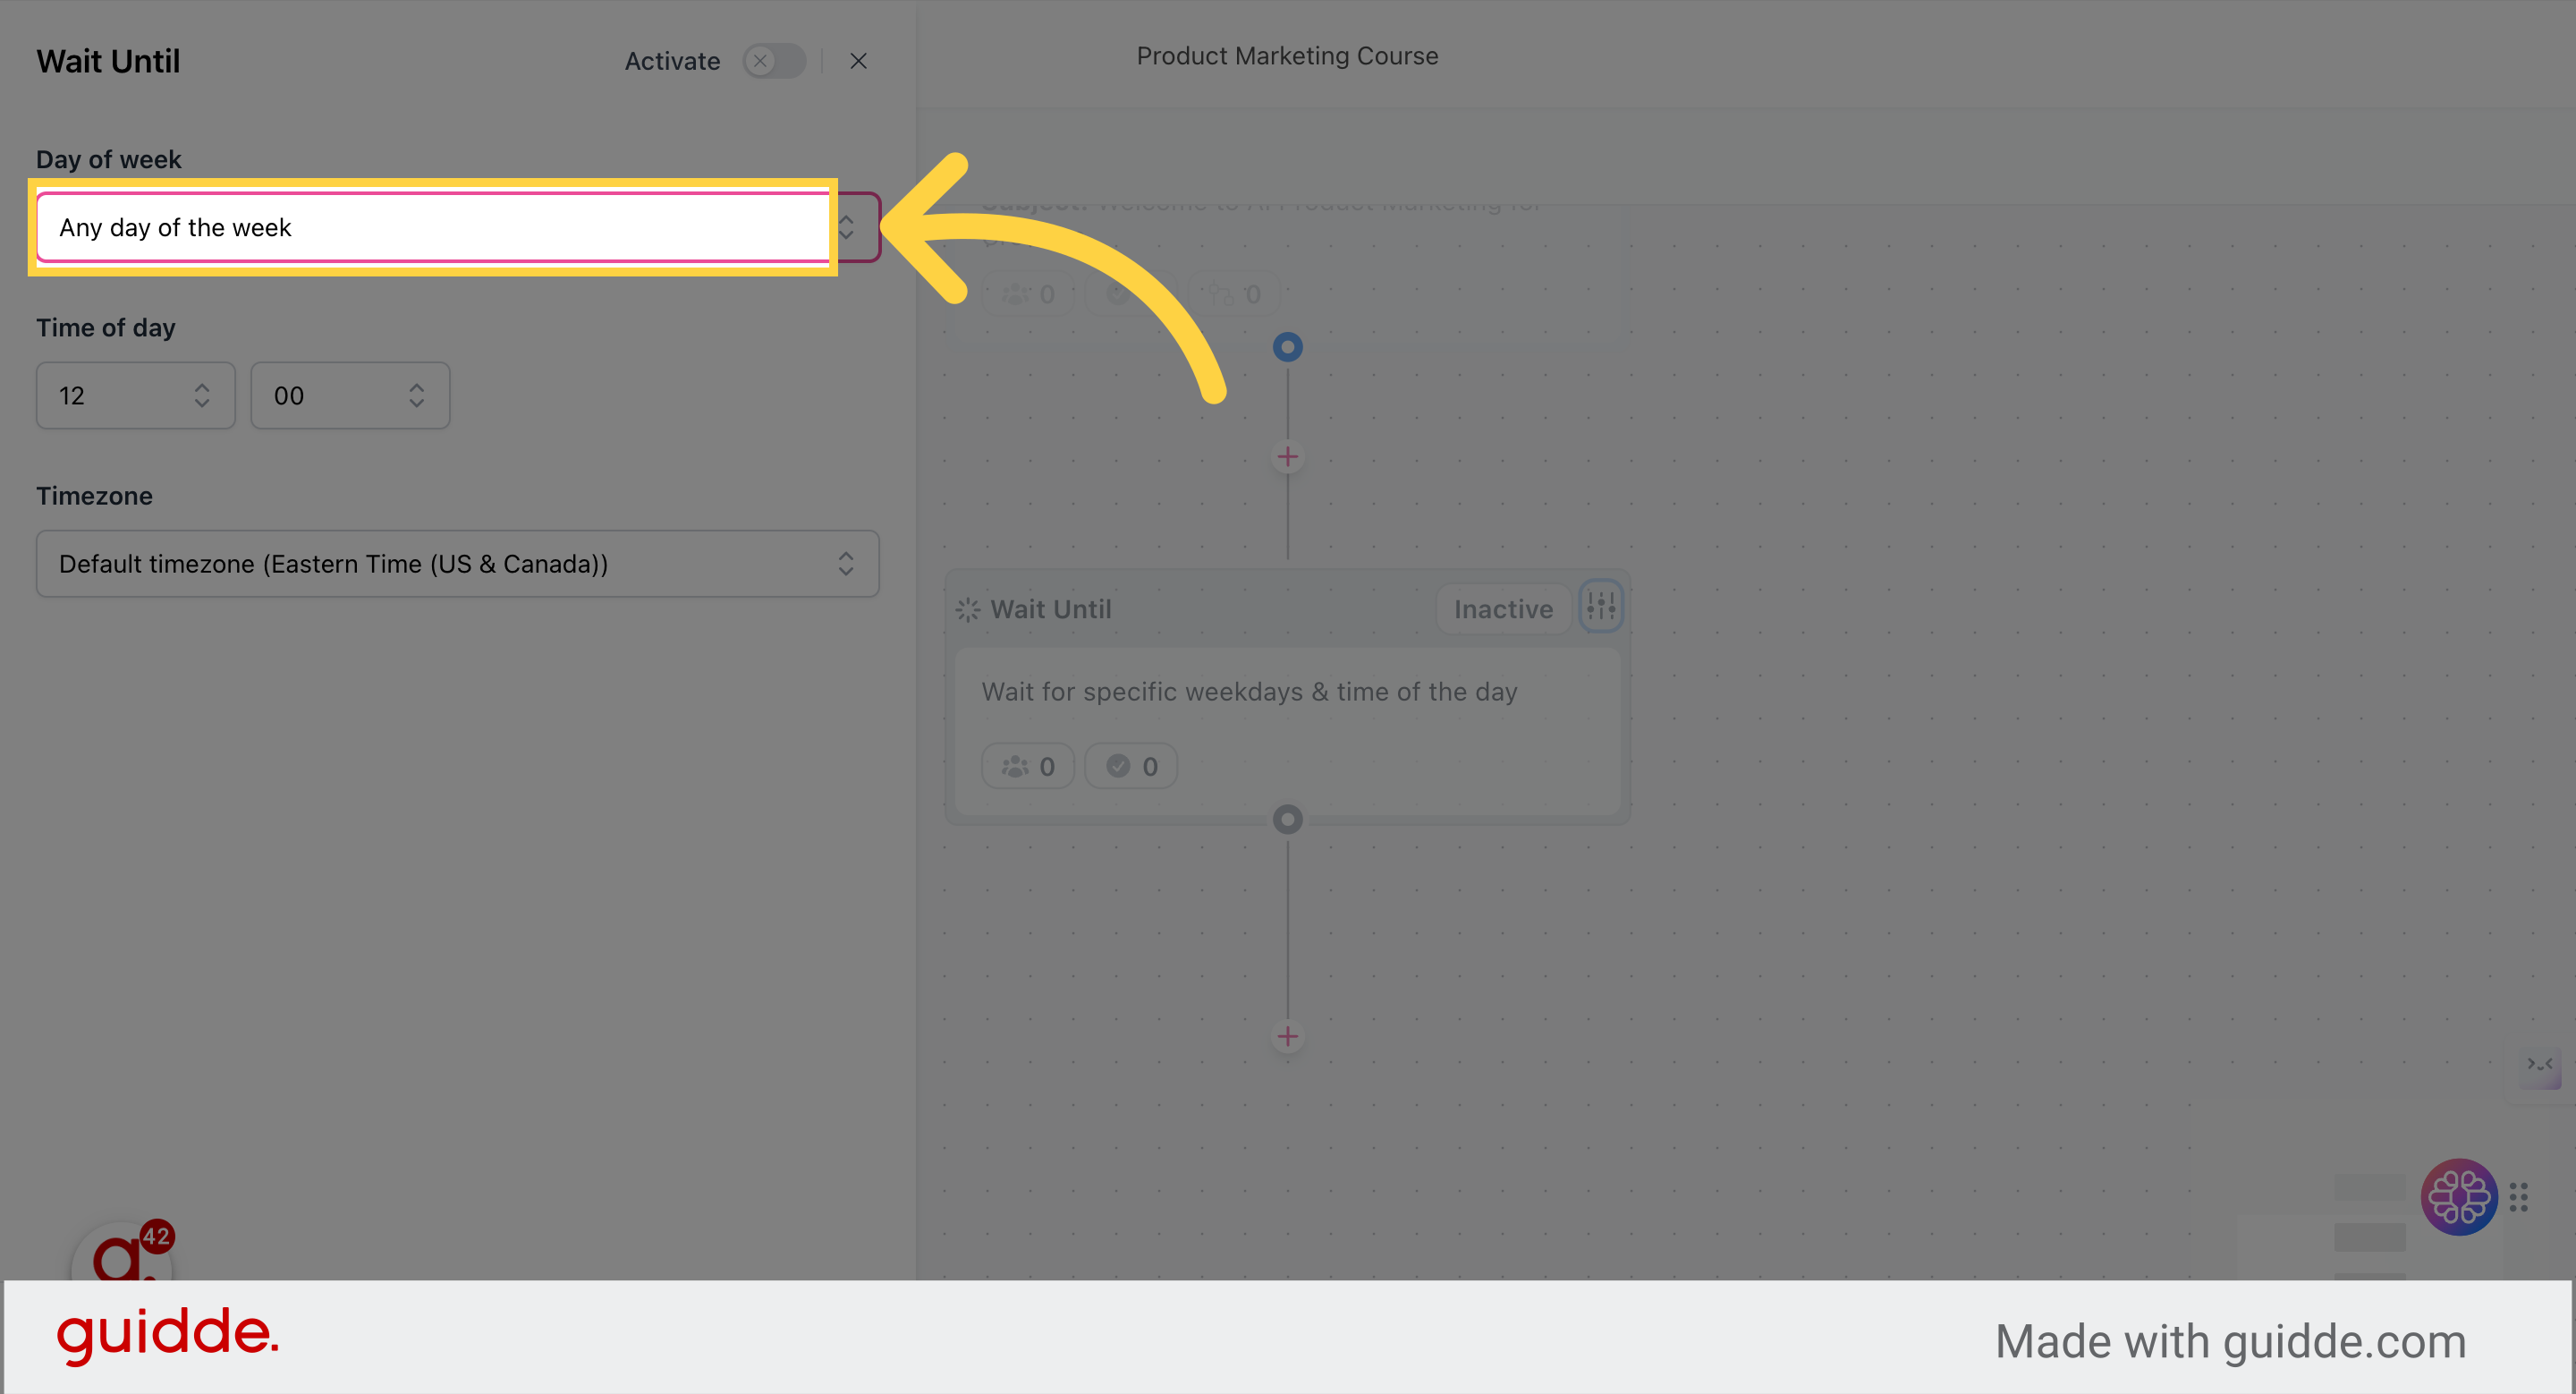
9. Configure and activate this step
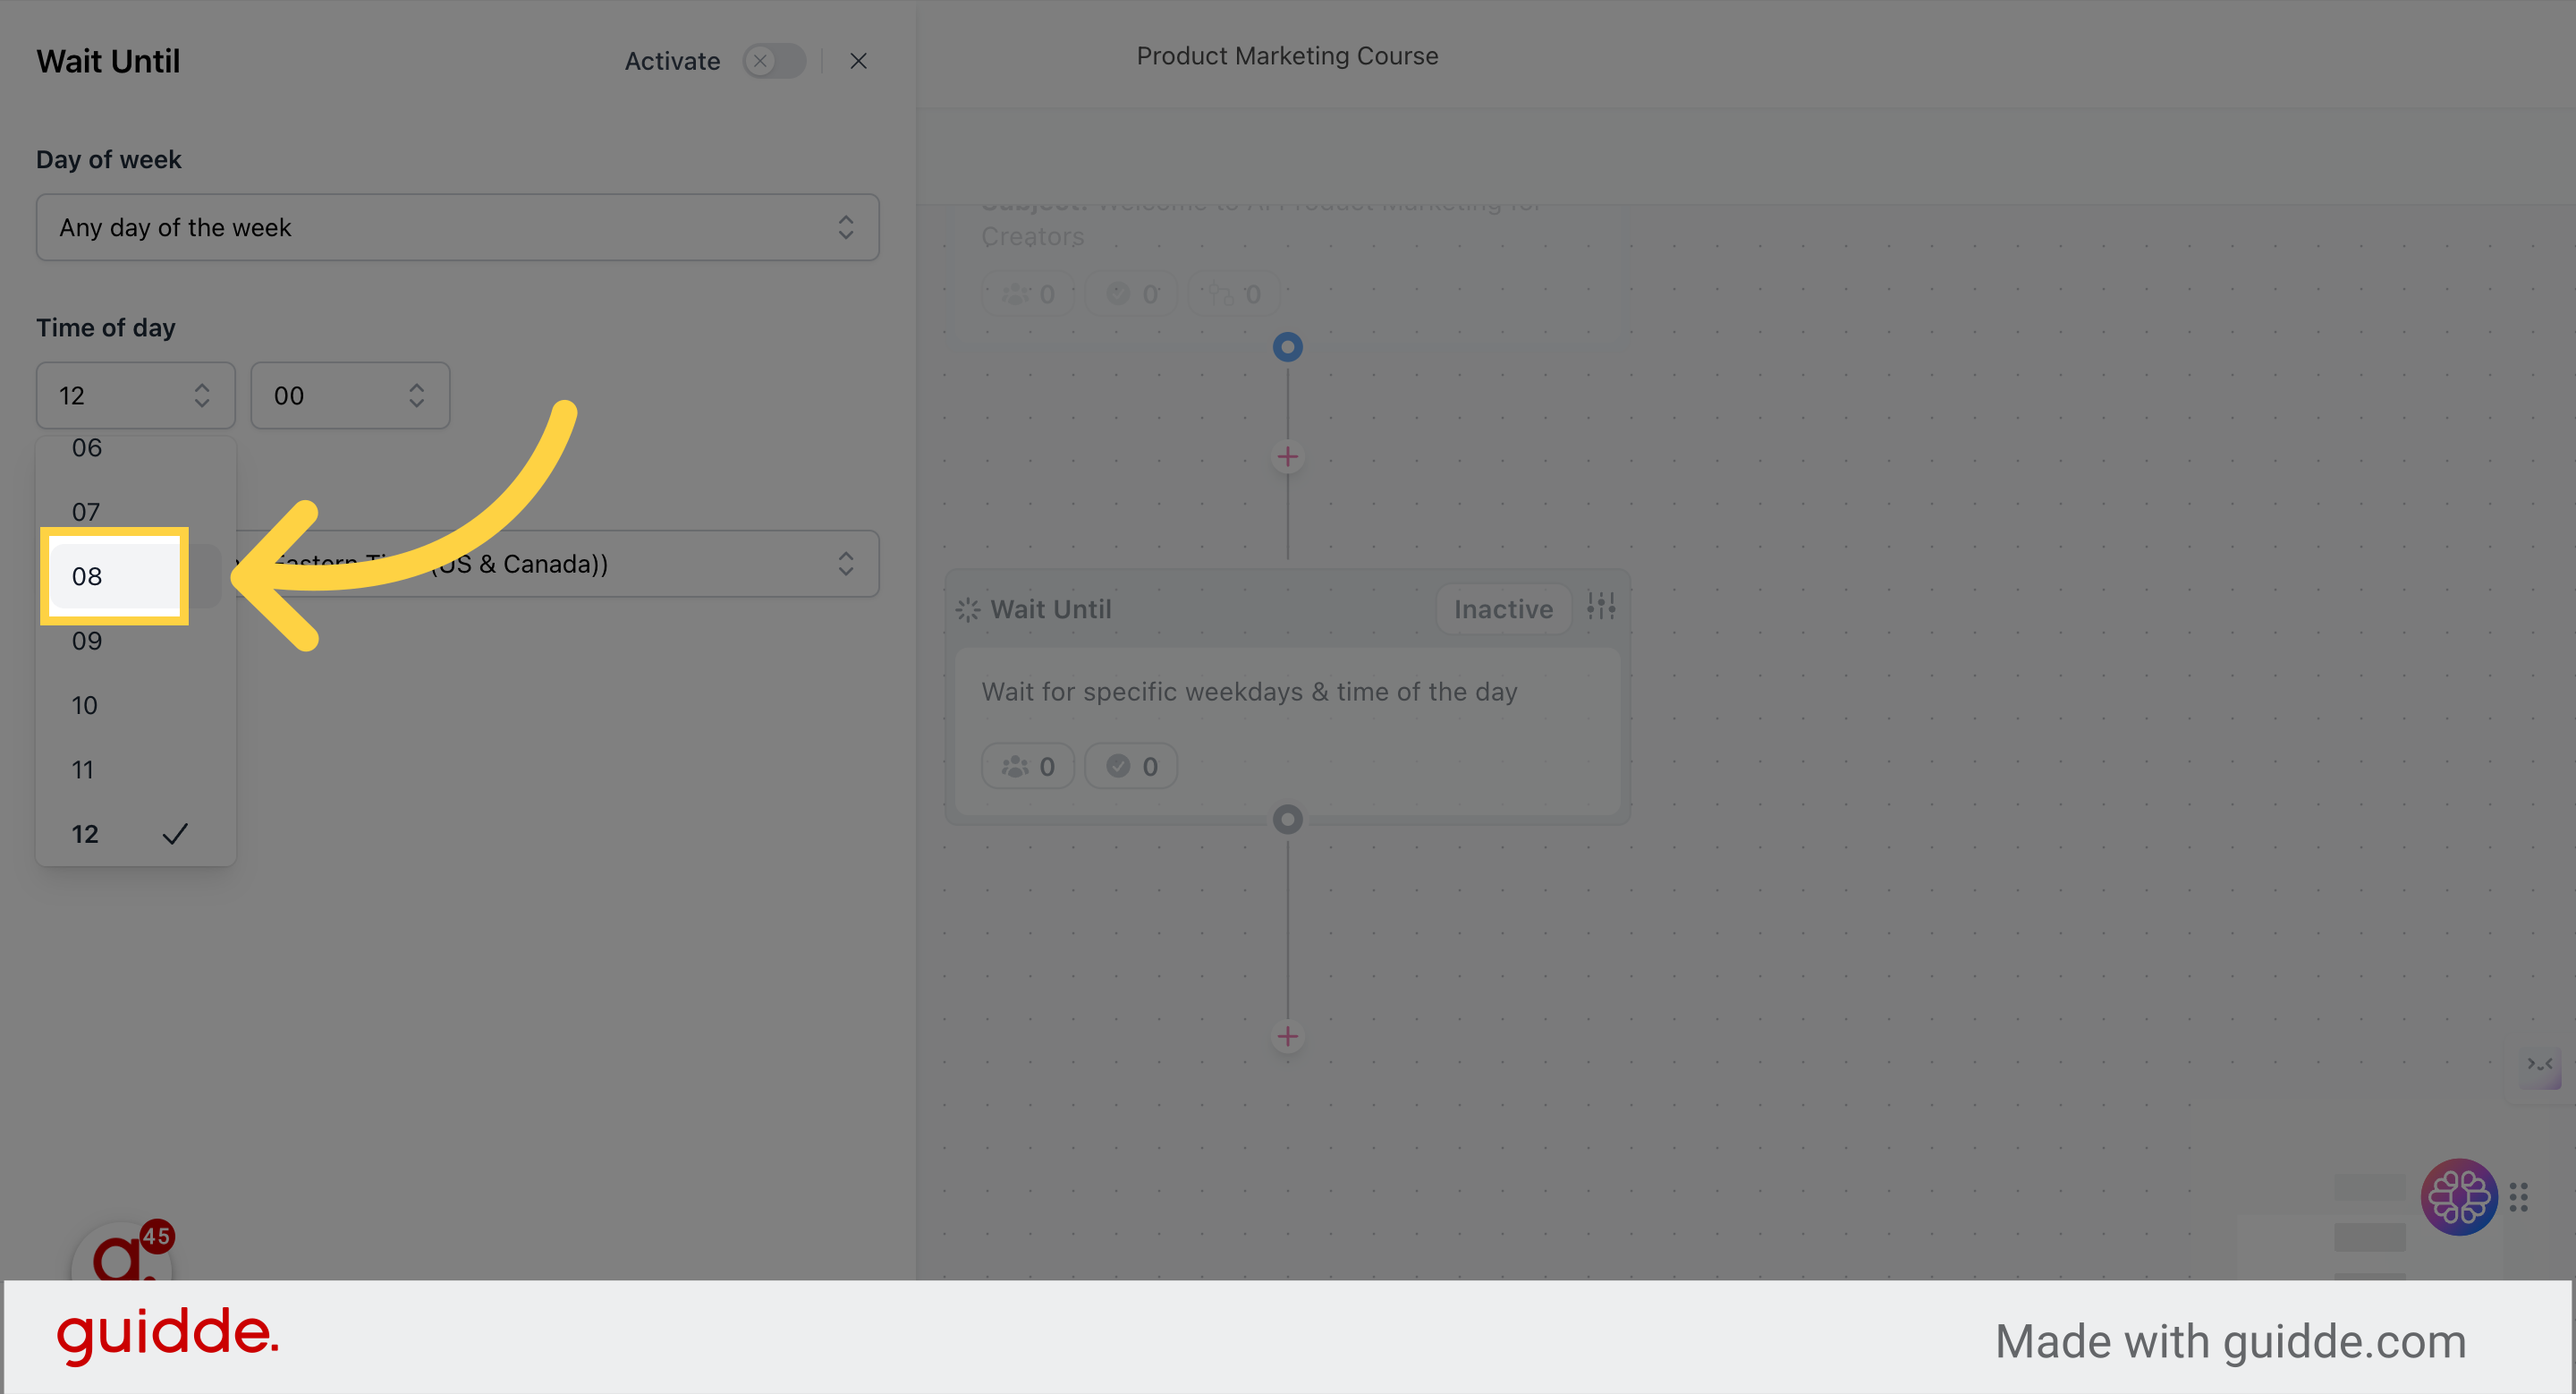
Choose your preferred days of the week and time for this email to be sent
I chose “any day of the week” at 8am subscriber time
When done, activate, confirm, and save this step
10. Continue adding emails and delays until your sequence is complete